1. Introduction
This manual provides essential information for the proper installation, operation, and maintenance of your Southwest Speed Wilwood D154 GM Metric Brake Calipers and Pads. These high-performance front brake components are designed for vehicles requiring a 2-piston caliper system compatible with 1.04-inch rotors. Please read this manual thoroughly before beginning any installation or service to ensure safety and optimal performance.
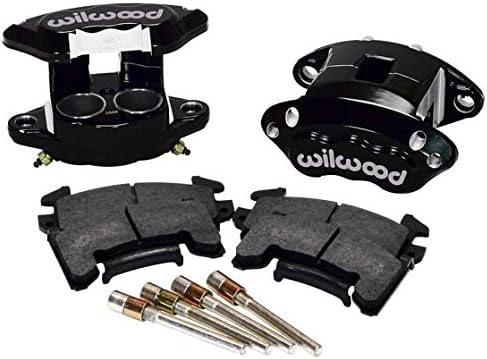
Image 1.1: Southwest Speed Wilwood D154 GM Metric Brake Calipers and Pads, including two black calipers, two brake pads, and mounting pins.
2. Safety Information
Brake system installation and maintenance require specialized knowledge and tools. Improper installation can lead to brake failure, serious injury, or death. If you are not confident in your ability to perform this installation, seek assistance from a qualified automotive technician.
- Always wear appropriate personal protective equipment (PPE), including safety glasses and gloves.
- Ensure the vehicle is securely supported on jack stands before working underneath it. Never rely solely on a jack.
- Use only DOT-approved brake fluid. Do not mix different types of brake fluid.
- Keep brake fluid away from painted surfaces, as it can damage paint.
- Properly dispose of old brake fluid and components according to local regulations.
- After installation, thoroughly bleed the brake system to remove all air.
- Test the brakes in a safe area at low speed before operating the vehicle on public roads.
3. Package Contents
Verify that all components are present and undamaged before beginning installation. If any parts are missing or damaged, contact your supplier immediately.
- 2 x Wilwood D154 GM Metric Brake Calipers (Black)
- 2 x Sets of Brake Pads (for two calipers)
- Caliper Mounting Pins and Hardware
- Instruction Sheet (This manual)
4. Setup and Installation
This section outlines the general procedure for installing the brake calipers and pads. Specific vehicle requirements may vary. Refer to your vehicle's service manual for detailed instructions regarding brake system disassembly and reassembly.
4.1. Pre-Installation Checks
- Ensure the vehicle is parked on a level surface, the parking brake is engaged, and the wheels are chocked.
- Raise the vehicle and support it securely with jack stands.
- Remove the wheels.
- Inspect the brake rotors for wear, cracks, or damage. Ensure they are compatible with 1.04-inch thickness. Replace if necessary.
- Clean the rotor and hub assembly thoroughly to remove any grease or debris.
4.2. Caliper Mounting
- Carefully remove the existing brake calipers and pads. Disconnect the brake line, being prepared for fluid leakage. Cap the brake line to prevent excessive fluid loss and contamination.
- Mount the new Wilwood D154 calipers onto the vehicle's caliper brackets. Ensure proper orientation (bleeder screw typically at the top).
- Secure the calipers using the provided mounting hardware. Torque bolts to vehicle manufacturer specifications or Wilwood's recommended torque values if available.
- Connect the brake lines to the new calipers. Use new crush washers if required and tighten fittings securely to prevent leaks.
4.3. Brake Pad Installation
- Insert the brake pads into the caliper. Ensure the friction material faces the rotor.
- Install the caliper mounting pins and retaining clips (if applicable) to secure the pads.
- Verify that the pads move freely within the caliper and are properly seated against the rotor.
4.4. Brake System Bleeding
After installing the calipers and connecting the brake lines, the brake system must be bled to remove any trapped air. Air in the brake lines will result in a spongy pedal and reduced braking performance.
- Fill the master cylinder reservoir with fresh, DOT-approved brake fluid.
- Starting with the caliper furthest from the master cylinder, attach a clear hose to the bleeder screw and submerge the other end in a container with brake fluid.
- Have an assistant slowly press the brake pedal down and hold it.
- Open the bleeder screw until fluid and air bubbles stop flowing, then close the screw.
- Have the assistant release the brake pedal.
- Repeat this process for each caliper until no air bubbles are visible in the fluid.
- Regularly check and refill the master cylinder reservoir during the bleeding process to prevent it from running dry.
4.5. Final Checks and Wheel Installation
- Double-check all brake line connections and bleeder screws for tightness.
- Ensure there are no fluid leaks.
- Reinstall the wheels and torque lug nuts to vehicle manufacturer specifications.
- Lower the vehicle.
5. Operating Instructions
After installation, it is crucial to properly bed-in the new brake pads and rotors to achieve optimal braking performance and longevity.
5.1. Brake Bed-In Procedure
Perform the following procedure in a safe, controlled environment, away from traffic:
- Make 10-12 moderate stops from approximately 30 MPH (48 km/h) down to 5 MPH (8 km/h). Allow a few seconds between stops for the brakes to cool slightly. Do not come to a complete stop during this phase.
- After the moderate stops, make 2-3 hard stops from approximately 40 MPH (64 km/h) down to 5 MPH (8 km/h).
- Drive for several miles without using the brakes excessively to allow them to cool completely. Avoid heavy braking during this cooling period.
- The brakes are now bedded-in. You may notice a slight odor or smoke during the bed-in process; this is normal.
During the first 100-200 miles (160-320 km) of driving, avoid sudden, hard braking unless absolutely necessary. This allows the pads and rotors to fully seat and ensures maximum performance.
6. Maintenance
Regular inspection and maintenance are vital for the safe and efficient operation of your brake system.
- Fluid Level: Check the brake fluid level in the master cylinder reservoir regularly. A low fluid level can indicate a leak or worn brake pads.
- Fluid Condition: Brake fluid should be clear or slightly amber. If it appears dark or contaminated, it should be flushed and replaced by a qualified technician.
- Pad Wear: Inspect brake pads for wear during tire rotations or at least every 10,000-15,000 miles (16,000-24,000 km). Replace pads when the friction material is worn to the minimum recommended thickness (typically 2-3mm).
- Rotor Condition: Check rotors for excessive wear, scoring, or warping. Rotors should be replaced if they fall below minimum thickness specifications or show signs of damage.
- Caliper Inspection: Periodically inspect calipers for leaks, seized pistons, or damaged dust boots. Address any issues promptly.
7. Troubleshooting
| Symptom | Possible Cause | Solution |
|---|---|---|
| Spongy Brake Pedal | Air in the brake lines; low brake fluid; faulty master cylinder. | Bleed the brake system; check and refill fluid; inspect master cylinder. |
| Brake Squeal/Noise | Worn pads; improper pad installation; glazed rotors; foreign material. | Inspect and replace pads; re-install pads with anti-squeal shims; clean/resurface rotors. |
| Vehicle Pulls to One Side During Braking | Seized caliper piston; uneven pad wear; contaminated brake fluid. | Inspect calipers and pads; flush brake fluid. |
| Excessive Pedal Travel | Air in lines; worn pads; faulty master cylinder; caliper issues. | Bleed system; inspect/replace pads; diagnose master cylinder/calipers. |
If you experience persistent brake issues, consult a qualified automotive technician immediately.
8. Specifications
- Brand: Southwest Speed (Wilwood)
- Model Number: 140-12099-BK
- Caliper Type: D154 GM Metric
- Piston Count: 2-Piston
- Rotor Compatibility: Designed for 1.04-inch thick rotors
- Position: Front
- Color: Black
9. Warranty and Support
For specific warranty information regarding your Southwest Speed Wilwood D154 GM Metric Brake Calipers and Pads, please refer to the documentation provided at the time of purchase or contact Southwest Speed directly. General product support and technical assistance can be obtained through the manufacturer's official channels.
Southwest Speed Contact:
Visit their official website for contact information and support resources.
www.southwestspeed.com


Image 9.1: Logos for Southwest Speed and Wilwood Disc Brakes, indicating brand and component manufacturer.