1. Introduction
This manual provides essential instructions for the setup, operation, and maintenance of your Yescom Electronic Fingerprint Gun Safe. This compact security box is designed to secure pistols, cash, jewelry, and other valuables, offering both fingerprint recognition and traditional key access. Constructed from cold-rolled steel with a black powder coating, it features a foam-lined interior to protect contents and includes a security cable for attachment to immovable objects.
2. Package Contents
Please verify that all items listed below are included in your package:
- 1 x Yescom Electronic Fingerprint Gun Safe
- 1 x Security Cable
- 2 x Backup Keys
- 1 x Foam Interior Lining (pre-installed)
- 1 x User Manual (this document)

Image: The Yescom Electronic Fingerprint Gun Safe shown open, displaying the foam interior, along with the included security cable and two backup keys.
3. Safety Information
- Do not store backup keys inside the safe. Keep them in a secure, separate location for emergency access.
- Ensure the safe is securely closed and locked after each use.
- Keep the safe out of reach of children and unauthorized individuals.
- Dispose of used batteries responsibly according to local regulations.
4. Setup
4.1 Battery Installation
The safe requires 4 AAA 1.5V batteries (not included) for its electronic fingerprint lock system. Follow these steps to install the batteries:
- Open the safe using one of the backup keys.
- Locate the battery compartment, typically on the inside of the lid or base.
- Insert 4 new AAA batteries, ensuring correct polarity (+/-).
- Close the battery compartment cover securely.

Image: A detailed view of the battery compartment, showing where to insert the AAA batteries.
4.2 Programming Fingerprints
To utilize the fingerprint locking mechanism, you must first enroll your fingerprints. The safe supports multiple fingerprints. Refer to the specific instructions provided with your safe for the exact programming sequence, as this may vary slightly. Generally, the process involves:
- With the safe open, locate the programming button (often a small button near the fingerprint sensor or inside the safe).
- Press the programming button. An indicator light or sound will signal that the safe is in programming mode.
- Place your finger firmly on the fingerprint sensor. Lift and repeat several times as prompted by the indicator.
- Once successfully programmed, the indicator will confirm with a specific light pattern or sound.
- Repeat for additional fingerprints you wish to enroll.
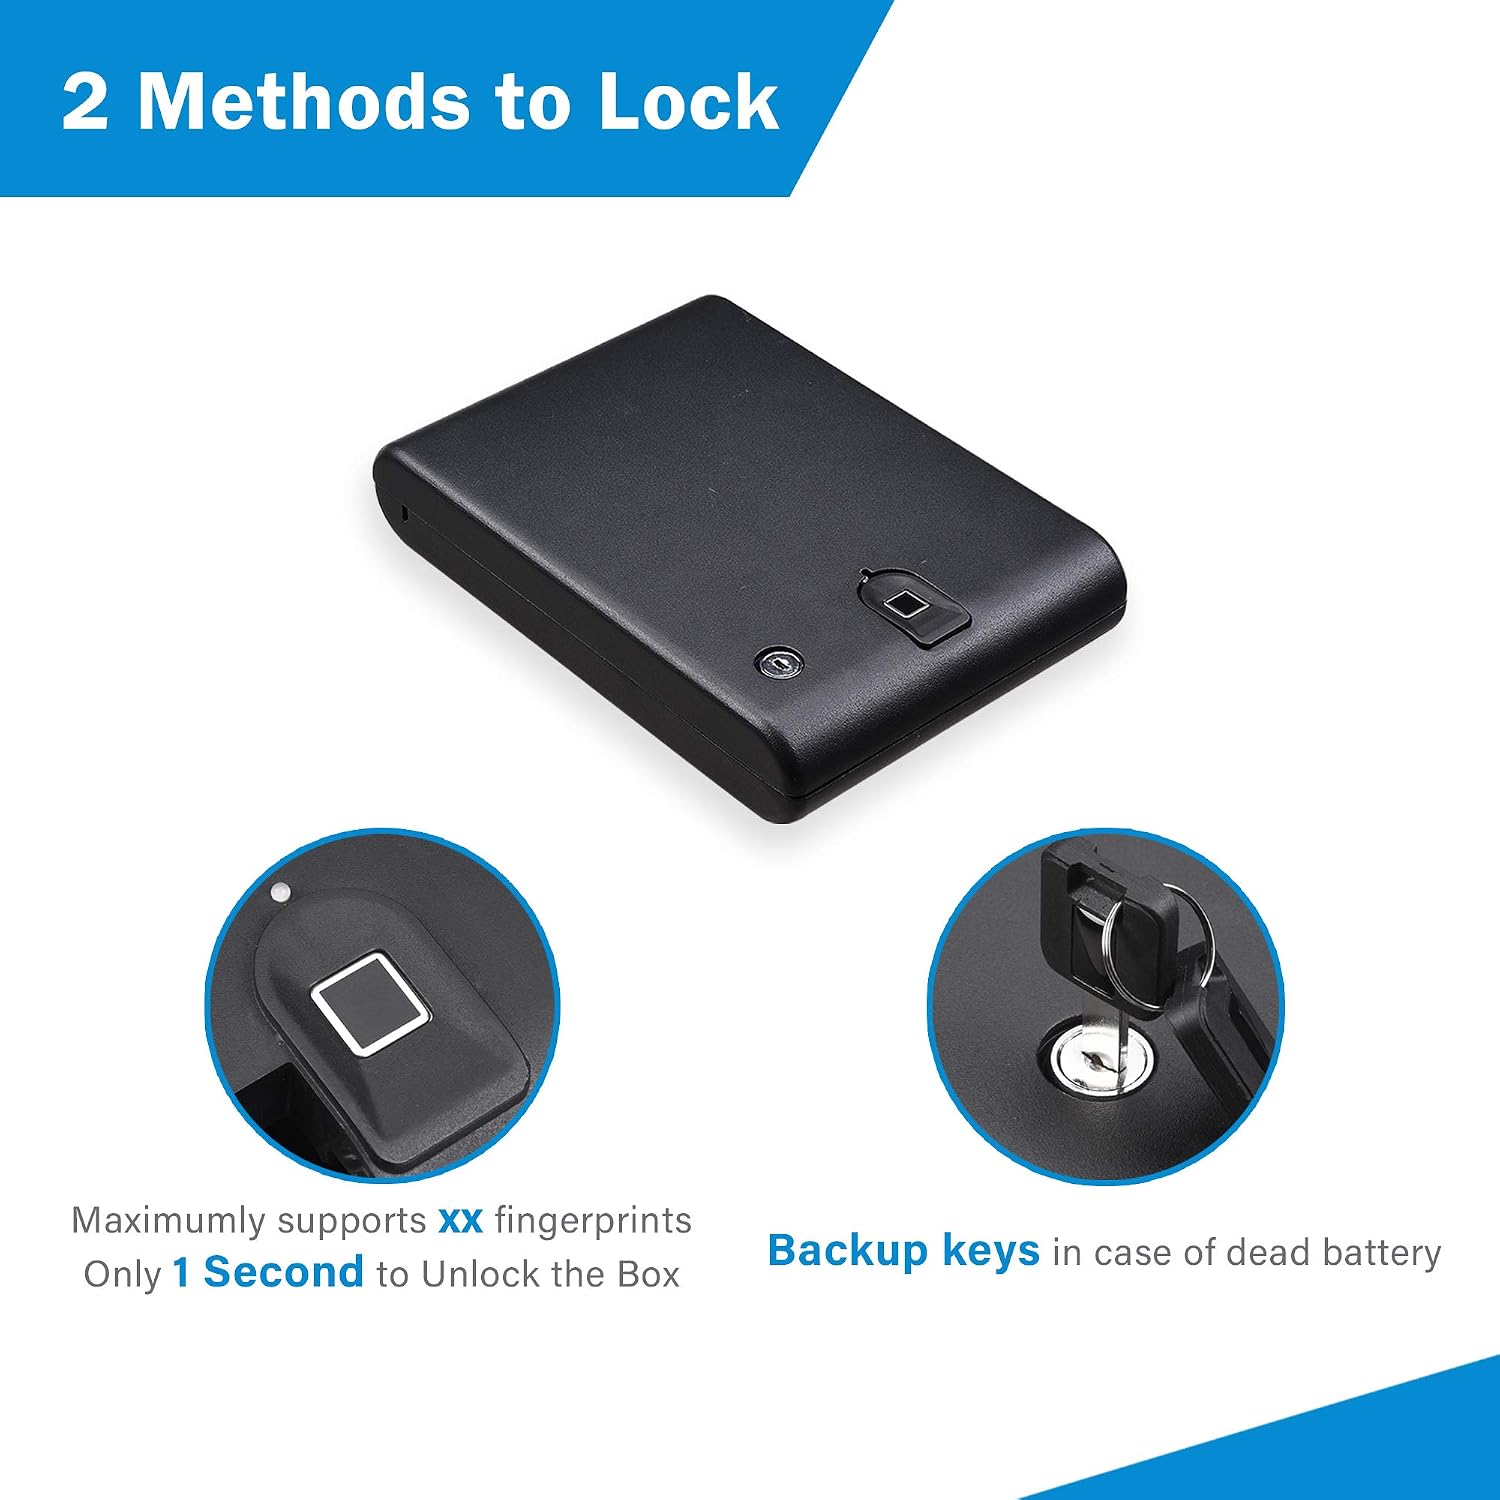
Image: The exterior of the safe, highlighting the fingerprint sensor and the backup keyhole, illustrating the two methods of locking and unlocking.
4.3 Securing the Safe with Cable
The included security cable allows you to tether the safe to an immovable object, providing an additional layer of security. This is particularly useful when using the safe in a vehicle or hotel room.
- Locate the cable attachment point on the safe (usually a slot or loop).
- Thread the security cable through the attachment point on the safe.
- Wrap the other end of the cable around a sturdy, immovable object (e.g., a car seat frame, a desk leg).
- Secure the cable by looping it back through itself or using the provided locking mechanism if applicable.

Image: The compact safe placed inside a car's glove compartment, demonstrating how the security cable can be used to attach it to a fixed point for enhanced protection.
5. Operation
5.1 Opening with Fingerprint
To open the safe using a programmed fingerprint:
- Place a programmed finger firmly on the fingerprint sensor.
- The safe will emit a confirmation sound or light, and the lock mechanism will disengage.
- Lift the lid to open the safe.
5.2 Opening with Backup Key
In case of battery failure or forgotten fingerprints, the backup keys provide manual access:
- Insert one of the backup keys into the keyhole on the safe.
- Turn the key to unlock the safe.
- Lift the lid to open the safe.
5.3 Low Battery Indicator
When the batteries are low, the safe's indicator light will typically flash red or provide an audible warning. Replace the batteries promptly to ensure continued functionality.
5.4 Lockout Feature
The safe is equipped with a lockout feature. If three incorrect fingerprint attempts are made consecutively, the safe may enter a temporary lockout period, during which the electronic lock will not respond. Wait for the lockout period to expire, or use the backup key to open the safe.
6. Maintenance
6.1 Battery Replacement
Replace all 4 AAA batteries when the low battery indicator activates. Always use new, high-quality alkaline batteries for optimal performance.
6.2 Cleaning
Wipe the exterior of the safe with a soft, damp cloth. Avoid using abrasive cleaners or solvents that could damage the finish or electronic components. Keep the fingerprint sensor clean and free of dirt or moisture for reliable operation.
7. Troubleshooting
- Safe does not open with fingerprint:
Ensure your finger is clean and dry. Try repositioning your finger on the sensor. Verify that the batteries are not low and are correctly installed. If issues persist, try using a different programmed finger or the backup key. - Safe does not respond:
Check battery installation and replace batteries if necessary. If the safe is in lockout mode due to multiple incorrect attempts, wait for the lockout period to end or use the backup key. - Red light flashes:
This typically indicates low battery power. Replace all 4 AAA batteries immediately.
8. Specifications
| Model Number | 06SAF023-CAR-06 |
| Outer Dimensions (L x W x D) | 10 3/16" x 7 1/2" x 2" (approx. 25.8cm x 19cm x 5cm) |
| Inner Dimensions (L x W x D) | 7 3/4" x 7 3/8" x 1" (approx. 19.7cm x 18.7cm x 2.5cm) |
| Weight | 3.38 lbs (approx. 1.53 kg) |
| Material | Cold-rolled Alloy Steel |
| Lock Type | Fingerprint Recognition, Key Lock |
| Power Source | 4 x AAA 1.5V Batteries (not included) |
| Alarm | Vibration (if applicable) |

Image: A visual representation of the safe's dimensions, including length, width, and depth for both the exterior and interior.
9. Warranty and Support
For warranty information or technical support, please refer to the documentation provided at the time of purchase or contact Yescom customer service directly. Keep your purchase receipt as proof of purchase.