
Introduction
This manual provides comprehensive instructions for the safe and effective use of your Yamato TPR 1050/13 Hammer Drill, Model 7020005. Please read this manual carefully before operating the tool to ensure proper handling, optimal performance, and to prevent injury or damage. Keep this manual in a safe place for future reference.
Safety Instructions
Always follow basic safety precautions to reduce the risk of fire, electric shock, and personal injury.
- Work Area Safety: Keep your work area clean and well-lit. Cluttered or dark areas invite accidents. Do not operate power tools in explosive atmospheres, such as in the presence of flammable liquids, gases, or dust.
- Electrical Safety: Power tool plugs must match the outlet. Never modify the plug in any way. Do not expose power tools to rain or wet conditions.
- Personal Safety: Always wear eye protection. Use hearing protection when operating the hammer drill. Dress properly; avoid loose clothing or jewelry. Secure long hair.
- Tool Use and Care: Do not force the power tool. Use the correct power tool for your application. Disconnect the plug from the power source before making any adjustments, changing accessories, or storing power tools.
- Maintenance: Maintain power tools. Check for misalignment or binding of moving parts, breakage of parts, and any other condition that may affect the power tool’s operation.
Setup
Unpacking and Components
Carefully remove the hammer drill and all accessories from the packaging. Inspect the tool for any signs of damage during transit. If any damage is found, do not operate the tool and contact customer support.
Included Components:
- Yamato TPR 1050/13 Hammer Drill (Model 7020005)
- Auxiliary Handle
- Depth Stop
- Carry Case
- Instruction Manual
Attaching the Auxiliary Handle and Depth Stop
- Loosen the auxiliary handle clamp by rotating it counter-clockwise.
- Slide the auxiliary handle over the chuck onto the front of the drill housing.
- Adjust the handle to a comfortable and secure position for your grip.
- Insert the depth stop into the hole in the auxiliary handle. Adjust it to the desired drilling depth.
- Tighten the auxiliary handle clamp by rotating it clockwise until it is firmly secured.
Installing Drill Bits
The Yamato TPR 1050/13 features a 13 mm keyless chuck for quick and easy bit changes.
- Ensure the drill is unplugged from the power source.
- Rotate the front collar of the chuck counter-clockwise to open the chuck jaws.
- Insert the drill bit fully into the chuck jaws.
- Rotate the front collar clockwise to tighten the chuck jaws securely around the drill bit. Ensure the bit is centered and firmly held.
- Pull on the drill bit to confirm it is securely fastened before operation.
Operating Instructions
Power Connection
Connect the drill to a standard 220V AC power outlet. Ensure the power switch is in the "OFF" position before plugging in the tool.
Selecting Operating Mode (Drill/Hammer Drill)
The drill features a mode selector switch, typically located on the top or side of the drill housing. Slide the switch to select between standard drilling (for wood, metal, plastic) and hammer drilling (for masonry, concrete, brick).
- Drill Mode: For drilling holes without impact.
- Hammer Drill Mode: For drilling into hard materials like concrete and brick, combining rotation with a hammering action.
Speed Control and Reversible Function
The drill is equipped with a speed variator and two mechanical speed settings (1,100 / 2,800 RPM) for optimal control across different materials and tasks. The electronic rotation control allows for precise speed adjustment via the trigger.
A reversible switch, usually located near the trigger, allows for changing the direction of rotation. This is useful for removing screws or freeing a jammed drill bit.
Drilling Procedure
- Mark the drilling spot accurately.
- Select the appropriate drill bit and operating mode.
- Hold the drill firmly with both hands, ensuring a stable stance.
- Place the tip of the drill bit on the marked spot.
- Start the drill at a low speed by gently pressing the trigger. Gradually increase speed as the bit penetrates the material.
- Apply steady, even pressure. Do not force the drill.
- Periodically withdraw the drill bit slightly to clear debris, especially when drilling deep holes.
- Once the desired depth is reached, release the trigger and wait for the drill bit to stop rotating before withdrawing the drill from the hole.
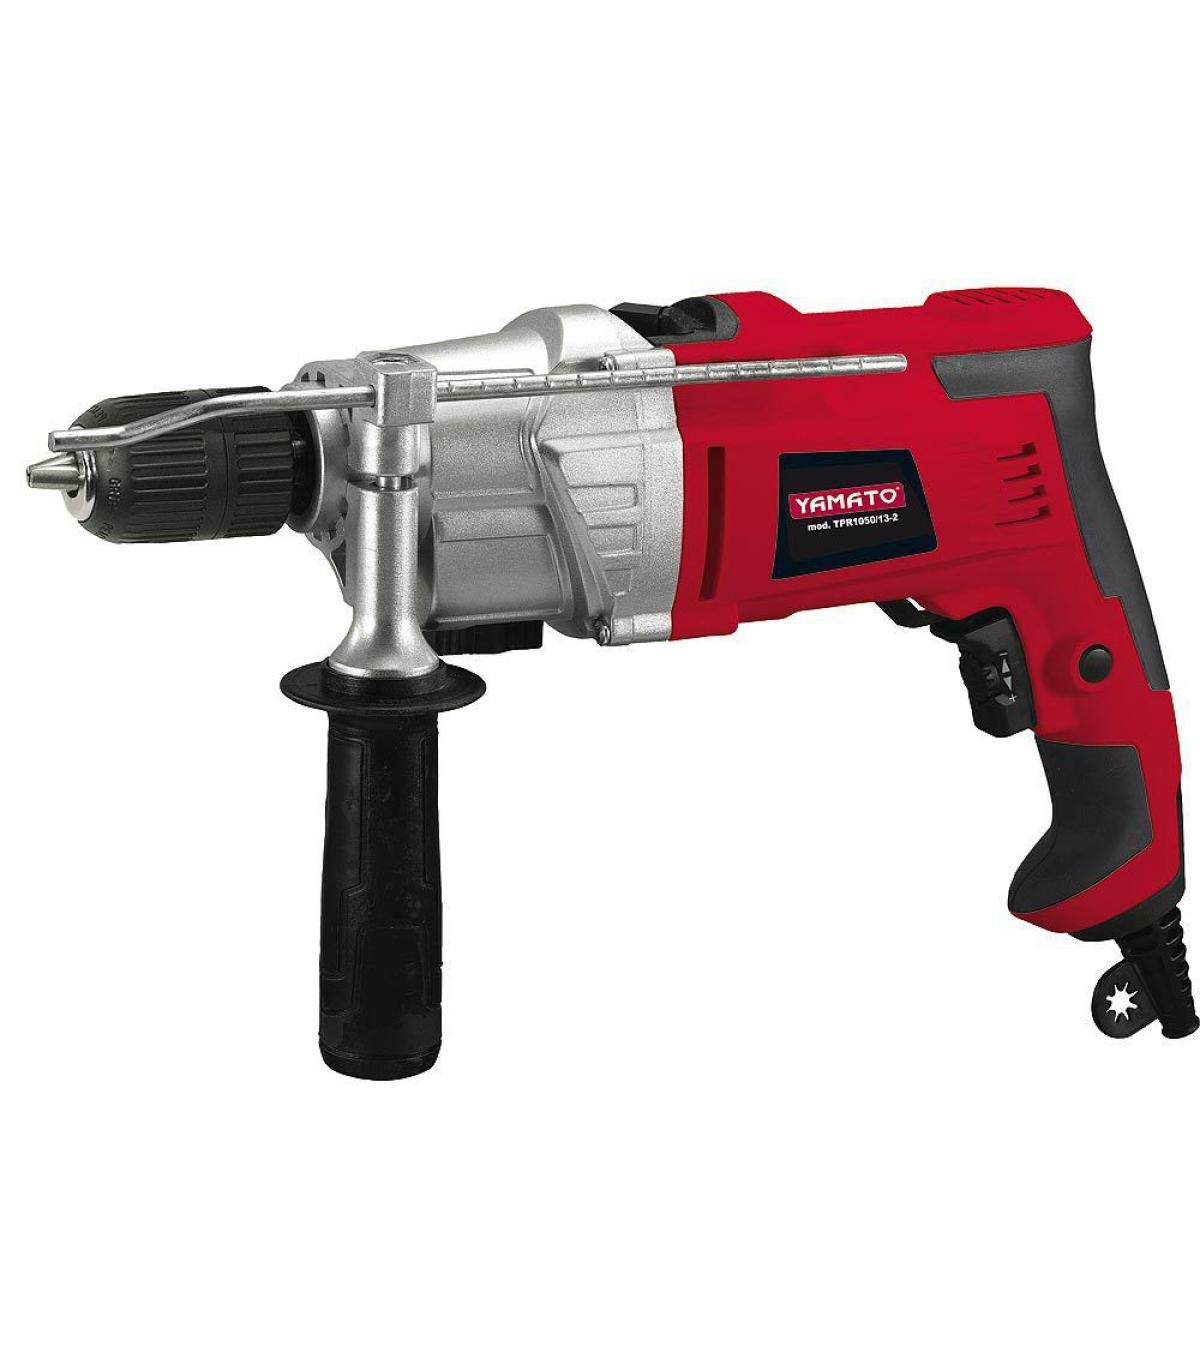
Figure 1: Yamato TPR 1050/13 Hammer Drill. This image shows the main unit of the hammer drill, typically including the chuck, motor housing, handle, and power cord. The auxiliary handle and depth stop are usually visible attached to the front of the tool.
Maintenance
Regular maintenance ensures the longevity and safe operation of your Yamato hammer drill. Always disconnect the tool from the power supply before performing any maintenance.
Cleaning
- After each use, clean the drill housing with a soft, damp cloth. Do not use harsh chemicals or abrasive cleaners.
- Use compressed air to clear dust and debris from ventilation openings to prevent overheating.
- Clean the chuck jaws regularly to ensure proper grip on drill bits.
Storage
Store the hammer drill in its original carry case in a dry, secure location, out of reach of children. Protect it from moisture and extreme temperatures.
Troubleshooting
Before attempting any repairs, always disconnect the drill from the power supply.
| Problem | Possible Cause | Solution |
|---|---|---|
| Drill does not start. | No power supply; faulty power cord/plug; trigger switch fault. | Check power outlet and connections. Inspect power cord for damage. If problem persists, seek professional service. |
| Loss of power during operation. | Overload; motor overheating; carbon brush wear. | Reduce pressure. Allow drill to cool down. If problem persists, carbon brushes may need replacement (professional service recommended). |
| Drill bit slips in chuck. | Chuck not tightened sufficiently; worn chuck jaws; dirty chuck. | Ensure bit is fully inserted and chuck is tightened firmly. Clean chuck jaws. If wear is evident, chuck replacement may be necessary. |
| Excessive vibration or noise. | Bent drill bit; internal component damage; loose parts. | Replace bent drill bits. Discontinue use and seek professional service if internal damage is suspected. |
Specifications
| Feature | Detail |
|---|---|
| Model Number | 7020005 |
| Product Name | Yamato TPR 1050/13 Hammer Drill |
| Power Input | 1050 W |
| Voltage | 220 V |
| No-Load Speed (2 Speeds) | 1st Gear: 1,100 RPM / 2nd Gear: 2,800 RPM |
| Impact Rate | 15,000 / 42,000 BPM (Beats Per Minute) |
| Chuck Type | Keyless Chuck |
| Chuck Capacity | 13 mm |
| Drilling Capacity (Wood) | 30 mm |
| Drilling Capacity (Steel) | 16 mm |
| Drilling Capacity (Brick/Masonry) | 22 mm |
| Weight | 4.2 kg (Item weight) |
| Material | Metal |
| Special Features | Reversible, Speed Variator, Electronic Rotation |
| GTIN | 08000071959780 |
Warranty and Support
Your Yamato TPR 1050/13 Hammer Drill is covered by a manufacturer's warranty against defects in materials and workmanship. Please refer to the warranty card included with your product for specific terms, conditions, and duration. Keep your purchase receipt as proof of purchase for warranty claims.
For technical assistance, spare parts, or warranty service, please contact your retailer or the authorized Yamato service center in your region. Do not attempt to repair the tool yourself, as this may void the warranty and pose safety risks.