1. Introduction
The SoundXtreme ST-EQ-180 is a 7-band passive stereo graphic equalizer designed to provide precise audio control for your car audio system. This manual provides detailed instructions for proper installation, operation, and maintenance to ensure optimal performance and longevity of your device.

Image: Front view of the SoundXtreme ST-EQ-180 equalizer, showing the fader, EQ sliders, and level meter.
2. Safety Information
- Always disconnect the vehicle's battery before performing any electrical work.
- Ensure all wiring connections are secure and properly insulated to prevent short circuits.
- Mount the equalizer in a location that does not obstruct the driver's view or interfere with vehicle operation.
- Avoid exposing the unit to excessive moisture, dust, or extreme temperatures.
- Refer to a professional installer if you are unsure about any installation steps.
3. Package Contents
- SoundXtreme ST-EQ-180 Graphic Equalizer
- Wiring Harness
- Mounting Hardware
- Instruction Manual
4. Product Features
- 7-Band Stereo Graphic Equalizer with Fader Control
- Adjustable Gain Control
- Output Level Display
- EQ Slide Controls for precise frequency adjustment
- Subwoofer Crossover Points (80Hz, 150Hz)
- Subwoofer Switch
5. Controls and Connections
5.1 Front Panel Controls
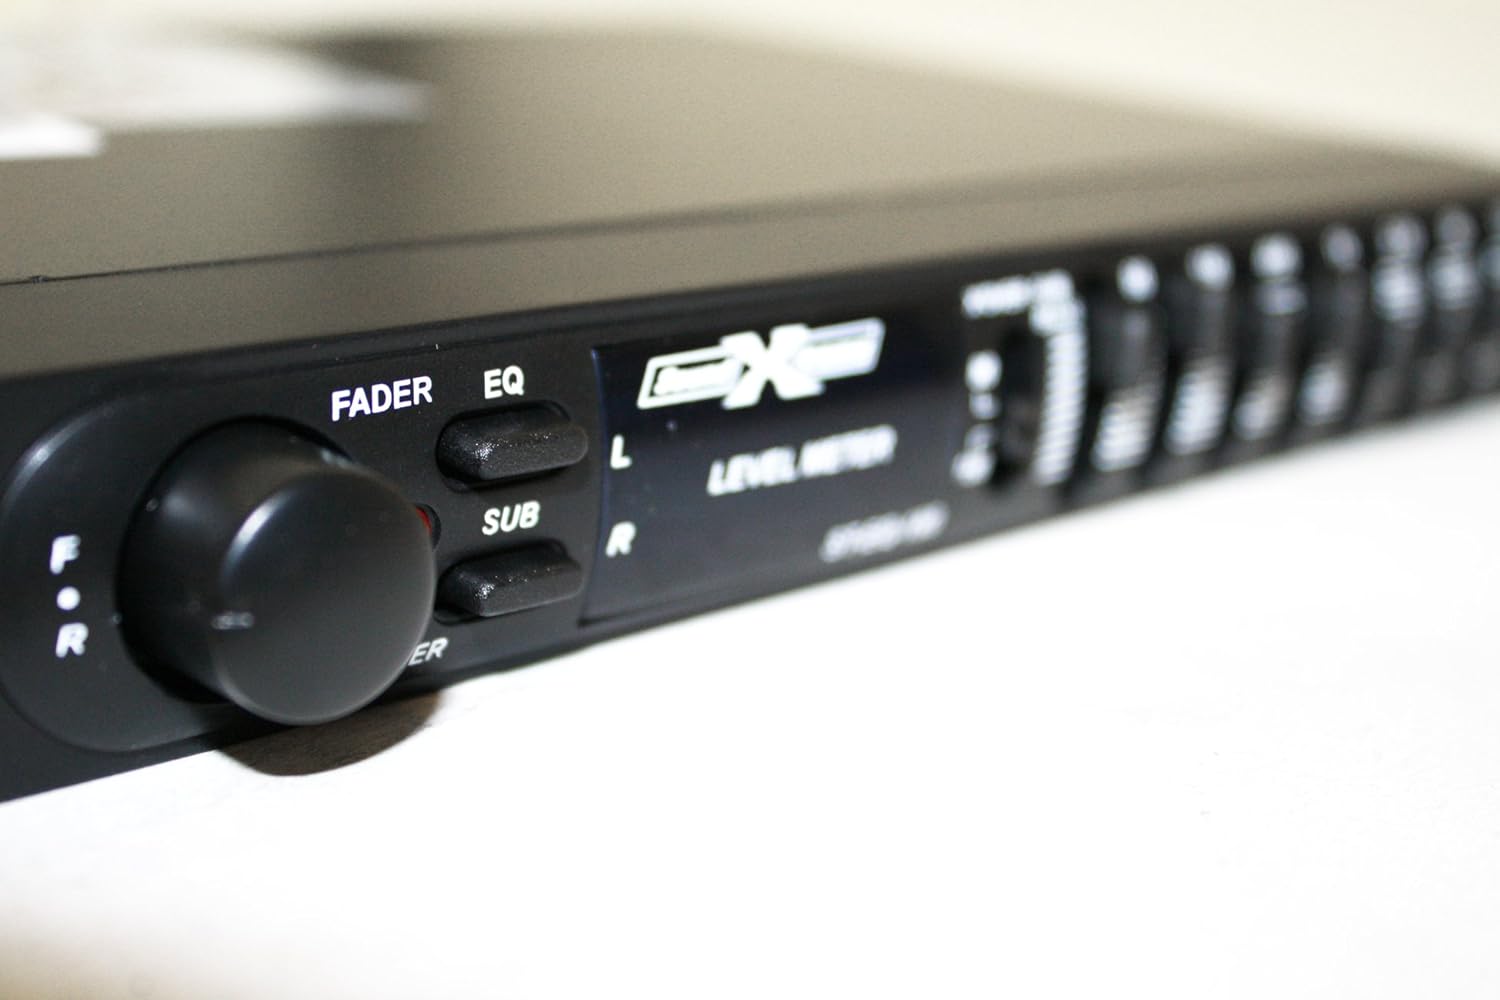
Image: Close-up of the front panel, highlighting the Fader, EQ, SUB buttons, Power LED, and Level Meter.
- FADER (F/R) Knob: Adjusts the balance between front and rear speakers.
- EQ Button: Activates or deactivates the equalizer function.
- SUB Button: Activates or deactivates the subwoofer output.
- POWER LED: Illuminates when the unit is powered on.
- LEVEL METER: Displays the output level.
- EQ Sliders (60Hz, 150Hz, 400Hz, 1KHz, 2.5KHz, 6KHz, 15KHz): Adjusts the gain for each frequency band by +/- 12dB.
- X'OVER SUB BASS (80/150) Switch: Selects the subwoofer crossover frequency.
5.2 Rear Panel Connections

Image: Rear view of the equalizer showing RCA input/output jacks and the wiring harness for power and remote connections.
- RCA Inputs: Connect to the audio source (e.g., head unit).
- RCA Outputs (Front, Rear, Sub): Connect to amplifiers.
- Power Input (11-16V DC): Connects to the vehicle's power supply.
- Ground: Connects to the vehicle's chassis ground.
- Remote Turn-On: Connects to the remote output of the head unit or ignition switch.

Image: Close-up of the wiring harness with labeled wires for power, ground, remote, and high-level inputs.
6. Installation
Follow these steps for proper installation of your SoundXtreme ST-EQ-180 equalizer:
- Mounting: Choose a secure, dry location for mounting the equalizer, away from direct heat or moisture. Use the provided mounting hardware to secure the unit.
- Power Connection: Connect the yellow wire (12V constant) to a fused 12V constant power source. Connect the black wire (Ground) to a clean chassis ground point. Connect the blue wire (Remote) to the remote turn-on output of your head unit or ignition switch. Ensure all connections are tight and insulated.
- Audio Input: Connect the RCA input cables from your head unit's pre-amp outputs to the corresponding RCA inputs on the equalizer.
- Audio Output: Connect RCA output cables from the equalizer's Front, Rear, and Sub outputs to the corresponding inputs on your amplifiers.
- Initial Setup: Before powering on, ensure all gain controls on the equalizer and connected amplifiers are set to their minimum positions.
7. Operation
Once installed, operate your equalizer using the following guidelines:
7.1 Adjusting Equalization
- Turn on your audio system. The POWER LED on the equalizer should illuminate.
- Ensure the EQ button is pressed in to activate the equalizer function.
- Play a familiar audio track.
- Adjust the 7 EQ sliders (60Hz, 150Hz, 400Hz, 1KHz, 2.5KHz, 6KHz, 15KHz) to fine-tune the audio frequencies to your preference. Each slider allows for +/- 12dB adjustment.
- Observe the Level Meter to avoid clipping (distortion). If the meter shows consistent red, reduce the input gain or output level.
7.2 Fader Control
- Use the FADER (F/R) knob to adjust the balance of sound between your front and rear speakers. Turn towards 'F' for more front sound, and towards 'R' for more rear sound.
7.3 Subwoofer Control
- Press the SUB button to activate the subwoofer output.
- Use the X'OVER SUB BASS switch to select the desired crossover frequency for the subwoofer (80Hz or 150Hz). This helps direct low frequencies specifically to your subwoofer.
8. Specifications
| Feature | Specification |
|---|---|
| EQ Center Frequencies | 60, 150, 400, 1K, 2.5K, 6K, 15KHz |
| Equalization Range | +/- 12dB |
| Input Impedance | 100 Ohm |
| Input Sensitivity | 4 Volts for 500mV out |
| Frequency Response | 20Hz to 20kHz +/- dB |
| Crossover Rolloff | 12dB/Octave |
| Power Requirement | 11-16V DC |
| Product Dimensions | 4.5 x 7 x 1.4 inches |
| Item Weight | 1.5 pounds |
| Model Number | ST-EQ-180 (also referred to as ST-EQ-48 in some specifications) |
9. Maintenance
To maintain the performance and appearance of your equalizer:
- Clean the unit regularly with a soft, dry cloth. Do not use harsh chemicals or abrasive cleaners.
- Ensure all connections remain secure. Loose connections can lead to poor audio quality or intermittent operation.
- Avoid blocking any ventilation openings on the unit to prevent overheating.
10. Troubleshooting
If you experience issues with your equalizer, refer to the following table for common problems and solutions:
| Problem | Possible Cause | Solution |
|---|---|---|
| No Power | Blown fuse, loose power connection, no remote signal. | Check the fuse in the power line. Verify all power, ground, and remote connections are secure. |
| No Sound | Incorrect input/output connections, EQ bypass active, amplifier off. | Check all RCA connections. Ensure the EQ button is pressed. Verify amplifiers are powered on. |
| Distorted Sound | Input gain too high, EQ sliders set too high, poor grounding. | Reduce input gain on the equalizer or amplifier. Adjust EQ sliders to a lower setting. Check ground connection for proper contact. |
| Engine Noise/Whine | Poor grounding, RCA cables too close to power wires. | Ensure a solid, clean ground connection. Reroute RCA cables away from power wires. Consider a ground loop isolator if the problem persists. |
11. Warranty and Support
For warranty information and technical support, please refer to the documentation provided with your purchase or contact SoundXtreme customer service directly. Keep your proof of purchase for any warranty claims.