
Introduction
This manual provides detailed instructions for the setup, operation, maintenance, and troubleshooting of your AOC E2261FWH 21.5-inch monitor. Please read this manual thoroughly before using your monitor to ensure proper installation and optimal performance.
The AOC E2261FWH monitor features a 21.5-inch display with a narrow screen border, a 50,000,000:1 Dynamic Contrast Ratio, and Clear Vision technology for enhanced image quality. It is designed for energy efficiency with LED backlighting.
1. Setup
1.1 Unpacking
Carefully remove all components from the packaging. Ensure all items listed in the packing list are present. Retain the packaging materials for future transport or storage.
1.2 Assembling the Stand
- Place the monitor face down on a soft, clean surface to prevent scratches.
- Attach the stand base to the stand neck, securing it with the provided screw.
- Align the assembled stand with the mounting slot on the back of the monitor and gently push until it clicks into place.
1.3 Connecting Cables
Before connecting any cables, ensure both the monitor and your computer are powered off.
- Power Cable: Connect one end of the power cable to the monitor's power input and the other end to a grounded electrical outlet.
- HDMI Cable: For digital video and audio, connect an HDMI cable from your computer's HDMI output to the monitor's HDMI input.
- VGA Cable: For analog video, connect a VGA cable from your computer's VGA output to the monitor's VGA input.

Figure 1: Front view of the AOC E2261FWH monitor, showing the display and stand.
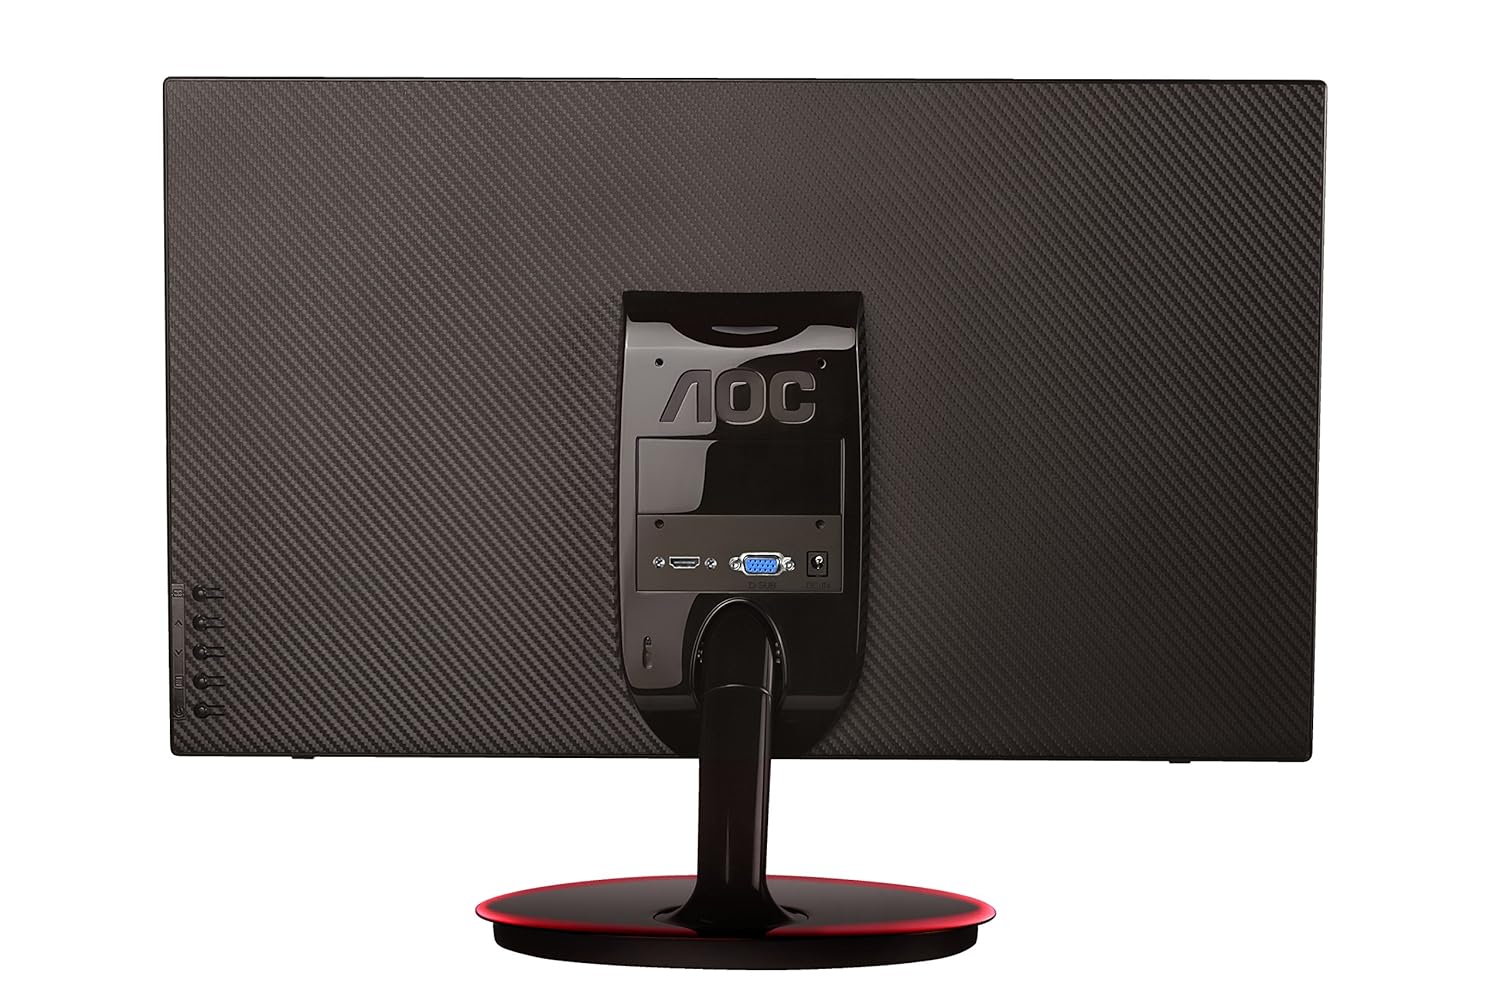
Figure 2: Rear view of the AOC E2261FWH monitor, highlighting the power, HDMI, and VGA input ports.
1.4 Initial Power-On
After connecting all necessary cables, power on your computer, then press the power button on the monitor. The monitor should automatically detect the input signal. If not, you may need to manually select the input source using the OSD menu.
2. Operating the Monitor
2.1 Power On/Off
Press the power button located on the monitor's bezel to turn the monitor on or off. The power indicator light will illuminate when the monitor is on.
2.2 On-Screen Display (OSD) Menu
The OSD menu allows you to adjust various monitor settings. Use the control buttons (usually located on the bottom right or rear of the monitor) to navigate the menu.
- Menu Button: Opens the OSD menu.
- Arrow Buttons: Navigate through menu options.
- Enter/Select Button: Confirms a selection or enters a sub-menu.
- Exit Button: Exits the current menu or OSD.
2.3 Adjusting Settings
Common adjustable settings include:
- Brightness/Contrast: Adjust the overall luminance and difference between light and dark areas.
- Color Settings: Modify color temperature, gamma, and individual RGB levels.
- Input Select: Manually switch between HDMI and VGA input sources.
- Clear Vision: Enable or disable Clear Vision technology to enhance image clarity for standard definition content.
- Picture Mode: Select from preset display modes (e.g., Standard, Text, Internet, Game, Movie, Sports).
3. Maintenance
3.1 Cleaning the Monitor
- Always power off the monitor and unplug the power cord before cleaning.
- Use a soft, lint-free cloth lightly dampened with water or a mild, non-abrasive screen cleaner.
- Do not spray cleaner directly onto the screen. Apply it to the cloth first.
- Avoid using benzene, thinner, ammonia-based cleaners, or abrasive materials, as these can damage the screen or casing.
3.2 General Care
- Avoid placing the monitor in direct sunlight or near heat sources.
- Ensure adequate ventilation around the monitor.
- Do not place heavy objects on the monitor or its cables.
- Protect the monitor from excessive dust and moisture.
4. Troubleshooting
If you encounter issues with your monitor, refer to the following common problems and solutions:
| Problem | Possible Cause | Solution |
|---|---|---|
| No Power | Power cable not connected; Power outlet faulty; Monitor off. | Check power cable connections; Try a different outlet; Press the monitor's power button. |
| No Signal | Video cable not connected; Incorrect input source selected; Computer not powered on. | Ensure video cable (HDMI/VGA) is securely connected; Select the correct input source via OSD; Power on your computer. |
| Image is Blurry/Distorted | Incorrect resolution; Loose video cable; Monitor settings. | Set your computer's display resolution to 1920 x 1080; Reconnect the video cable; Adjust OSD settings like phase, clock, brightness, and contrast. |
| Colors are Incorrect | Color settings in OSD; Faulty video cable. | Adjust color settings in the OSD menu; Try a different video cable. |
If the problem persists after trying these solutions, please contact AOC customer support.
5. Specifications
| Feature | Detail |
|---|---|
| Brand | AOC |
| Model | E2261FWH |
| Screen Size | 21.5 Inches |
| Screen Resolution | 1920 x 1080 |
| Aspect Ratio | 16:9 |
| Response Time | 5 Milliseconds |
| Dynamic Contrast Ratio | 50,000,000:1 (typical) |
| Input Ports | 1 x HDMI, 1 x VGA |
| Frequency Range (H) | 30-83 KHz |
| Frequency Range (V) | 55-76 Hz |
| Power Consumption | 22 Watts (typical) |
| Item Weight | 3.51 kg (approx.) |
6. Warranty and Support
6.1 Warranty Information
AOC monitors are covered by a limited warranty. For specific warranty terms and conditions applicable to your region, please refer to the warranty card included with your product or visit the official AOC website. Keep your purchase receipt as proof of purchase for warranty claims.
6.2 Customer Support
For technical assistance, product inquiries, or service requests, please contact AOC customer support. You can typically find contact information (phone numbers, email, or support portals) on the official AOC website or in the documentation provided with your monitor.
AOC Official Website: www.aoc.com


