1. Introduction
The Kaito KA29 is a compact and versatile world receiver designed for global radio reception and multimedia playback. It features AM, FM, and Shortwave (SW) radio bands, an integrated MP3 player, and a recording function for both radio broadcasts and voice. This manual provides detailed instructions for the proper setup, operation, and maintenance of your device.

Figure 1: Front view of the Kaito KA29 World Receiver.
2. Product Features
- World Band Radio: Receives AM, FM, and Shortwave (SW) frequencies.
- Digital Signal Processing (DSP): Enhances reception and audio clarity.
- MP3 Player: Supports playback from Micro-USB and USB 2.0 ports.
- Voice and Radio Recorder: Records audio from radio broadcasts or the built-in microphone to external storage.
- E-Book Reader & Calendar App: Additional utility functions.
- Alarm Clock & Sleep Mode: Programmable functions for convenience.
- Rechargeable Battery: Integrated lithium-ion battery for portable use.
- Connectivity: Micro-USB, USB 2.0 ports, Aux input, Earphone jack.
3. Setup
3.1. Unpacking and Inspection
Carefully remove all components from the packaging. Verify that all items listed in the 'What's in the Box' section are present and undamaged.
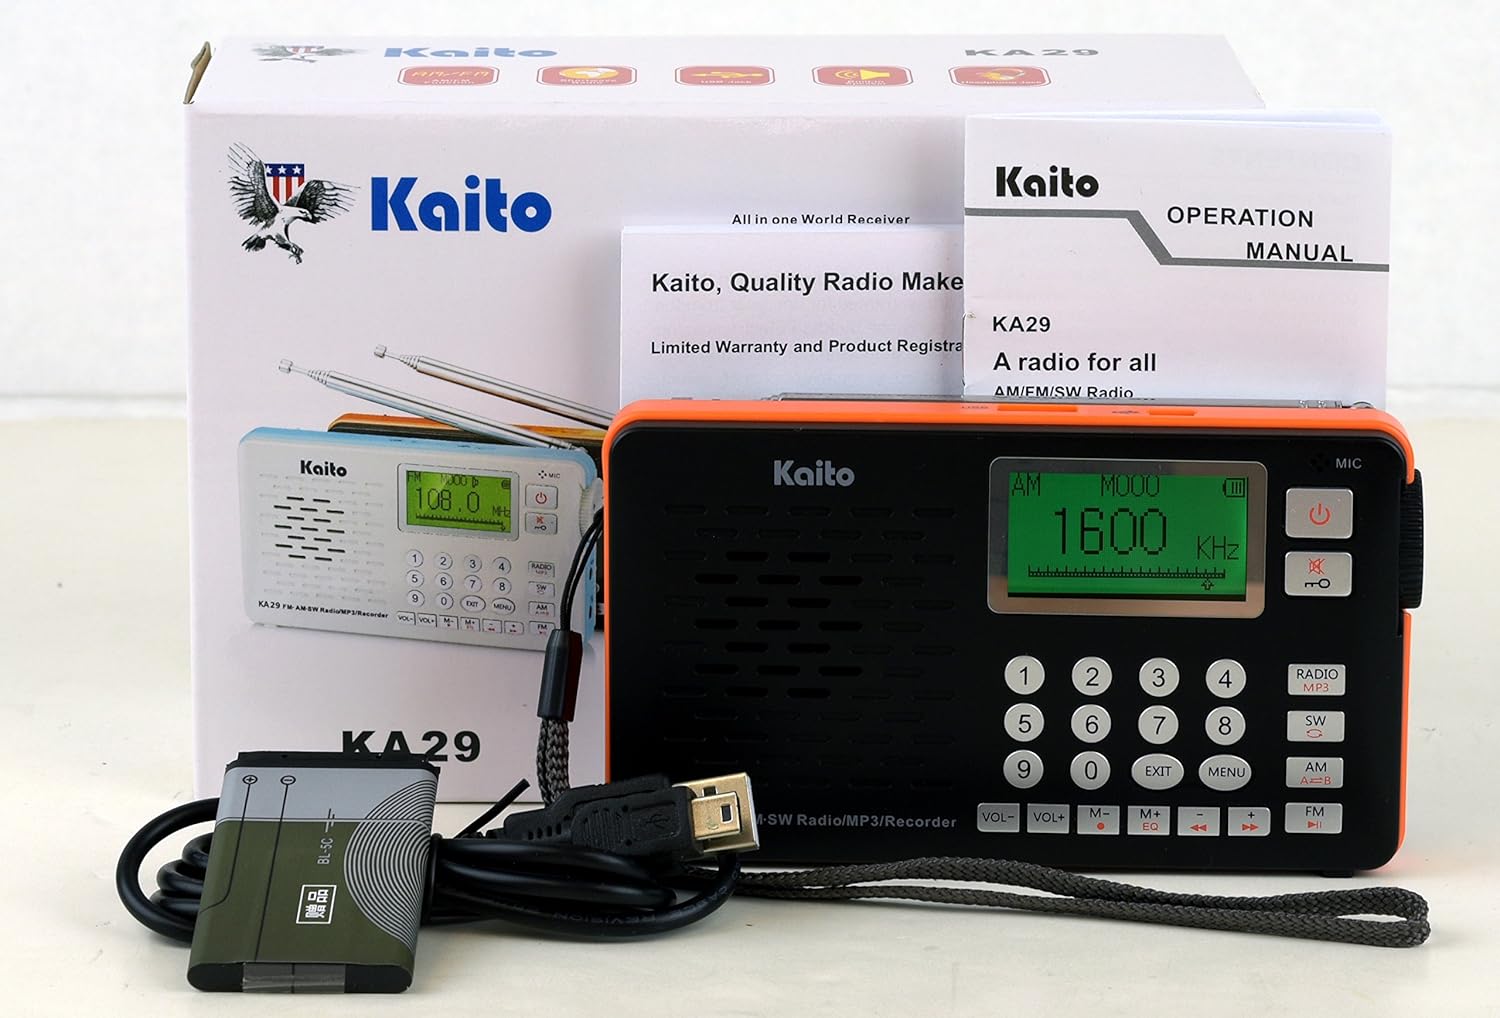
Figure 2: Kaito KA29 packaging and included accessories.
3.2. Battery Installation and Charging
- Locate the battery compartment on the back of the radio.
- Open the compartment cover.
- Insert the provided lithium-ion battery, ensuring correct polarity.
- Close the battery compartment cover securely.
- Connect the radio to a USB power source (e.g., computer, USB wall adapter) using the supplied Micro-USB cable to charge the battery. The charging indicator will illuminate.
- Allow the battery to fully charge before first use.

Figure 3: Back view of the Kaito KA29, showing the battery compartment.
3.3. Antenna Extension
For optimal FM and Shortwave reception, fully extend the telescopic antenna. For AM reception, the internal ferrite bar antenna is used, and antenna orientation may improve signal.
4. Operating Instructions
4.1. Power On/Off
Press and hold the Power button () located on the top right of the front panel to turn the radio on or off.
4.2. Radio Operation (AM/FM/SW)
- Select Band: Press the RADIO/MP3 button repeatedly to cycle through FM, AM, and SW bands. The selected band will be displayed on the screen.
- Tuning:
- Manual Tuning: Use the number keypad to directly enter a frequency, then press OK or wait a few seconds. Alternatively, use the tuning knob on the side of the unit for fine-tuning.
- Auto Scan: Press and hold the PLAY/PAUSE button (►▮) to automatically scan and store available stations.
- Volume Control: Adjust the volume using the VOL+ and VOL- buttons on the front panel, or the rotary volume knob on the side.

Figure 4: Side view with volume control, AUX input, and headphone jack.
4.3. MP3 Player Operation
The KA29 supports MP3, WMA, and WAV audio formats.
- Insert Storage: Insert a USB flash drive into the USB 2.0 port or a Micro SD card into the dedicated slot.
- Select MP3 Mode: Press the RADIO/MP3 button until "MP3" mode is displayed.
- Playback: Use the PLAY/PAUSE (►▮), Previous (◀◀), and Next (►►) buttons to control playback.
- Equalizer: Press the EQ button to cycle through available equalizer presets.

Figure 5: Top view with USB and Micro-USB ports for MP3 playback and charging.
4.4. Recording Function
The KA29 can record from the radio or its built-in microphone to a connected USB drive or Micro SD card.
- Ensure a USB drive or Micro SD card is inserted.
- Radio Recording: Tune to the desired radio station. Press the REC button (often indicated by a red dot or specific icon) to start recording. Press again to stop.
- Voice Recording: Switch to a mode that allows voice recording (refer to on-screen prompts if available). Press the REC button to start recording via the built-in microphone. Press again to stop.
4.5. Alarm Clock and Sleep Mode
Refer to the on-screen menu options for setting the alarm time and activating the sleep timer. The sleep timer allows the radio to automatically turn off after a set duration.
4.6. E-Book Reader and Calendar
Access these functions through the main menu. The E-Book reader supports text files (e.g., .TXT) stored on your external memory. The calendar app provides basic date and time information.
5. Maintenance
5.1. Cleaning
Wipe the radio with a soft, dry cloth. Do not use liquid cleaners or abrasive materials, as they may damage the surface or internal components.
5.2. Battery Care
To prolong battery life, avoid fully discharging the battery frequently. Charge the battery regularly, even if the radio is not in use for extended periods.
5.3. Storage
Store the radio in a cool, dry place away from direct sunlight and extreme temperatures. If storing for a long time, remove the battery if possible, or ensure it is partially charged.
6. Troubleshooting
- No Power: Ensure the battery is correctly installed and charged. Connect to a USB power source to check if it powers on.
- Poor Radio Reception: Fully extend the telescopic antenna. Try repositioning the radio. For AM, rotate the unit for better signal. Check for local interference sources.
- MP3 Playback Issues: Ensure the USB drive or Micro SD card is properly inserted and contains supported audio files (MP3, WMA, WAV). Check if the storage device is formatted correctly.
- Recording Not Working: Verify that a compatible USB drive or Micro SD card with sufficient free space is inserted.
- Language Changed to Non-English: If a factory reset was performed, the language might revert to an Asian language. Navigate through the menu options to find the language settings and select English.
- Alarm/Sleep Timer Not Functioning: Double-check the settings for the alarm time and sleep duration. Ensure they are correctly activated.
7. Specifications
| Feature | Specification |
|---|---|
| Brand | Kaito |
| Model | KA29 |
| Radio Bands Supported | AM, FM, Shortwave (SW) |
| FM Frequency Range | 64.0/87.0-108MHz |
| AM Frequency Range | 520-1710KHz |
| SW Frequency Range | 3.20-21.85MHz |
| Connectivity Technology | USB (Micro-USB, USB 2.0) |
| Power Source | Rechargeable Lithium-ion Battery (5V === 500mA) |
| Product Dimensions (LxWxH) | 5.25" x 3" x 0.9" (13.3cm x 7.6cm x 2.3cm) |
| Material | Plastic |
| Included Components | Micro-USB cable, USB 2.0 Ports, Aux input, Telescopic Antenna, Earphone |
8. Warranty and Support
8.1. Warranty Information
This product is covered by a limited manufacturer's warranty. Please refer to the warranty card included in your product packaging or visit the official Kaito website for detailed warranty terms and conditions. Keep your purchase receipt as proof of purchase for warranty claims.
8.2. Customer Support
For technical assistance, troubleshooting not covered in this manual, or service inquiries, please contact Kaito customer support. Contact information can typically be found on the official Kaito website or on the product packaging.