1. Introduction
Thank you for choosing the Meister 600W Belt Sander MBS600-1. This powerful tool is designed for efficient sanding of large flat surfaces made of wood, plastic, and metal. It is ideal for tasks such as removing paint and varnish, deburring plastic, and preparing surfaces for finishing. This manual provides essential information for safe operation, proper setup, maintenance, and troubleshooting to ensure optimal performance and longevity of your belt sander.
2. Important Safety Instructions
Always observe basic safety precautions when using electric tools to reduce the risk of fire, electric shock, and personal injury. Keep this manual for future reference.
General Power Tool Safety
- Work Area Safety: Keep your work area clean and well-lit. Cluttered or dark areas invite accidents. Do not operate power tools in explosive atmospheres, such as in the presence of flammable liquids, gases, or dust.
- Electrical Safety: Power tool plugs must match the outlet. Never modify the plug in any way. Avoid body contact with earthed or grounded surfaces such as pipes, radiators, ranges, and refrigerators.
- Personal Safety: Always wear eye protection. Use dust masks, non-skid safety shoes, hard hats, or hearing protection for appropriate conditions. Dress properly. Do not wear loose clothing or jewelry. Keep hair and clothing away from moving parts.
- Tool Use and Care: Do not force the power tool. Use the correct power tool for your application. Disconnect the plug from the power source before making any adjustments, changing accessories, or storing power tools.
Belt Sander Specific Safety
- Ensure the sanding belt is correctly installed and tensioned before operation.
- Always use the auxiliary handle for secure guidance and control of the machine.
- Connect the dust extraction system to maintain a clean and safe working environment.
- Do not sand materials containing asbestos.
- The tool is GS certified, indicating compliance with German safety standards.
3. Package Contents
Carefully unpack your Meister 600W Belt Sander and check that all items are present and undamaged. If any parts are missing or damaged, please contact your retailer.
- 1 x Meister 600W Belt Sander MBS600-1
- 1 x Fabric abrasive belt, grit 80
- 1 x External dust extraction adapter (2 pieces)
- 1 x Dust collection box

Figure 1: Meister 600W Belt Sander MBS600-1 with included accessories: sanding belt, dust collection box, and dust extraction adapter.
4. Product Features and Components
Familiarize yourself with the main components of your belt sander before operation.
- Power Switch with Lock-on Function: For continuous operation.
- Speed Adjustment Dial: Allows continuous adjustment of belt speed for material-specific work.
- Auxiliary Handle: Provides secure grip and guidance.
- Dust Extraction Port: For connecting the dust collection box or an external vacuum system.
- Quick-Release Lever: For fast and tool-free sanding belt changes.
- Soft-Grip Inserts: For comfortable and secure handling.
- LED Operating Indicator: Shows when the tool is powered on.

Figure 2: Power switch with lock-on function and LED indicator.

Figure 3: Speed adjustment dial for continuous speed control.

Figure 4: Dust extraction adapter and dust collection box attachment.
5. Setup
Attaching the Sanding Belt
- Ensure the tool is unplugged from the power source.
- Locate the quick-release lever on the side of the sander.
- Push the quick-release lever to loosen the belt tension.
- Slide the old sanding belt off (if applicable) and slide the new belt onto the rollers, ensuring the arrow on the belt matches the direction of rotation indicated on the tool.
- Release the quick-release lever to tension the belt.
- Manually rotate the belt a few times to ensure it is centered. If not, use the belt tracking adjustment knob (if present) to center it.
Connecting Dust Collection
- For internal dust collection, attach the provided dust collection box to the dust extraction port. Ensure it clicks securely into place.
- For external dust extraction, attach the 2-piece adapter to the dust extraction port, then connect your external vacuum hose to the adapter.
Stationary Use
The belt sander can be quickly converted for stationary use by clamping it to a workbench. This is useful for tasks like sharpening or sanding smaller workpieces.
- Ensure the tool is unplugged.
- Position the sander upside down on a stable workbench.
- Secure the sander using appropriate clamps (not included) through the designated mounting points. Ensure the sander is stable and will not move during operation.
- Always ensure adequate ventilation and clear the area around the sanding belt.

Figure 5: Belt sander set up for stationary use, clamped to a workbench.
6. Operating Instructions
Powering On/Off
- To Turn On: Press the power switch. The LED operating indicator will light up.
- For Continuous Operation: Press the power switch and then press the lock button. The tool will continue to run without holding the switch.
- To Turn Off (from continuous operation): Press the power switch again.
Adjusting Speed
Use the speed adjustment dial to select the appropriate belt speed (170-250 m/min) for your material and application. Lower speeds are generally suitable for fine sanding or heat-sensitive materials, while higher speeds are for coarse material removal.
Sanding Techniques
- Mobile Use: Hold the sander firmly with both hands using the main handle and auxiliary handle. Place the sander flat on the workpiece and move it evenly across the surface. Apply light, consistent pressure.
- Stationary Use: With the sander clamped to a workbench, carefully bring the workpiece to the moving sanding belt. Maintain a firm grip on the workpiece and move it smoothly against the belt.
- Material Suitability: This sander is effective for wood, plastic, and metal. Always test on a scrap piece first to determine the optimal speed and pressure.
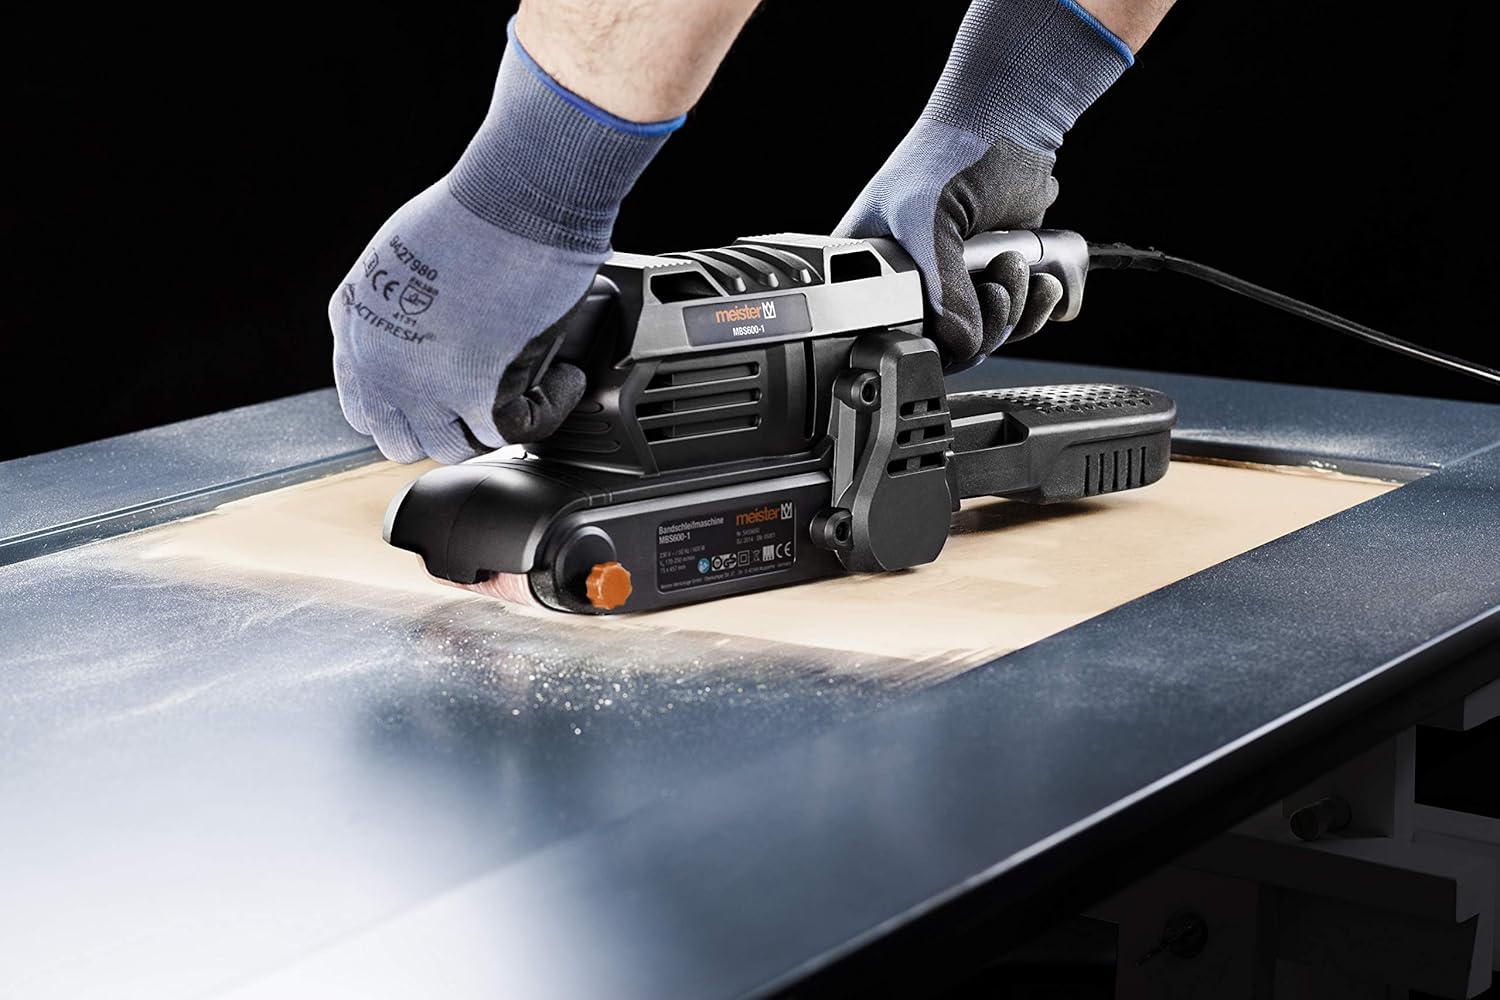
Figure 6: Operating the belt sander on a flat surface.
7. Maintenance
Regular maintenance ensures the longevity and safe operation of your tool.
Cleaning the Tool
- Always unplug the tool before cleaning.
- Use a soft brush or compressed air to clean dust and debris from the ventilation openings and around the sanding belt area.
- Wipe the housing with a damp cloth. Do not use harsh chemicals or abrasive cleaners.
Changing Sanding Belts
Refer to the 'Attaching the Sanding Belt' section under Setup for detailed instructions on changing the abrasive belt.
Emptying the Dust Box
Regularly empty the dust collection box to maintain effective dust extraction and prevent clogging. Detach the box, empty its contents, and reattach it securely.
8. Troubleshooting
Here are some common issues and their potential solutions:
| Problem | Possible Cause | Solution |
|---|---|---|
| Sander does not start | No power supply; Faulty switch | Check power connection and outlet; Contact service if switch is faulty. |
| Sanding belt slips or runs off | Belt not tensioned correctly; Belt tracking misaligned | Re-tension belt with quick-release lever; Adjust belt tracking knob. |
| Poor sanding results | Worn sanding belt; Incorrect grit; Too much pressure | Replace sanding belt; Use appropriate grit for the task; Apply lighter, even pressure. |
| Excessive dust | Dust box full or not attached correctly; Dust extraction port blocked | Empty and reattach dust box; Clear any blockages in the dust port or adapter. |
9. Technical Specifications
| Specification | Value |
|---|---|
| Model Number | MBS600-1 (Reference: 5455650) |
| Rated Power | 600 W |
| Power Supply | 230 V / 50 Hz |
| Belt Speed | 170 - 250 m/min (continuously adjustable) |
| Sanding Surface | 150 x 75 mm |
| Abrasive Belt Size | 457 x 75 mm |
| Weight | 2.5 kg (product) / 3.14 kg (package) |
| Cable Length | 300 cm (3 meters) |
| Included Components | 1 x Belt Sander, 1 x K80 Abrasive Belt, 1 x 2-piece External Dust Adapter, 1 x Dust Box |
| Manufacturer | Conmetall Meister GmbH - Tools - FR |
10. Warranty and Support
The Meister 600W Belt Sander MBS600-1 is manufactured to high-quality standards and is GS certified for your safety. For warranty claims or technical support, please refer to the warranty card included with your product or contact your retailer. Keep your proof of purchase for any warranty-related inquiries.
Information regarding spare parts availability is not provided in the product details. For any specific spare part inquiries, please contact the manufacturer or your point of purchase.


