
1. Introduction
Thank you for choosing the Champion MSF Radio-Controlled Quartz Wall Clock, model WLD1RC. This clock combines classic analog timekeeping with a modern integrated LCD display, showing the date, day, and ambient temperature. The analog clock automatically synchronizes with the MSF radio signal for precise time, while the LCD display offers additional useful information. Please read this manual carefully to ensure proper setup and operation of your new clock.
2. Safety Information
- Keep batteries out of reach of children.
- Do not mix old and new batteries, or different types of batteries.
- Remove exhausted batteries promptly to prevent leakage.
- Dispose of batteries according to local regulations.
- Do not expose the clock to extreme temperatures, direct sunlight, or high humidity.
3. Package Contents
Please check that your package contains the following items:
- Champion MSF Radio-Controlled Quartz Wall Clock (Model WLD1RC)
- Instruction Manual
Note: 2 AA batteries are required for operation and are not included in the package.
4. Product Overview
The Champion WLD1RC wall clock features a clear analog dial with an integrated LCD display at the 6 o'clock position. The back of the clock houses the battery compartments and control buttons for the LCD display.

Figure 1: Front view of the Champion MSF Radio-Controlled Quartz Wall Clock WLD1RC. This image displays the clock's white face with large black numerals, black hour, minute, and second hands, and the 'Radio Controlled' logo above the integrated LCD screen. The LCD screen shows the date, month, day of the week, and temperature.
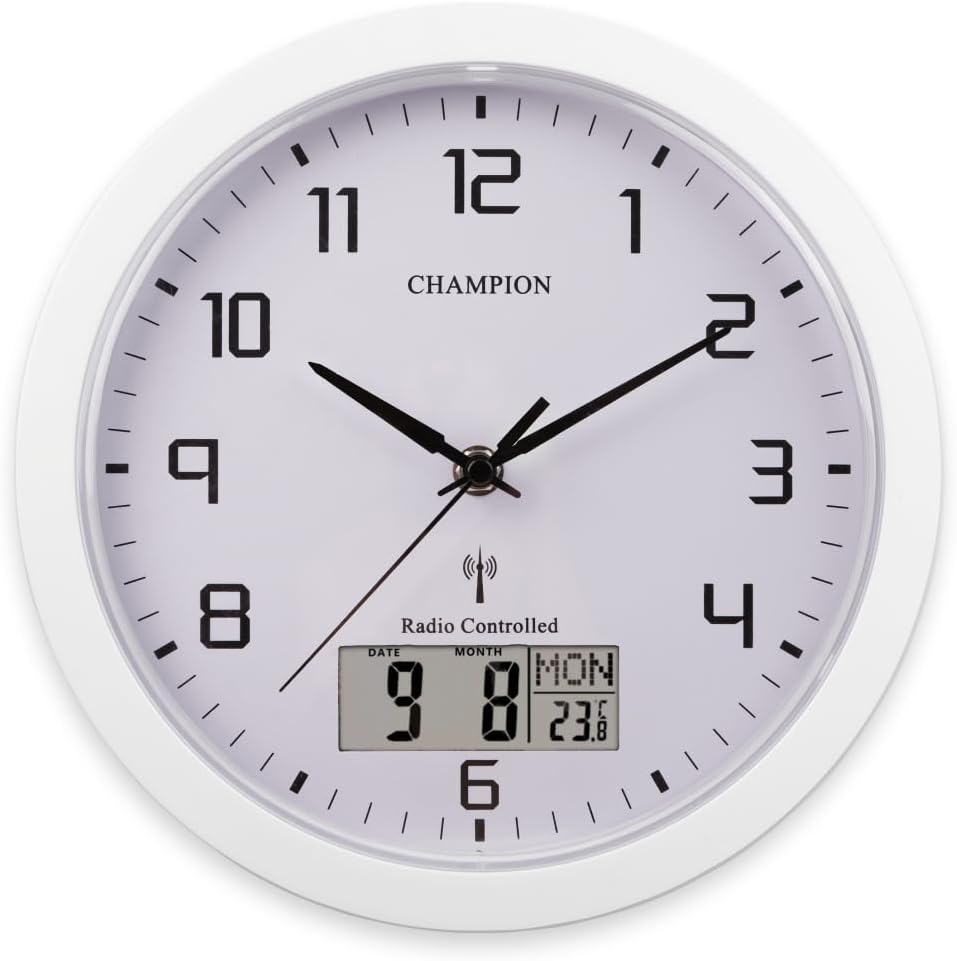
Figure 2: Close-up of the LCD display. This image provides a detailed view of the digital screen, which shows the date (e.g., '9'), month (e.g., '8'), day of the week (e.g., 'MON'), and ambient temperature (e.g., '24.9°').
5. Setup
5.1 Battery Installation
- Locate the two battery compartments on the back of the clock.
- Insert one AA alkaline battery into the compartment for the analog clock movement, ensuring correct polarity (+/-).
- Insert a second AA alkaline battery into the compartment for the LCD display, ensuring correct polarity (+/-).
- Replace the battery covers.
5.2 Analog Clock Synchronization (MSF Radio Control)
After battery installation, the analog clock hands will automatically move to the 12 o'clock position and begin searching for the MSF radio signal. This process can take up to 10 minutes. Once the signal is received, the clock will automatically set itself to the correct time.
- For optimal reception, place the clock near a window and away from electronic devices that may cause interference.
- The MSF signal is primarily broadcast for the UK and Ireland. Performance may vary in other regions.
- The clock will automatically adjust for Daylight Saving Time (Summer/Winter time changes).
5.3 LCD Display Initial Setup
The LCD display operates independently and is not radio-controlled. It requires manual setting for the initial time, date, and preferences.
- Locate the control buttons on the back of the clock, typically labeled 'SET', 'UP', 'DOWN', or similar.
- Setting Time/Date: Press and hold the 'SET' button to enter setting mode. Use 'UP'/'DOWN' buttons to adjust values (e.g., hour, minute, year, month, day). Press 'SET' again to confirm each setting and move to the next.
- Temperature Unit (Celsius/Fahrenheit): While in normal display mode, press the 'UP' button to toggle between Celsius (°C) and Fahrenheit (°F).
- 12/24 Hour Format: While in normal display mode, you may find an option to switch between 12-hour (with AM/PM) and 24-hour formats by pressing a specific button (often 'DOWN' or 'MODE'). If not, this setting is usually part of the time setting sequence.
6. Operating the Clock
6.1 Reading Analog Time
The large, clear analog dial displays the current time with hour, minute, and second hands. The time is automatically kept accurate by the MSF radio signal.
6.2 Understanding the LCD Display
The LCD display provides the following information:
- Date: Displays the current day of the month.
- Month: Displays the current month.
- Day of the Week: Displays the current day (e.g., MON, TUE).
- Temperature: Shows the ambient temperature in your chosen unit (°C or °F).
7. Maintenance
7.1 Cleaning
To clean your clock, gently wipe the surface with a soft, dry cloth. Do not use abrasive cleaners, solvents, or chemical sprays, as these can damage the clock's finish or internal components.
7.2 Battery Replacement
When the analog clock hands stop moving or the LCD display becomes dim or blank, it is time to replace the batteries. Follow the battery installation steps in Section 5.1. It is recommended to replace both AA batteries simultaneously for optimal performance.
8. Troubleshooting
- Analog clock not setting or incorrect time:
- Ensure batteries are fresh and correctly inserted.
- Relocate the clock to an area with better MSF signal reception (e.g., near a window, away from electronics).
- Allow up to 24 hours for the clock to receive the signal, especially in areas with weaker reception.
- Manually reset the clock by removing batteries for a few minutes and reinserting them.
- LCD display is blank or incorrect:
- Check the battery for the LCD display; replace if necessary.
- Ensure the LCD display's time and date have been set manually as described in Section 5.3.
- Temperature reading is inaccurate:
- Ensure the clock is not placed near heat sources or in direct sunlight, which can affect the sensor.
- Clock making unusual noise:
- The clock movement is designed to be silent. If you hear unusual noise, check for any obstructions to the hands or contact customer support.
9. Specifications
| Model Number: | WLD1RC |
| Dimensions (L x W x H): | 25 x 3.81 x 25 cm (approximately 10 x 1.5 x 10 inches) |
| Weight: | 499.99 grams (approximately 1.1 pounds) |
| Power Source: | 2 x AA Alkaline Batteries (not included) |
| Display Type: | Analog with Digital LCD |
| Special Feature: | MSF Radio-Controlled Time (Analog), Independent LCD Display |
| Color: | White |
10. Warranty and Support
This Champion clock comes with a full 1-year warranty from the date of purchase, covering manufacturing defects. Please retain your proof of purchase for warranty claims.
For technical support, troubleshooting assistance, or warranty inquiries, please contact Champion customer service through the retailer where the product was purchased or visit the official Champion website for contact information.