Thermaltake CA-1B8-00S1WN-00
Thermaltake Core V1 SPCC Mini ITX Cube Gaming Computer Case Chassis User Manual
Model: CA-1B8-00S1WN-00 | Brand: Thermaltake
Introduction
The Thermaltake Core V1 Extreme Mini ITX Cube Chassis is designed for ease of installation and maximum cooling performance. It offers versatile configurations for both air and liquid cooling setups, catering to modern cooling demands. This chassis features a tool-free drive bay design, optimized airflow, and modular options, allowing users to customize their build efficiently.
Key Features:
- Supports Mini ITX Motherboard.
- Front I/O Ports: 2x USB 3.0, 1x Headphone, 1x Mic.
- Internal Drive Bays: 2x 3.5 inches, 2x 2.5 inches.
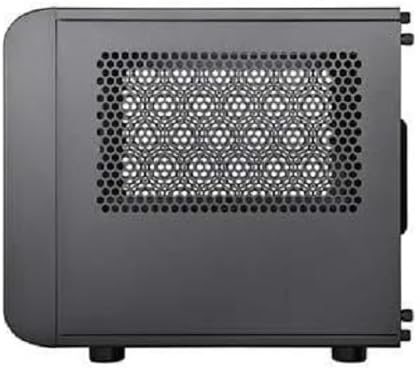
- Interchangeable Side Panels: Symmetrical panels for personalized system building.
- Adjustable I/O Panel Location.
- Extreme Air/Liquid Cooling Configurations Options and Dual Modular Drive Rack Design.
- Chambers concept for advanced ventilation.
- Great Expansion in Compact Size: Accommodates up to 4 data storage devices, dual expansion slot VGA (up to 260mm length, 40.5mm width), tower CPU cooler (up to 140mm height), and high wattage PSU (up to 180mm length).
- Includes 1x 200mm Front Fan Pre-installed.
Setup
This section provides instructions for setting up your Thermaltake Core V1 chassis, including component installation and panel configuration.
1. Chassis Overview and Panel Removal
The Core V1 features a cube design with interchangeable panels, allowing for flexible system orientation and easy access to internal components. The top, bottom, and side panels are removable.


2. Motherboard and Component Installation
The Core V1 supports Mini ITX motherboards (6.7" x 6.7"). Install your motherboard and other components such as CPU, RAM, and CPU cooler before installing the graphics card and storage drives.

3. Storage Drive Installation
The chassis provides bays for 2x 3.5" and 2x 2.5" drives. The modular drive racks allow for flexible placement.


4. Power Supply Unit (PSU) Installation
The Core V1 supports standard PS2 power supplies. The PSU is typically mounted at the rear of the chassis.

5. Cooling System Installation
The chassis supports various air and liquid cooling configurations. A 200mm front fan is pre-installed for optimal intake.


Operating
Once all components are installed and connected, ensure all panels are securely reattached. Connect your peripherals and power cable, then power on the system using the front panel power button.
The large 200mm front fan provides substantial airflow for cooling. Additional fans can be installed at the rear for exhaust, or liquid cooling radiators can be mounted at the front for enhanced thermal performance.


Maintenance
Regular maintenance helps ensure optimal performance and longevity of your computer components. The Core V1 chassis is designed for easy access to internal parts.
Dust Filter Cleaning:
The chassis includes removable dust filters to prevent dust buildup inside. Periodically remove and clean these filters to maintain good airflow and cooling efficiency.

General Cleaning:
- Use a soft, dry cloth to wipe down the exterior of the chassis.
- For internal cleaning, use compressed air to remove dust from fans, heatsinks, and other components. Ensure the system is powered off and unplugged before cleaning.
Troubleshooting
If you encounter issues with your Thermaltake Core V1 chassis or the system built within it, consider the following common troubleshooting steps:
- System Not Powering On:
- Ensure the power supply is properly connected to the wall outlet and the motherboard.
- Verify that the front panel power switch cable is correctly connected to the motherboard's header.
- Check if the power supply unit (PSU) switch is in the 'ON' position.
- Overheating Issues:
- Confirm all fans are spinning correctly.
- Clean any dust buildup from fans and dust filters.
- Ensure proper airflow by checking cable management and component placement.
- Verify that the CPU cooler is securely mounted and thermal paste is applied correctly.
- USB Ports Not Functioning:
- Check if the USB 3.0 header cable from the front panel is securely connected to the motherboard.
- Audio Jacks Not Functioning:
- Ensure the HD Audio cable from the front panel is correctly connected to the motherboard's audio header.
For further assistance, please visit the official Thermaltake support website or consult the detailed user manual PDF available online.
Specifications
Below are the detailed specifications for the Thermaltake Core V1 SPCC Mini ITX Cube Gaming Computer Case Chassis.


| Feature | Detail |
|---|---|
| Case Type | Mini Case |
| Dimensions (H x W x D) | 276 x 260 x 316 mm (10.9 x 10.2 x 12.4 inches) |
| Side Panel | Transparent Window (Interchangeable) |
| Color | Exterior & Interior : Black |
| Material | SPCC (Steel Plate Cold Rolled) |
| Cooling System (Front Intake) | 1 x 200 x 200 x 30 mm fan (800rpm, 13dBA) |
| Drive Bays (Hidden) | 2 x 3.5", 2 x 2.5" |
| Expansion Slots | 2 |
| Motherboards | 6.7" x 6.7" (Mini ITX) |
| I/O Port | USB 3.0 x 2, HD Audio x 1 |
| PSU | Standard PS2 PSU (optional) |
| CPU Cooler Height Limitation | 140mm |
| VGA Length Limitation | 255mm (Inner chassis), 285mm (Outer chassis) |
| PSU Length Limitation | 200mm |
Warranty and Support
Thermaltake products are designed and manufactured to the highest quality standards. For detailed warranty information, please refer to the warranty card included with your product or visit the official Thermaltake website.
For technical support, FAQs, and additional resources, please visit the Thermaltake support page:
You can also find the official User Guide and User Manual in PDF format: