Introduction
The Movo VXR500 is a professional-grade stereo condenser microphone designed for recording high-quality audio directly to DSLR cameras, camcorders, and audio recorders. Its robust metal construction and advanced features make it suitable for various video production environments. This manual provides comprehensive instructions for the proper setup, operation, and maintenance of your VXR500 microphone.
Setup
1. Battery Installation
The VXR500 microphone requires one 9V battery for operation (not included). To install the battery:
- Locate the battery compartment on the underside of the microphone body.
- Carefully slide the battery cover away from the microphone body until it opens. Note that the cover may require some finesse to open.
- Insert a fresh 9V battery, ensuring correct polarity.
- Close the battery cover by sliding it back into place until it clicks securely.

Image: The Movo VXR500 microphone with its battery compartment open, showing where to insert the 9V battery.
2. Mounting the Microphone
The VXR500 can be mounted on a camera's hot shoe or any 1/4-inch thread mount.
- Attach the microphone's integrated shock mount to your camera's hot shoe by sliding it in and tightening the fastening wheel. Ensure it is secure to prevent wobbling.
- Alternatively, the shock mount features a 1/4-inch thread for mounting on tripods, light stands, or other compatible accessories.
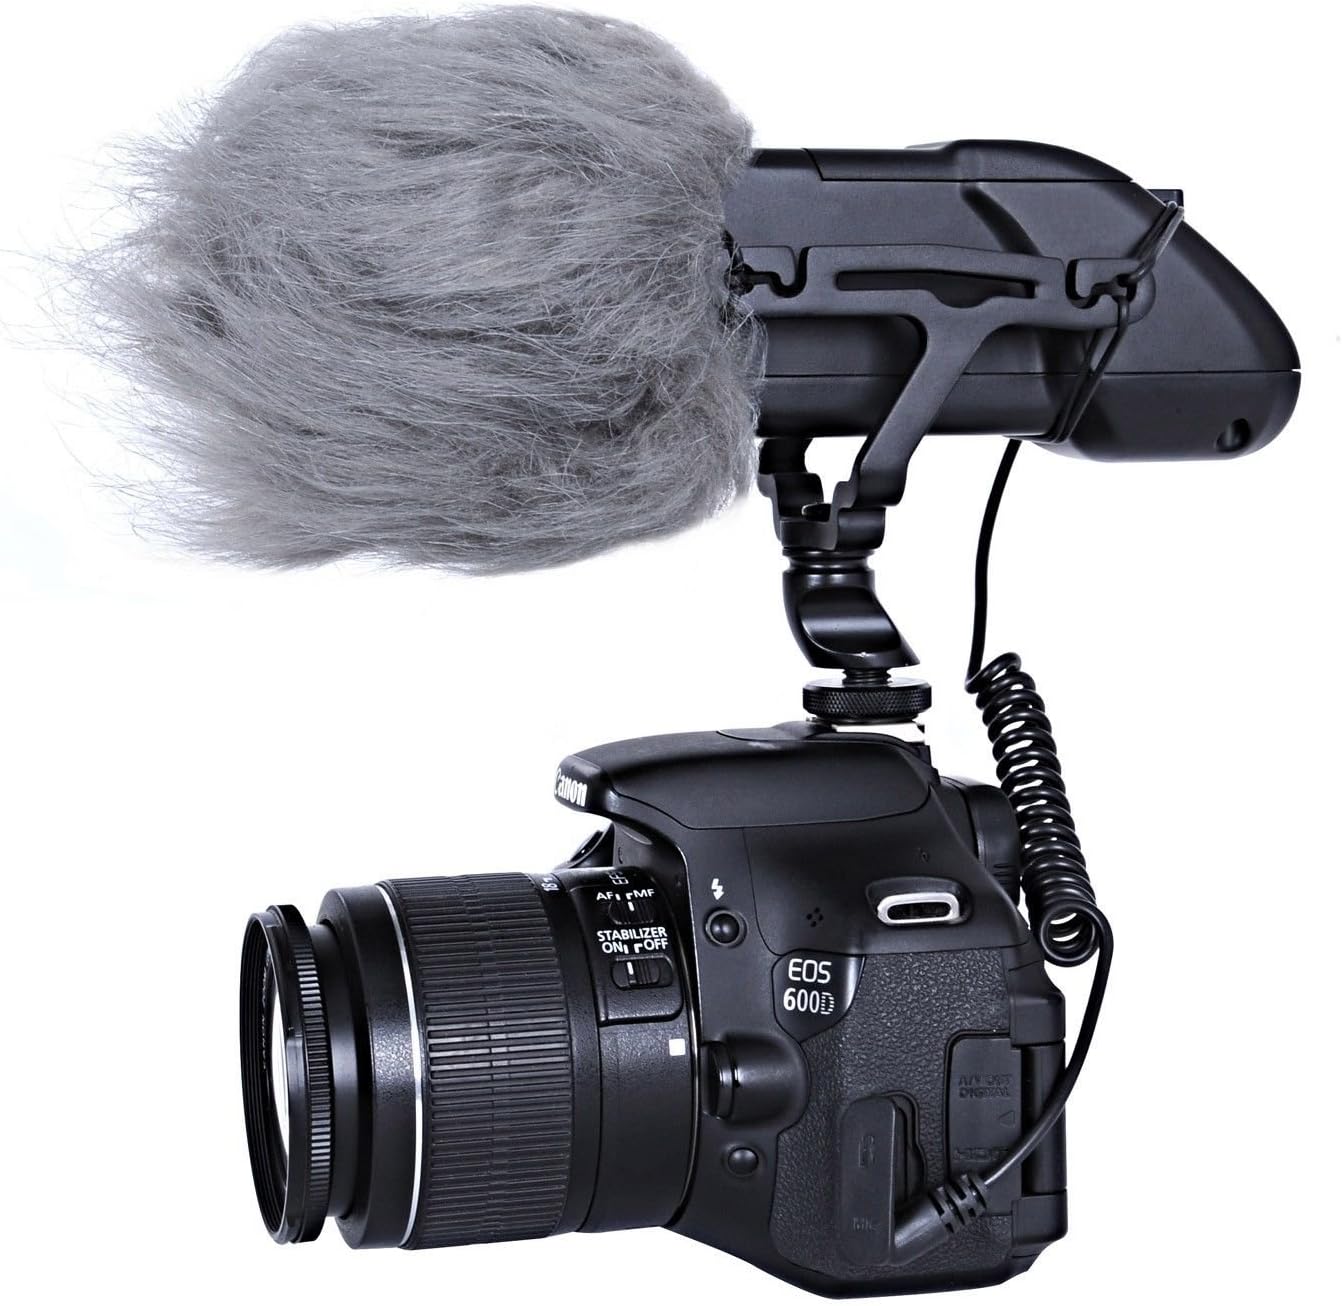
Image: The Movo VXR500 microphone securely mounted on a Canon DSLR camera, demonstrating typical camera attachment.
3. Connecting to Your Device
Connect the microphone to your recording device using the integrated 3.5mm coiled cable.
- Plug the 3.5mm TRS connector from the microphone's coiled cable into the microphone input jack on your DSLR camera, camcorder, or audio recorder.
- Ensure the connection is firm to avoid audio interruptions.

Image: The Movo VXR500 microphone showing its coiled 3.5mm cable, ready for connection to a recording device.
Operating Instructions
1. Powering On/Off
After battery installation, locate the power switch on the rear of the microphone. Slide the switch to the "ON" position to power on the microphone. A visible light indicator will illuminate to confirm the microphone is active. Slide the switch to "OFF" when not in use to conserve battery life.
2. High-Pass Filter (HPF)
The VXR500 features a selectable high-pass filter at 80Hz (12 dB/octave). This filter helps to reduce low-frequency noise such as air conditioners, traffic, or wind rumble, which can interfere with your audio recording. To activate the high-pass filter, slide the HPF switch to the "80Hz" position. For full frequency response, set the switch to the "FLAT" position.
3. Gain Control
Adjust the microphone's output gain using the switches on the rear panel. You can select between -10dB, 0dB, and +10dB settings. Adjusting the gain allows you to optimize the audio signal level for your recording device, preventing distortion or ensuring a strong enough signal.

Image: A detailed view of the rear panel of the Movo VXR500 microphone, highlighting the power switch, high-pass filter (HPF) switch, and gain control switches.
Maintenance
1. Cleaning
To maintain the microphone's performance and appearance, wipe the body with a soft, dry cloth. Avoid using harsh chemicals or abrasive cleaners. Keep the microphone grille free from dust and debris.
2. Battery Care
Remove the 9V battery if the microphone will not be used for an extended period to prevent battery leakage and potential damage to the device.
3. Wind Protection
For outdoor recording or in windy conditions, use the included outdoor wind muff (dead cat) to minimize wind noise. This accessory slides over the microphone's grille.

Image: The Movo VXR500 microphone with the included dead cat wind muff installed, demonstrating its use for wind noise reduction.
Troubleshooting
- No Audio or Low Audio Level:
- Ensure the 9V battery is correctly installed and has sufficient charge.
- Verify the microphone is powered on (check the indicator light).
- Confirm the 3.5mm cable is securely connected to both the microphone and the recording device's microphone input.
- Check the gain settings on the microphone and the input level settings on your camera/recorder. Adjust as necessary.
- If your camera's preamps are weak, consider using an external audio recorder or preamp.
- Excessive Noise or Hiss:
- Activate the high-pass filter (HPF) to reduce low-frequency ambient noise.
- Ensure the microphone is not picking up excessive handling noise; the shock mount is designed to mitigate this.
- If recording outdoors, use the included wind muff.
- Check for electromagnetic interference from other electronic devices.
- Wobbly Mount:
- Ensure the fastening wheel on the hot shoe mount is tightened completely.
- Periodically check the rubber bands on the shock mount for wear and tear; replace if necessary.
Specifications
| Feature | Detail |
|---|---|
| Acoustic Principle | Pressure Gradient |
| Directional Pattern | Super Cardioid |
| Frequency Response | 38Hz-20kHz with Selectable high-pass filter @ 80Hz 12 dB/octave |
| Output Impedance | 2200 Ohms |
| Sensitivity | -38dB +/- 2dB @ 1kHz |
| Equivalent Noise | 20dB SPL |
| Dynamic Range | 115dB SPL |
| Maximum SPL | 135dB SPL |
| Signal to Noise Ratio | 75 dB |
| Power Requirements | 9V Battery |
| Weight | 470g |
| Material | Metal, Zinc |
| Connectivity Technology | Wired (3.5mm TRS) |
| Connector Type | 3.5mm TRS Jack |
| Compatible Devices | DSLR Cameras, Camcorders, Audio Recorders |
Warranty Information
The Movo VXR500 microphone comes with a 1-Year Warranty. This warranty covers manufacturing defects and ensures the product performs as intended under normal use. Please retain your proof of purchase for warranty claims.
Customer Support
For any questions, technical assistance, or warranty inquiries regarding your Movo VXR500 microphone, please contact Movo's friendly US-Based customer support team. Contact information can typically be found on the official Movo website or through your purchase platform.