Introduction
This manual provides essential instructions for the proper installation, operation, and maintenance of your Honda 17511-ZL8-000 fuel tank. This genuine Honda replacement part is designed for use with GC160, GC190, and GS190 series engines. Please read this manual thoroughly before attempting any installation or maintenance to ensure safe and effective use.
Safety Information
WARNING: Gasoline is highly flammable and explosive. Handle with extreme care.
- Always work in a well-ventilated area.
- Keep fuel away from sparks, open flames, pilot lights, heat, and other ignition sources.
- Do not smoke while handling fuel.
- Wear appropriate personal protective equipment, including gloves and eye protection.
- Ensure the engine is cool before refueling or performing any maintenance on the fuel system.
- Wipe up any spilled fuel immediately.
- Store fuel in approved containers only.
Product Overview
The Honda 17511-ZL8-000 fuel tank is a direct replacement part for specific Honda GC and GS series engines. It is designed to securely hold gasoline and provide a reliable fuel supply to the engine. The tank typically includes a fuel cap and may have provisions for a fuel filter and fuel lines, which are often sold separately or are part of the engine assembly.
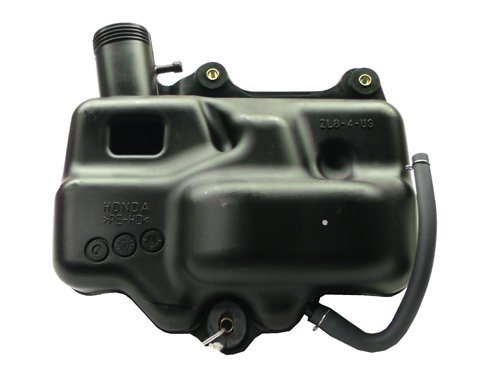
Image 1: Honda 17511-ZL8-000 Fuel Tank. This image displays the complete fuel tank assembly, including the main body and the fuel cap. It is a genuine replacement part for compatible Honda engines.
Setup and Installation
Tools Required:
- Socket wrench set
- Screwdriver set
- Pliers
- Clean rags
- Drain pan for fuel (if removing an old tank)
Pre-Installation Checks:
- Ensure the engine is turned off and completely cool.
- Disconnect the spark plug cap to prevent accidental starting.
- If replacing an old tank, ensure all fuel is drained into an approved container.
- Inspect the new fuel tank for any signs of damage or manufacturing defects.
Installation Steps:
- Remove Old Fuel Tank (if applicable): Carefully disconnect the fuel line(s) from the old tank and engine. Remove any mounting bolts or straps securing the old tank. Lift the old tank away from the engine.
- Position New Fuel Tank: Place the new Honda 17511-ZL8-000 fuel tank onto the engine's mounting points. Ensure it sits flush and correctly aligned.
- Secure Fuel Tank: Install and tighten all mounting bolts or secure straps according to the engine's service manual specifications. Do not overtighten.
- Connect Fuel Lines: Reconnect the fuel line(s) to the new fuel tank and the engine. Ensure all connections are secure and free of leaks. Use new fuel line clamps if the old ones are damaged or worn.
- Install Fuel Cap: Ensure the fuel cap is properly seated and tightened.
- Final Inspection: Double-check all connections and mounting points. Look for any potential obstructions or loose components.
Operating Instructions
Fueling the Tank:
- Ensure the engine is off and cool.
- Move the equipment to a well-ventilated outdoor area.
- Slowly remove the fuel cap.
- Fill the tank with fresh, unleaded gasoline (86 octane or higher) up to the recommended level, typically indicated by a fill line or just below the filler neck to allow for expansion. Do not overfill.
- Securely replace the fuel cap.
- Wipe up any spilled fuel immediately with a clean rag.
Refer to your engine's specific owner's manual for detailed fuel type recommendations and additional operating procedures.
Maintenance
Regular Inspection:
- Periodically inspect the fuel tank for cracks, leaks, or damage.
- Check the fuel cap for a tight seal and ensure the gasket is intact.
- Inspect fuel lines for cracks, hardening, or deterioration. Replace if necessary.
- Ensure all mounting hardware remains secure.
Cleaning:
Clean the exterior of the fuel tank with a damp cloth. Avoid using harsh chemicals that could damage the plastic or paint. Do not attempt to clean the interior of the tank unless specifically instructed by a qualified technician, as this can introduce contaminants.
Fuel Storage:
If the equipment will be stored for an extended period (over 30 days), it is recommended to drain the fuel tank completely or use a fuel stabilizer to prevent fuel degradation and potential engine issues. Consult your engine's owner's manual for specific storage recommendations.
Troubleshooting
This section addresses common issues related to the fuel tank. For engine-specific troubleshooting, refer to your engine's owner's manual.
| Problem | Possible Cause | Solution |
|---|---|---|
| Fuel Leak | Loose fuel cap, damaged fuel line, cracked tank, loose mounting bolts. | Tighten fuel cap. Inspect and replace damaged fuel lines. Check tank for cracks; replace if cracked. Tighten mounting bolts. |
| Engine not getting fuel (despite tank being full) | Clogged fuel filter (if equipped), kinked fuel line, faulty fuel cap vent. | Inspect and clean/replace fuel filter. Check fuel lines for kinks. Ensure fuel cap vent is clear. |
| Fuel cap difficult to remove/install | Cross-threaded, damaged cap or filler neck, dirt/debris. | Clean threads. Inspect cap and filler neck for damage; replace if necessary. |
Specifications
- Part Number: 17511-ZL8-000
- Brand: Honda
- Compatible Engines: Honda GC160, GC190, GS190 series
- Fuel Type: Gasoline
- Item Weight: Approximately 12.16 ounces (0.34 kg)
- Fit Type: Vehicle Specific (Outdoor Power Equipment)
Warranty and Support
For warranty information or technical support regarding your Honda 17511-ZL8-000 fuel tank, please refer to the documentation provided with your engine or contact an authorized Honda service dealer. Genuine Honda parts are typically covered by a limited warranty against defects in material and workmanship.
You can find more information and locate authorized dealers on the official Honda Power Equipment website.