Introduction
This manual provides essential instructions for the safe and effective assembly, operation, and maintenance of your KATSU Tools Angle Grinder Clamp Stand. This stand is designed to convert 100-125mm angle grinders into a stationary cutting tool, enhancing precision and safety for various cutting tasks on wood and steel.

Image: The KATSU Tools Angle Grinder Clamp Stand, shown with included cutting discs for wood and steel.
Safety Information
WARNING: Always prioritize safety when operating power tools. Failure to follow these instructions may result in serious injury or property damage.
- Personal Protective Equipment: Always wear safety glasses, ear protection, and gloves when using the angle grinder and stand. Depending on the material being cut, a dust mask may also be required.
- Read All Instructions: Before use, carefully read and understand all instructions provided with both the angle grinder and this clamp stand.
- Secure Workpiece: Ensure the workpiece is securely clamped before beginning any cutting operation.
- Stable Surface: Always operate the stand on a stable, level, and clean surface.
- Angle Grinder Not Included: The angle grinder itself is not supplied with this stand. Images showing an angle grinder are for illustration purposes only.
Package Contents
Verify that all components are present before assembly:
- Angle Grinder Clamp Stand Base (Cast Iron)
- Stand Arm Assembly
- Adjustable Clamp/Vise
- Handle
- Protective Guard (Plastic and Metal)
- Assembly Hardware (Bolts, Nuts, Washers, Spring)
- Cutting Discs (1 for wood, 10 for steel) - Note: Quantity may vary based on specific product bundle.
Setup and Assembly
Follow these steps to assemble your angle grinder clamp stand. Refer to the assembly diagram for visual guidance.

Image: Step-by-step assembly diagram for the KATSU Tools Angle Grinder Clamp Stand.
- Attach the Stand Arm to the Base: Secure the main stand arm assembly to the heavy cast iron base using the provided bolts and nuts. Ensure all connections are tight.
- Install the Handle: Fasten the auxiliary handle to the designated mounting point on the stand arm.
- Mount the Angle Grinder: Carefully position your 100-125mm angle grinder into the stand's mounting brackets. Use the appropriate bolts and clamps to secure the grinder firmly. Ensure the grinder's power cord is routed safely and does not interfere with operation.
- Attach Protective Guards: Install the plastic and metal protective guards to control sparks and debris during operation. Ensure they are correctly aligned and securely fastened.
- Connect the Spring Mechanism: Attach the return spring to the stand arm and base as shown in the diagram. This spring assists in returning the grinder to its upright position after a cut.
- Assemble the Adjustable Clamp: Mount the adjustable workpiece clamp/vise to the base. This clamp will hold your material securely during cutting.
- Adjust the Clamp: The clamp can be adjusted for different workpiece sizes and angles. Ensure it moves freely and can be tightened securely.

Image: Detailed view of the spring mechanism, which aids in the return of the grinder arm.
Operating Instructions
Once assembled, follow these steps for safe and effective operation:
- Secure the Workpiece: Place the material to be cut into the adjustable clamp. Tighten the clamp firmly to prevent movement during cutting.
- Adjust Cutting Angle (if applicable): If your stand allows for angle adjustments, set the desired cutting angle.
- Power On the Grinder: With the workpiece secured and all safety precautions in place, turn on your angle grinder. Allow it to reach full speed before making contact with the material.
- Perform the Cut: Slowly and steadily lower the angle grinder arm to make the cut. Apply consistent, moderate pressure. Do not force the cut.
- Retract and Power Off: Once the cut is complete, slowly raise the grinder arm. Turn off the angle grinder and wait for the disc to stop rotating completely before handling the workpiece or making any adjustments.
- Clear Debris: Regularly clear away cutting debris to maintain a clean and safe workspace.
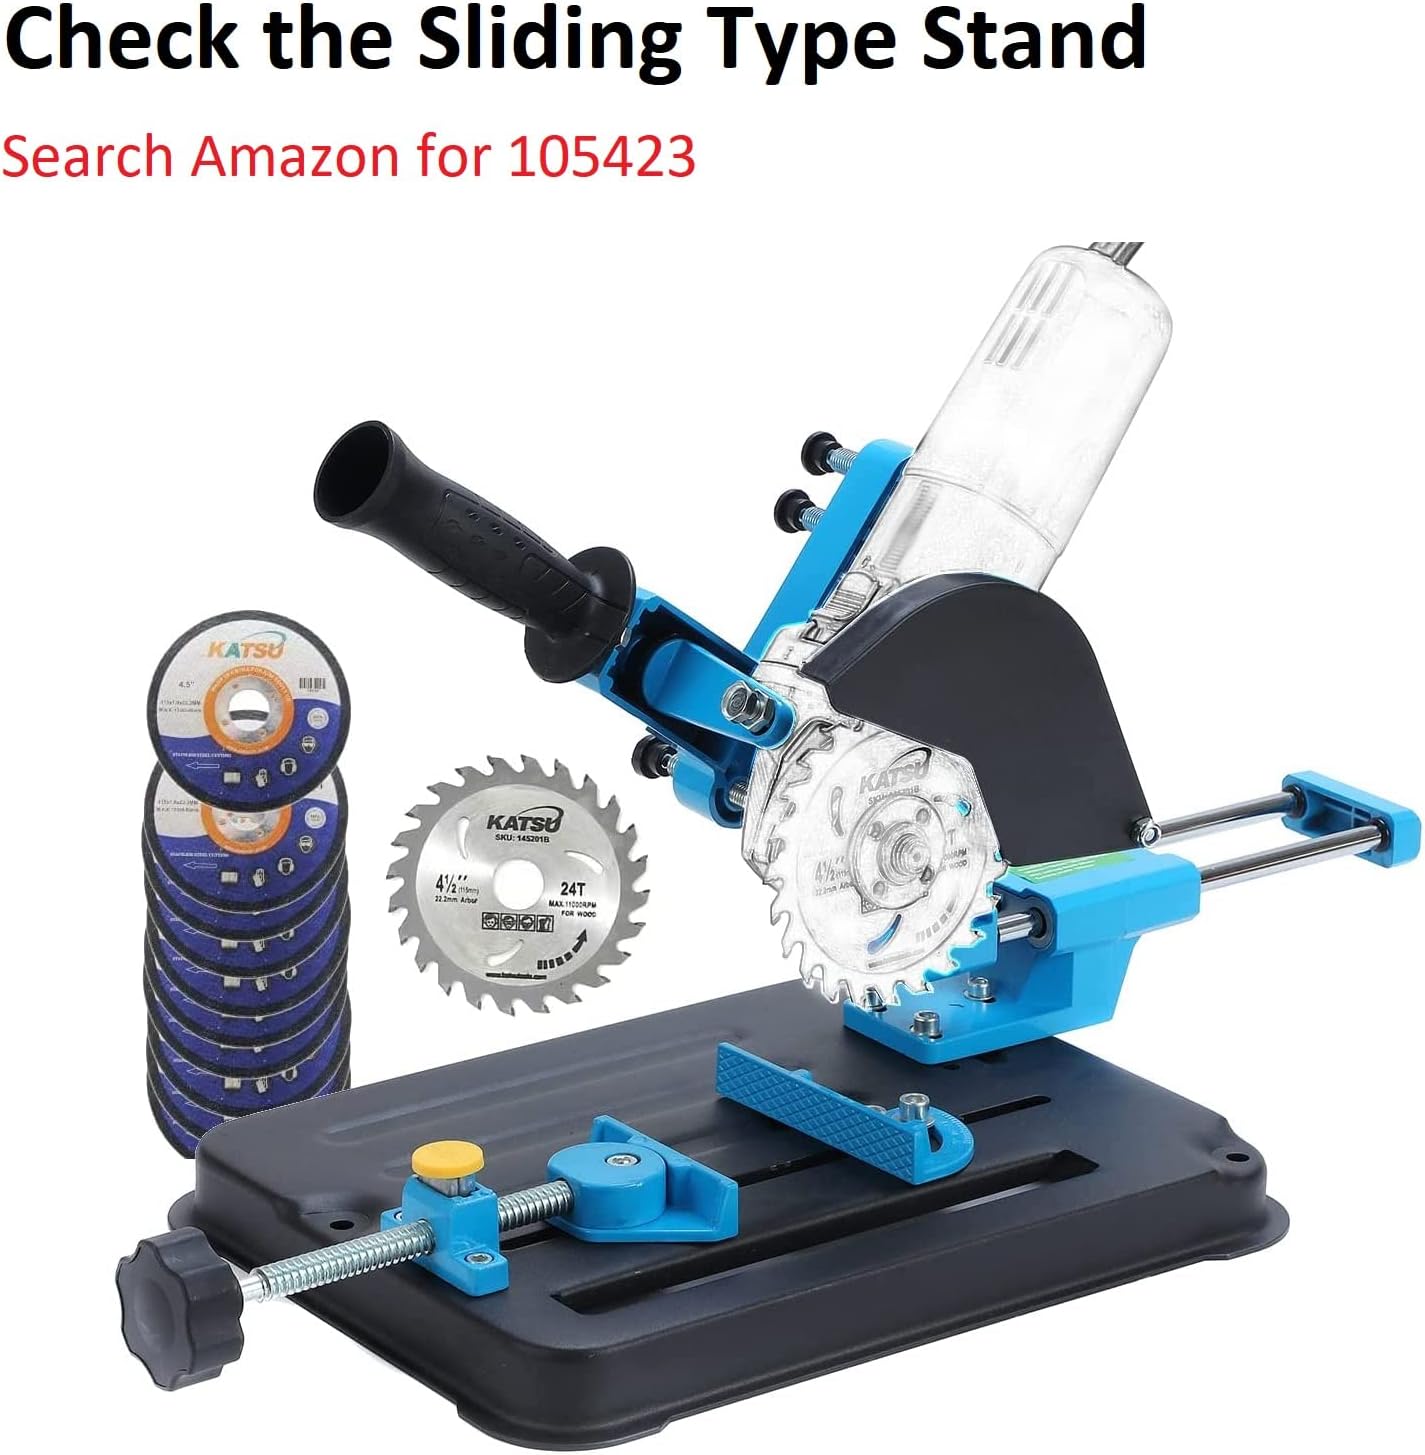
Image: An angle grinder securely mounted on the stand, demonstrating a typical operational setup.
Maintenance
Regular maintenance ensures the longevity and safe operation of your stand:
- Cleaning: After each use, clean the stand to remove dust, metal shavings, and other debris. Use a brush or compressed air.
- Inspection: Periodically inspect all bolts, nuts, and moving parts for tightness and wear. Tighten any loose fasteners.
- Lubrication: Apply a light lubricant to moving parts, such as the clamp screw and pivot points, to ensure smooth operation.
- Storage: Store the stand in a clean, dry place away from moisture and extreme temperatures.
Troubleshooting
| Problem | Possible Cause | Solution |
|---|---|---|
| Unstable cutting | Workpiece not securely clamped; stand not on a stable surface; loose fasteners. | Ensure workpiece is tightly clamped. Place stand on a firm, level surface. Check and tighten all assembly bolts. |
| Grinder arm does not return smoothly | Spring incorrectly installed or damaged; pivot points require lubrication. | Verify spring installation. Lubricate pivot points with a suitable lubricant. Replace spring if damaged. |
| Excessive sparks or debris | Protective guards improperly installed or damaged. | Ensure protective guards are correctly positioned and securely fastened. Replace damaged guards. |
Specifications
| Brand | KATSU Tools |
| Model Number | 5766513 |
| Compatible Angle Grinder Sizes | 100mm to 125mm (4" to 5") |
| Material | Alloy Steel, Cast Iron, Metal, Plastic |
| Product Dimensions (L x W x H) | 24 x 19 x 27 cm (approximately 9.4 x 7.5 x 10.6 inches) |
| Item Weight | 3.47 kg (approximately 7.65 lbs) |
| Power Source | Corded Electric (for the angle grinder, stand is manual) |
| Manufacturer | Merry Tools |
| UPC | 519204463059 |

Image: Diagram illustrating the key dimensions of the KATSU Tools Angle Grinder Clamp Stand.
Warranty and Support
Specific warranty information for this product is not provided in the available data. For warranty claims, technical support, or replacement parts, please contact the retailer or manufacturer directly. Keep your purchase receipt as proof of purchase.
Manufacturer: Merry Tools
Brand: KATSU Tools