
1. Introduction
The Rockwell BladeRunner X2 Portable Tabletop Saw is designed for versatility and ease of transport. This compact tool allows for various cutting operations on different materials, providing a convenient solution for both workshop and job site tasks. Its lightweight design and integrated features aim to enhance user control and cutting accuracy.
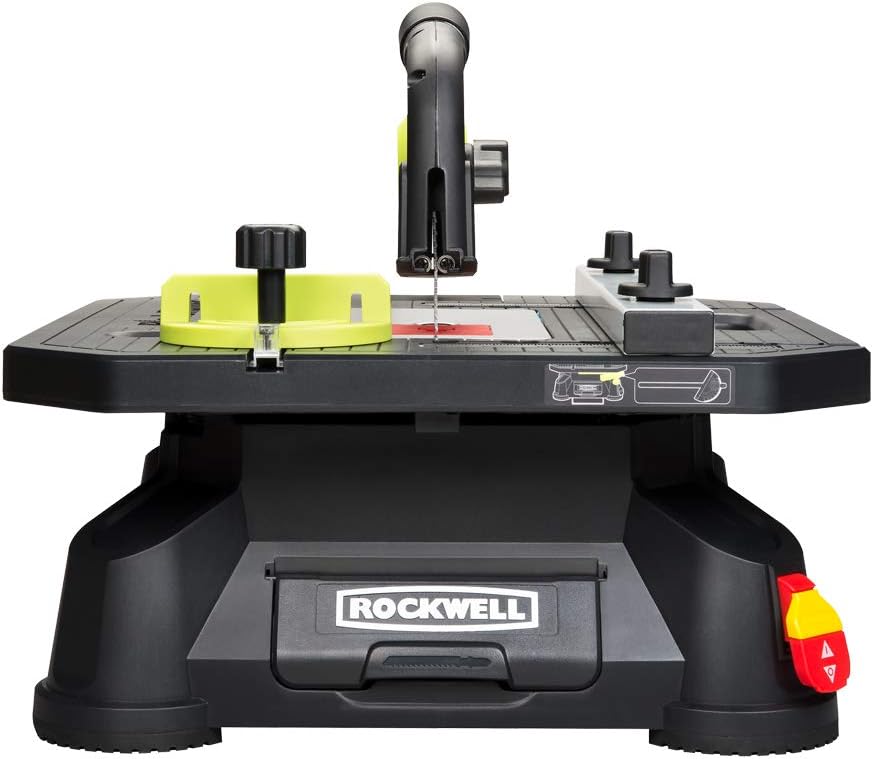
Figure 1: Rockwell BladeRunner X2 Portable Tabletop Saw, front view.
2. Safety Information
Always read and understand all safety warnings and instructions before operating this tool. Failure to follow the warnings and instructions may result in electric shock, fire, and/or serious injury.
- Wear appropriate personal protective equipment, including eye protection, hearing protection, and gloves.
- Ensure the work area is clean and well-lit. Cluttered or dark areas invite accidents.
- Do not operate power tools in explosive atmospheres, such as in the presence of flammable liquids, gases, or dust.
- Keep children and bystanders away while operating a power tool. Distractions can cause you to lose control.
- Always use the safety switch to prevent accidental starting. The removable key can be stored separately when not in use.

Figure 2: Close-up of the safety switch with a removable key, designed to prevent unintended operation.
Proposition 65 Warning:
This product may contain chemicals known to the State of California to cause cancer and birth defects or other reproductive harm. Always ensure proper ventilation and use appropriate safety measures when operating.
3. Components and Accessories
The Rockwell BladeRunner X2 comes with several accessories to facilitate various cutting tasks:
- Miter Gauge: For precise angled cuts from 0-60 degrees.
- Rip Fence: Provides stability and accuracy for straight rip cuts.
- Assorted Blades: Includes 5 standard 4-inch T-shank blades suitable for cutting wood, ceramic tile, plastic, aluminum, and metal.
- Push Stick: For safely guiding workpieces through the blade.
- Vacuum Port: Allows connection to a shop vacuum for dust collection.

Figure 3: Overview of the Rockwell BladeRunner X2 and its included accessories: miter gauge, rip fence, and five assorted blades.
4. Setup
- Unpacking: Carefully remove all components from the packaging. Verify that all listed accessories are present.
- Placement: Place the saw on a stable, level surface. The compact design allows for use on various workbenches or job sites.
- Blade Installation: The BladeRunner X2 features a tool-less blade change system. To install a blade, lift the blade cover, press the blade release button, insert the T-shank blade into the slot, and release the button to secure. Ensure the blade is fully seated.
- Accessory Storage: The miter gauge, rip fence, and extra blades can be conveniently stored in the base of the saw when not in use.
5. Operating Instructions
The BladeRunner X2 supports various cutting operations:
- Rip Cuts: Use the steel rip fence to guide the material for straight cuts along its length.
- Cross Cuts: Utilize the miter gauge to make accurate cuts across the width of the material.
- Miter Cuts: The adjustable miter gauge allows for precise angled cuts from 0 to 60 degrees.
- Scroll Cuts: The design of the saw enables intricate scroll cuts, similar to a scroll saw.

Figure 4: Demonstrating a rip cut using the steel rip fence to guide the workpiece.

Figure 5: The adjustable miter gauge set for angled cuts on ceramic tile.

Figure 6: The saw performing an intricate scroll cut on a wooden workpiece.
Material Compatibility: The BladeRunner X2 can cut various materials, including wood (up to 1-1/2 inches), ceramic tile (3/8 inch), PVC pipe (1-1/4 inches), aluminum (3/8 inch), and steel (1/8 inch). Always select the appropriate blade for the material being cut.

Figure 7: The BladeRunner X2 cutting ceramic tile, showcasing its versatility.
Official Product Overview
6. Maintenance
- Cleaning: Regularly clean the saw to remove sawdust and debris. Use a soft cloth and avoid harsh chemicals.
- Dust Collection: Connect a shop vacuum to the integrated vacuum port to minimize dust accumulation during operation.
- Blade Care: Inspect blades before each use for damage or dullness. Replace worn blades promptly to ensure optimal cutting performance and safety.
7. Troubleshooting
- Saw not starting: Check if the power cord is securely plugged in and if the safety switch key is fully inserted.
- Inaccurate cuts: Ensure the rip fence or miter gauge is securely clamped and properly aligned. Verify the blade is sharp and correctly installed.
- Excessive vibration: Check that the workpiece is properly supported and guided. Ensure the saw is placed on a stable surface.
8. Specifications
| Specification | Value |
|---|---|
| Brand | Rockwell |
| Model Number | RK7323 |
| Power Source | Corded Electric |
| Voltage | 120 Volts |
| Wattage | 660 watts |
| Speed | 3000 RPM |
| Item Weight | 17 Pounds |
| Product Dimensions | 17.5"L x 16.1"W x 8.3"H |
| Blade Length | 4 Inches |
| Surface Recommendation | Ceramic, Metal, Plastic, Wood |
9. Warranty and Support
The Rockwell RK7323 BladeRunner X2 is backed by a 3-year Limited Consumer Warranty. For warranty claims, technical support, or service inquiries, please refer to the contact information provided in your product packaging or visit the official Rockwell website.

