1. Introduction
Welcome to the user manual for your Milwaukee 48-89-9224 Step Bit 6-Piece Set. This manual provides essential information for the safe and effective use, maintenance, and care of your new step bit set. Please read this manual thoroughly before using the product to ensure optimal performance and longevity.
2. Product Overview
The Milwaukee 48-89-9224 Step Bit 6-Piece Set is designed for precision drilling across various materials. This durable set includes six essential step bits (#1, #4, #6, #7, #8, #9) crafted from high-quality alloy steel with a black oxide finish, ensuring long-lasting performance and resistance to wear. Each bit is engineered for ease of use and handling, making it a reliable tool for professionals and DIY enthusiasts alike.

Figure 2.1: The Milwaukee 48-89-9224 Step Bit 6-Piece Set displayed in its open, red storage case, showcasing the various bit sizes.

Figure 2.2: The Milwaukee 48-89-9224 Step Bit Set in its closed, compact red storage case, ready for transport or storage.
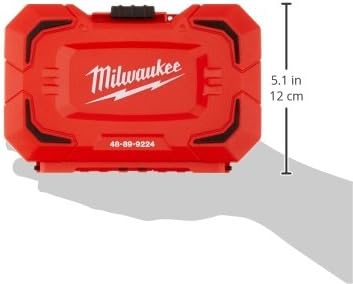
Figure 2.3: The Milwaukee 48-89-9224 Step Bit Set case with approximate dimensions of 5.1 inches (12 cm) indicated, demonstrating its compact size.
3. Setup
Before beginning any drilling operation, ensure your drill is powered off and unplugged (if corded) or has its battery removed (if cordless).
- Select the Correct Bit: Choose the appropriate step bit from the set based on the desired hole diameter. Each step on the bit is clearly marked with its corresponding measurement.
- Insert into Drill Chuck: Insert the straight shank of the selected step bit firmly into the drill's chuck. Ensure the bit is centered and securely tightened to prevent slippage during operation.
- Prepare Workpiece: Secure the material you intend to drill (e.g., aluminum, brass, copper, plastic, steel, wood) to a stable surface using clamps or a vise. This prevents movement and ensures accurate drilling.
- Safety Gear: Always wear appropriate personal protective equipment, including safety glasses, gloves, and hearing protection, before operating any power tools.
4. Operating Instructions
Milwaukee step bits are designed for efficient and clean hole creation. Follow these guidelines for optimal performance:
- Start Slowly: Begin drilling at a slow speed to allow the bit to center itself and create an initial pilot hole.
- Increase Speed Gradually: Once the bit has engaged the material, gradually increase the drill speed. Step bits are effective at higher speeds, but always maintain control.
- Apply Consistent Pressure: Apply steady, consistent pressure to the drill. Avoid excessive force, which can lead to bit damage or reduced cutting efficiency.
- Lubrication (for Metal): When drilling metal, especially thicker gauges, apply cutting fluid or lubricant to the bit and workpiece. This reduces friction, dissipates heat, and extends the life of the bit.
- Monitor Hole Size: As you drill, the bit will progressively enlarge the hole with each step. Stop drilling once the desired hole diameter, indicated by the markings on the bit, is achieved.
- Clear Chips: Periodically withdraw the bit from the hole to clear chips and debris, especially when drilling deep holes or soft materials.
5. Maintenance
Proper maintenance ensures the longevity and performance of your Milwaukee step bits.
- Cleaning: After each use, wipe down the step bits with a clean cloth to remove any dust, debris, or metal shavings. For stubborn residue, a mild solvent can be used, followed by thorough drying.
- Lubrication: Lightly oil the bits after cleaning, especially if they will be stored for an extended period, to prevent rust and corrosion.
- Storage: Always store the step bits in their original red storage case. The case is designed to protect the bits from damage and keep them organized. Ensure the case is securely latched.
- Inspection: Regularly inspect the cutting edges of the bits for signs of wear, dullness, or damage. While these bits are highly durable, extreme use can cause wear.
6. Troubleshooting
If you encounter issues while using your step bit set, consider the following:
- Bit Not Cutting Effectively:
- Ensure the bit is securely fastened in the drill chuck.
- Check if the bit's cutting edges are dull or damaged. If so, consider replacement.
- Verify that the drill speed is appropriate for the material being drilled.
- For metal, ensure adequate lubrication is being used.
- Hole is Not Round or Clean:
- Ensure the workpiece is securely clamped and not moving during drilling.
- Apply consistent, even pressure.
- Reduce drill speed if the material is soft or prone to tearing.
- Excessive Heat Generation:
- This is common when drilling metal. Use cutting fluid or lubricant.
- Reduce drill speed or apply less pressure.
- Allow the bit to cool periodically.
7. Specifications
| Attribute | Detail |
|---|---|
| Model Number | 48-89-9224 |
| Included Bits | #1, #4, #6, #7, #8, #9 |
| Material | Alloy Steel |
| Finish Type | Black Oxide |
| Shank Type | Straight |
| Tool Flute Type | Dual |
| Point Style | Taper Point |
| Number of Flutes | 6 |
| Surface Recommendation | Aluminum, Brass, Copper, Plastic, Steel, Wood |
| Item Dimensions (L x W x H) | 1 x 7 x 10.73 inches |
| Item Weight | 1.6 pounds |
| Manufacturer | Builders World Wholesale Distribution |
| Country of Origin | United States |
8. Warranty and Support
Milwaukee is committed to producing high-quality tools. For detailed warranty information, product registration, or technical support, please visit the official Milwaukee website or contact their customer service directly. Always refer to the official Milwaukee resources for the most current and accurate information regarding your product.