1. Introduction
This manual provides essential instructions for the safe and effective use of your Panasonic HC-MDH2 AVCHD Shoulder Mount Camcorder. Please read this manual thoroughly before operating the device and retain it for future reference. The Panasonic HC-MDH2 is designed for high-quality video recording, featuring a 1/2.33" MOS Full HD Sensor, 20x optical zoom, and advanced image stabilization.

Figure 1.1: Front-left view of the Panasonic HC-MDH2 camcorder, showing the lens, microphone, and main controls.
2. Package Contents
Verify that all items listed below are included in your product package:
- Camcorder body
- Lithium-ion battery
- Shoulder mount
- User manual (this document)
3. Getting Started (Setup)
3.1 Attaching the Shoulder Mount
The shoulder mount provides stability during handheld operation. Align the shoulder mount with the designated attachment points on the camcorder body and secure it firmly. Refer to the diagram below for proper attachment.

Figure 3.1: Rear-right view of the camcorder, illustrating the shoulder pad and battery compartment area.
3.2 Inserting the Battery
- Ensure the camcorder is powered off.
- Locate the battery compartment on the rear of the camcorder.
- Insert the supplied Lithium-ion battery, ensuring it clicks into place securely.
- Close the battery compartment cover.
3.3 Inserting SD Cards
The HC-MDH2 features dual media card slots for SDHC cards. This allows for extended recording times or simultaneous recording for backup purposes.
- Open the SD card slot cover.
- Insert the SDHC card(s) into the designated slot(s) with the label facing the correct direction until it clicks.
- Close the SD card slot cover.
3.4 Initial Power On
After installing the battery and SD card(s), switch the camcorder to the 'ON' position. The camcorder will perform a self-check, and the LCD screen will activate. Follow any on-screen prompts for initial setup, such as setting the date and time.
4. Operating the Camcorder
4.1 Understanding Controls
Familiarize yourself with the various buttons and switches on your camcorder. Key controls include the power switch, record start/stop button, zoom lever, and menu navigation buttons. The illuminated ring indicates the camera's status, such as recording or standby.
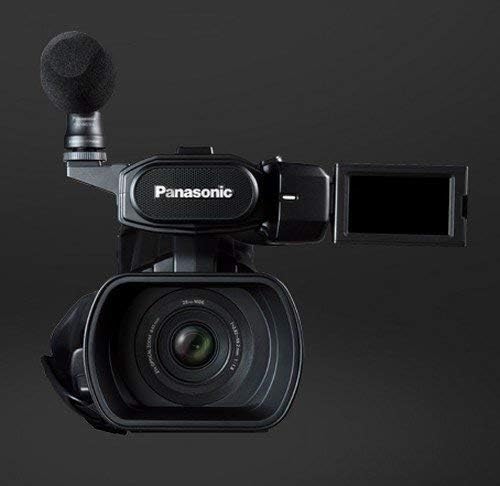
Figure 4.1: Front view of the camcorder with the 3-inch LCD touch panel extended and rotated.
4.2 Recording Video
To begin recording, ensure the camcorder is in recording mode. Press the record start/stop button. The illuminated ring will change color or pattern to indicate active recording. Press the button again to stop recording. The camcorder records in AVCHD format at 1080p resolution.
4.3 Using the LCD Touch Panel
The 3-inch 16:9 LCD touch panel allows for easy navigation of menus, playback of recorded footage, and adjustment of settings. Touch the screen to select options or swipe to navigate. The LCD can be rotated for various viewing angles.
4.4 Zoom and Stabilization Features
Utilize the zoom lever to control the 20x optical zoom and 50x intelligent zoom. The Hybrid O.I.S.+ (Optical Image Stabilization) and Level Shot Function work together to minimize camera shake and maintain a level horizon, even during dynamic shooting.
4.5 Manual Control
For advanced users, the camcorder offers manual control over various lens functions, including focus, iris, and white balance. Access these settings through the menu system via the LCD touch panel or dedicated buttons.
4.6 Transferring Files
Connect the camcorder to a computer using a USB cable to transfer recorded video files. Alternatively, remove the SD card(s) and insert them into a compatible card reader for direct file transfer. The camcorder supports Dolby Digital (AC-3) and LPCM audio formats.
5. Maintenance
5.1 Cleaning
- Camcorder Body: Use a soft, dry cloth to wipe the exterior. For stubborn dirt, slightly dampen the cloth with water and then wipe dry. Avoid using harsh chemicals or solvents.
- Lens: Use a lens brush or a soft, lint-free cloth specifically designed for optical lenses. Breathe lightly on the lens before wiping if necessary.
- LCD Screen: Gently wipe with a soft, dry, lint-free cloth. Do not press hard on the screen.
5.2 Storage
When not in use, store the camcorder in a cool, dry place away from direct sunlight, extreme temperatures, and high humidity. Remove the battery if the camcorder will not be used for an extended period.
6. Troubleshooting
If you encounter issues with your camcorder, refer to the following common troubleshooting steps:
- Camcorder does not power on: Ensure the battery is fully charged and correctly inserted. Check that the power switch is in the 'ON' position.
- Recording issues: Verify that an SD card is inserted and has sufficient free space. Check recording settings in the menu.
- Poor image quality: Ensure the lens is clean. Check lighting conditions and adjust exposure settings if necessary.
- No audio: Confirm that the microphone is properly connected and audio recording is enabled in the settings.
For persistent issues, consult the Panasonic support website or contact customer service.
7. Specifications
| Feature | Specification |
|---|---|
| Model Number | PNC_HC-MDH2 |
| Product Dimensions | 18.86 x 8.19 x 8.5 inches |
| Item Weight | 4.99 pounds |
| Photo Sensor Technology | MOS |
| Video Capture Resolution | 1080p |
| Maximum Focal Length | 59 Millimeters |
| Maximum Aperture | 1.8 f |
| Flash Memory Type | SDHC |
| Video Capture Format | AVCHD |
| Supported Audio Format | Dolby Digital (AC-3), LPCM |
| Screen Size | 3 Inches |
| Connectivity Technology | USB |
| Batteries Required | 1 Lithium Ion battery |
8. Safety Information
- Do not expose the camcorder to rain or moisture to prevent fire or electric shock.
- Avoid disassembling the camcorder. Refer all servicing to qualified service personnel.
- Use only specified batteries and accessories.
- Keep the camcorder away from strong magnetic fields.
- Do not block ventilation openings.
9. Support and Warranty
For technical support, warranty information, or service inquiries, please visit the official Panasonic support website or contact your local Panasonic customer service center. Please have your product model number (HC-MDH2) and purchase details available when contacting support.