1. Safety Instructions
Always observe basic safety precautions when using electrical tools to reduce the risk of fire, electric shock, and personal injury. Read all instructions carefully before operating this drill press.
General Safety
- Work Area Safety: Keep the work area clean and well-lit. Cluttered or dark areas invite accidents. Do not operate power tools in explosive atmospheres, such as in the presence of flammable liquids, gases, or dust.
- Electrical Safety: Avoid body contact with earthed or grounded surfaces. Do not expose power tools to rain or wet conditions. Never abuse the cord; keep it away from heat, oil, sharp edges, or moving parts.
- Personal Safety: Always wear eye protection. Use hearing protection when operating for extended periods. Dress properly; avoid loose clothing, jewelry, or long hair that can get caught in moving parts.
Drill Press Specific Safety
- Secure Workpiece: Always clamp the workpiece securely to the drill press table. Never hold it by hand.
- Correct Speed: Select the appropriate speed for the material and drill bit size. Refer to the speed adjustment section.
- Clearance: Ensure adequate clearance for the drill bit and workpiece.
- Maintenance: Disconnect the power before making any adjustments, changing accessories, or performing maintenance.
2. Product Overview
The KATSU Mini Bench Drill Press is designed for precise drilling in various materials such as wood, metal, and plastics. Familiarize yourself with its components before operation.

Figure 2.1: Complete view of the KATSU Mini Bench Drill Press.
Main Components
- Base: Provides stability for the drill press.
- Column: Supports the drill head and allows for height adjustment.
- Drill Head: Contains the motor, spindle, and chuck.
- Chuck: Holds the drill bits (0.6-6.5mm capacity).
- Depth Stop: For setting precise drilling depth.
- Feed Handle: Lowers and raises the drill bit.
- Speed Control Dial: Adjusts the motor speed.
- Power Switch: On/Off control.

Figure 2.2: Close-up of the control panel, chuck, and depth stop.
3. Setup and Assembly
The drill press requires minimal assembly. Follow these steps to prepare your unit for use.
- Unpacking: Carefully remove all components from the packaging. Inspect for any shipping damage.
- Base and Column Assembly: Securely attach the column to the base using the provided fasteners. Ensure it is stable and upright.
- Drill Head Installation: Slide the drill head onto the column. Tighten the locking mechanism to secure it at the desired height.
- Handle Installation: Attach the feed handle to the drill head. It is recommended to install the handle at a slightly inclined angle for optimal leverage.
- Belt Adjustment (if necessary): The drive belt may need adjustment for different speed settings. Open the top cover to access the belt and pulleys. Adjust the belt position on the pulleys to change speeds (refer to the speed adjustment section for details).
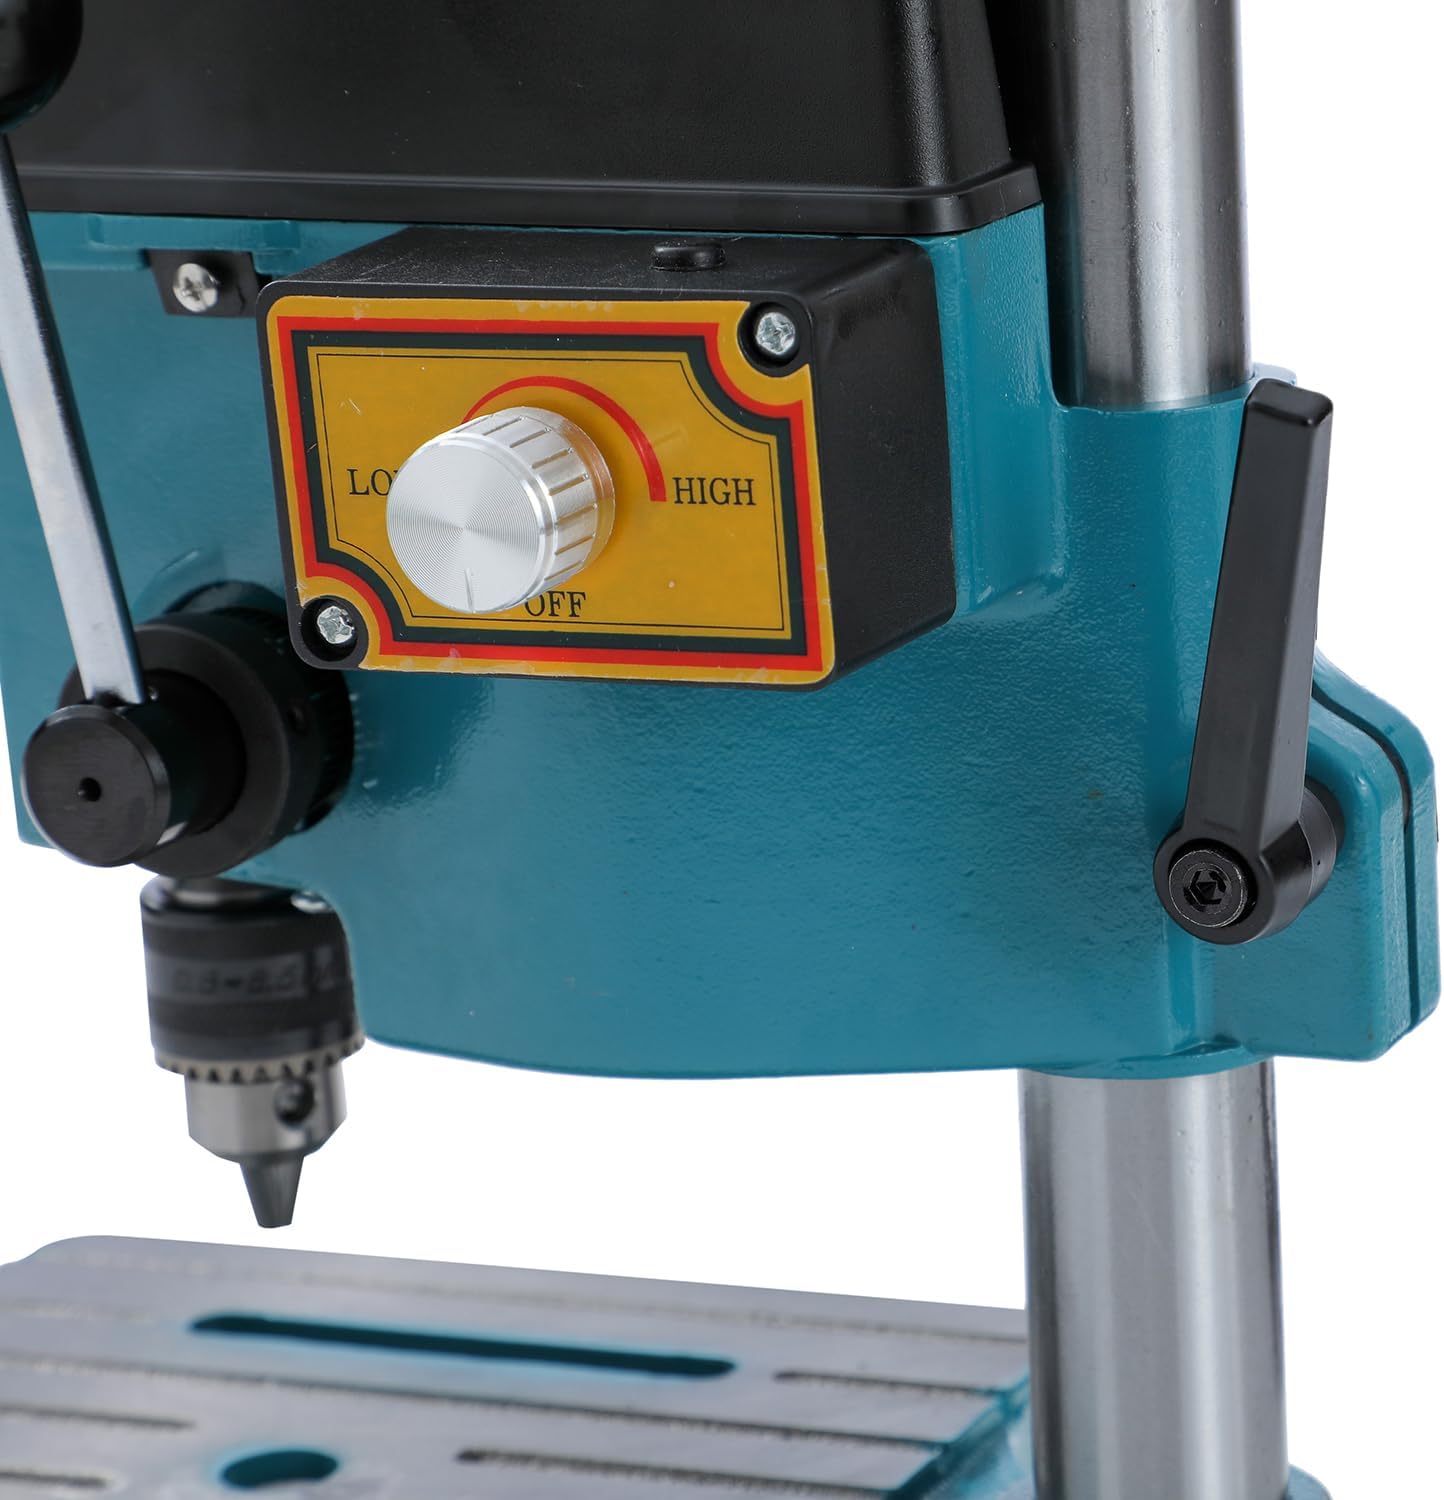
Figure 3.1: Internal view of the belt drive system for speed selection.
- Power Connection: Connect the power cord to a suitable 220V, 50Hz power outlet.
4. Operating Instructions
Follow these steps for safe and effective operation of your KATSU Mini Bench Drill Press.
4.1. Installing a Drill Bit
- Ensure the drill press is unplugged.
- Insert the drill bit into the chuck, ensuring it is centered and fully seated.
- Tighten the chuck jaws firmly using the chuck key. Remove the chuck key immediately after tightening.

Figure 4.1: Proper insertion and tightening of a drill bit in the chuck.
4.2. Adjusting Speed
The drill press offers adjustable speeds (0-5000/6500/8500 RPM) via a mechanical belt system and an electronic variable speed switch.
- Mechanical Speed Adjustment: Unplug the unit. Open the top cover. Move the drive belt to different pulley grooves to select a base speed range (Low, Medium, High). Close the cover securely.
- Electronic Variable Speed: Use the speed control dial on the side of the drill head to fine-tune the speed within the selected mechanical range. Turn the dial from 'LOW' to 'HIGH' to increase speed.

Figure 4.2: Speed control dial and power switch.
4.3. Setting Drilling Depth
Use the depth stop for consistent and precise drilling depths.
- Lower the drill bit until it just touches the workpiece.
- Adjust the depth stop collar to the desired depth and tighten its locking screw.
4.4. Drilling Operation
- Secure the workpiece firmly to the drill press table using clamps.
- Plug in the drill press and turn the power switch to 'ON'.
- Slowly lower the drill bit into the workpiece using the feed handle. Apply steady, even pressure.
- Once the desired depth is reached, retract the drill bit from the workpiece.
- Turn the power switch to 'OFF' and unplug the unit after use.
5. Maintenance
Regular maintenance ensures the longevity and optimal performance of your drill press.
- Cleaning: Keep the machine clean and free of dust and debris. Use a brush or compressed air to remove chips from the table and drill head.
- Lubrication: Periodically lubricate the column rack and pinion mechanism with appropriate grease. Apply a thin layer of fine oil to the column and the upper collar of the chuck to ensure smooth movement.
- Belt Inspection: Regularly check the drive belt for wear, cracks, or damage. Replace if necessary.
- Chuck Maintenance: Keep the chuck jaws clean. If the chuck becomes stiff, clean it thoroughly and apply a light lubricant.
- Power Cord: Inspect the power cord for any damage. Do not use the tool if the cord is damaged.
6. Troubleshooting
This section addresses common issues you might encounter.
| Problem | Possible Cause | Solution |
|---|---|---|
| Drill not turning on | No power supply; Faulty power switch; Damaged cord | Check power connection; Test outlet; Inspect power cord; Contact support if switch is faulty. |
| Excessive vibration or noise | Loose components; Worn belt; Unbalanced drill bit | Tighten all fasteners; Inspect and replace belt if worn; Ensure drill bit is properly seated and not bent. |
| Drill bit not cutting efficiently | Dull drill bit; Incorrect speed; Insufficient pressure | Replace or sharpen drill bit; Adjust speed according to material; Apply steady, appropriate pressure. |
| Chuck or column movement is stiff | Lack of lubrication; Dirt/debris | Clean and lubricate the column and chuck mechanism. |
| Belt breaks or slips frequently | Worn belt; Incorrect tension; Overload | Replace belt; Adjust belt tension; Avoid excessive force during drilling. |
7. Technical Specifications
Detailed specifications for the KATSU Mini Bench Drill Press, Model 100080.
| Feature | Specification |
|---|---|
| Model | 100080 |
| Motor Power | 100 W |
| Voltage | 220 V, 50 Hz |
| Chuck Capacity | 0.6 - 6.5 mm |
| Adjustable Speed | 0-5000 / 6500 / 8500 RPM |
| Drilling Stroke | 25 mm (1 inch) |
| Max. Drilling Capacity (Steel) | 3.2 mm (1/8 inch) |
| Max. Drilling Capacity (Non-metallic) | 6 mm (1/4 inch) |
| Max. Drilling Capacity (Copper/Aluminum) | 5 mm |
| Table Size | 168 mm x 168 mm |
| Max. Spindle to Base Distance | 200 mm |
| Cable Length | 1.45 m |
| Dimensions (L x W x H) | 12.76 x 10.91 x 8.78 cm |
| Weight | 5.25 kg |
| Material | Metal |
8. Warranty and Support
KATSU Tools products are manufactured to high-quality standards. For warranty information, technical support, or spare parts, please refer to the documentation included with your purchase or contact KATSU Tools customer service directly.
Keep your purchase receipt as proof of purchase for any warranty claims.
For further assistance, please visit the official KATSU Tools website or contact your retailer.