Introduction
This manual provides essential information for the safe and effective operation of your KATSU 60W Soldering Station. Please read it thoroughly before use and keep it for future reference.
Important Safety Instructions
- Always work in a well-ventilated area.
- Wear appropriate eye protection.
- Do not touch the soldering iron tip or heated components.
- Ensure the power supply matches the station's requirements (220V 50Hz).
- Keep out of reach of children.
- Disconnect from power when not in use or during maintenance.
- Use only original or approved replacement parts.
Package Contents
Verify that all items are present in your package:
- KATSU 60W Soldering Station Unit
- Soldering Iron with Silicone Lead
- Soldering Iron Stand
- Cleaning Sponge
- 4 x Soldering Tips
Product Overview
Familiarize yourself with the components of your soldering station.

Figure 1: The complete KATSU 60W Soldering Station, including the main unit with LCD display, soldering iron, and four interchangeable tips.
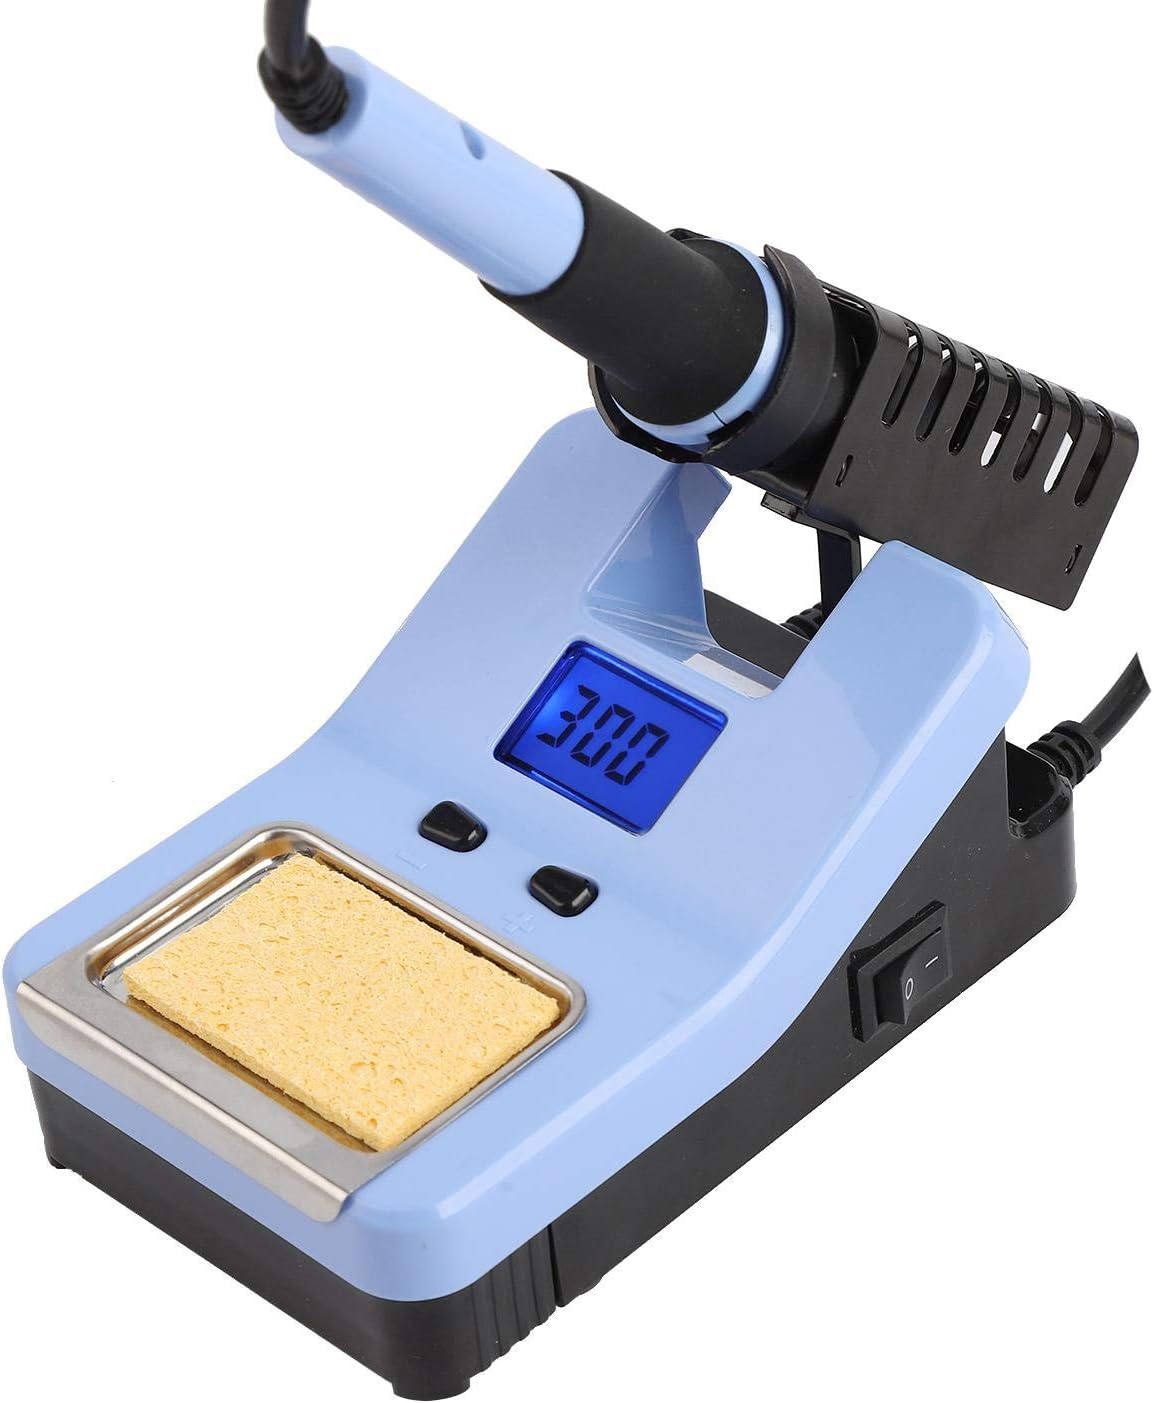
Figure 2: Detail of the soldering station's control panel, showing the LCD temperature display and the '+' and '-' buttons for temperature adjustment.

Figure 3: The integrated sponge tray, designed to hold the cleaning sponge for maintaining the soldering iron tip.

Figure 4: A close-up view of one of the interchangeable soldering tips, highlighting its conical shape.
Setup
- Place the soldering station on a stable, heat-resistant surface.
- Insert the soldering iron into the designated port on the station.
- Place the soldering iron into its stand.
- Lightly dampen the cleaning sponge with water and place it in the sponge tray.
- Connect the power cord to the station and then to a suitable 220V 50Hz power outlet.
Operating Instructions
Power On/Off
Flip the power switch located on the front of the unit to the 'ON' position. The LCD display will illuminate, showing the current temperature.
Temperature Adjustment
Use the '+' and '-' buttons below the LCD display to adjust the desired temperature. The temperature range is 200°C to 480°C. The station will quickly heat up to the set temperature.
Soldering Process
- Allow the iron to reach the desired temperature.
- Clean the tip by wiping it on the damp sponge.
- Apply a small amount of solder to the tip to "tin" it.
- Place the hot tip against the joint to be soldered, ensuring both components are heated simultaneously.
- Apply solder to the heated joint, not directly to the iron tip.
- Remove the solder, then remove the iron. Allow the joint to cool naturally.
Changing Soldering Tips
Caution: Ensure the soldering iron is cool before attempting to change tips.
- Unscrew the retaining nut at the base of the soldering iron tip.
- Carefully remove the old tip.
- Insert the new tip and secure it by tightening the retaining nut.
Maintenance
Tip Cleaning
Regularly clean the soldering iron tip using the damp sponge to remove excess solder and oxidation. This helps maintain optimal heat transfer and extends tip life.
Tip Tinning
Always tin the tip with a small amount of fresh solder before storing the iron and after cleaning. This prevents oxidation and ensures the tip is ready for the next use.
General Cleaning
Wipe the station and iron handle with a soft, dry cloth. Do not use abrasive cleaners or solvents.
Troubleshooting
| Problem | Possible Cause | Solution |
|---|---|---|
| Iron not heating | Power switch off; Loose connection; Faulty heating element | Check power switch and connections; Contact support if element is faulty |
| Temperature display inaccurate | Sensor issue; Calibration needed | While the unit has a calibration option, it may require a calibration tool for precise adjustment. For general use, adjust temperature to desired working level. |
| Solder not melting | Temperature too low; Oxidized tip | Increase temperature; Clean and re-tin tip |
Specifications

Figure 5: Dimensional overview of the KATSU Soldering Station, indicating key measurements for the unit and iron.
| Feature | Detail |
|---|---|
| Input Voltage | 220V 50Hz |
| Output Voltage | 24V |
| Power Consumption | 60W |
| Temperature Range | 200-480°C |
| Temperature Stability | ±2°C |
| Display | LCD |
| Model Number | 312087 |
| Item Weight | 1.7 Kilograms |
| Material | Iron |
Warranty and Support
For warranty information or technical support, please refer to the documentation provided at the time of purchase or contact KATSU Tools customer service. Specific warranty details are not included in this manual.