MSI Computer Z97 PC MATE
MSI Z97 PC Mate Motherboard User Manual
Model: Z97 PC MATE
Introduction
This manual provides detailed instructions for the installation, operation, maintenance, and troubleshooting of your MSI Z97 PC Mate ATX Motherboard. Please read this manual thoroughly before beginning installation to ensure proper setup and optimal performance.
The MSI Z97 PC Mate is an ATX motherboard designed for Intel LGA 1150 processors, featuring the Intel Z97 chipset. It supports DDR3 memory, multiple PCI-E slots, and various connectivity options including SATA 6Gb/s, USB 3.0, VGA, DVI, HDMI, and Gigabit LAN.
Package Contents
Before proceeding, please verify that all items listed below are included in your package:
- MSI Z97 PC Mate ATX Motherboard
- Driver CD / Software DVD
- User Manual (this document, or a printed version)
- SATA Cables
- I/O Shield
Setup and Installation
Proper installation is crucial for the stability and performance of your system. Follow these steps carefully.
1. Preparing Your Workspace
- Ensure you are working in a clean, well-lit area.
- Use an anti-static wrist strap or frequently touch a grounded metal object (e.g., the metal casing of your PC power supply) to discharge static electricity.
- Unplug your power supply from the wall outlet before handling any components.
2. Motherboard Overview
Familiarize yourself with the layout of the MSI Z97 PC Mate motherboard. Key components and connectors are highlighted below.

Figure 1: MSI Z97 PC Mate Motherboard Layout. This image shows the full motherboard with various components like the CPU socket, RAM slots, PCI-E slots, and SATA ports clearly visible.
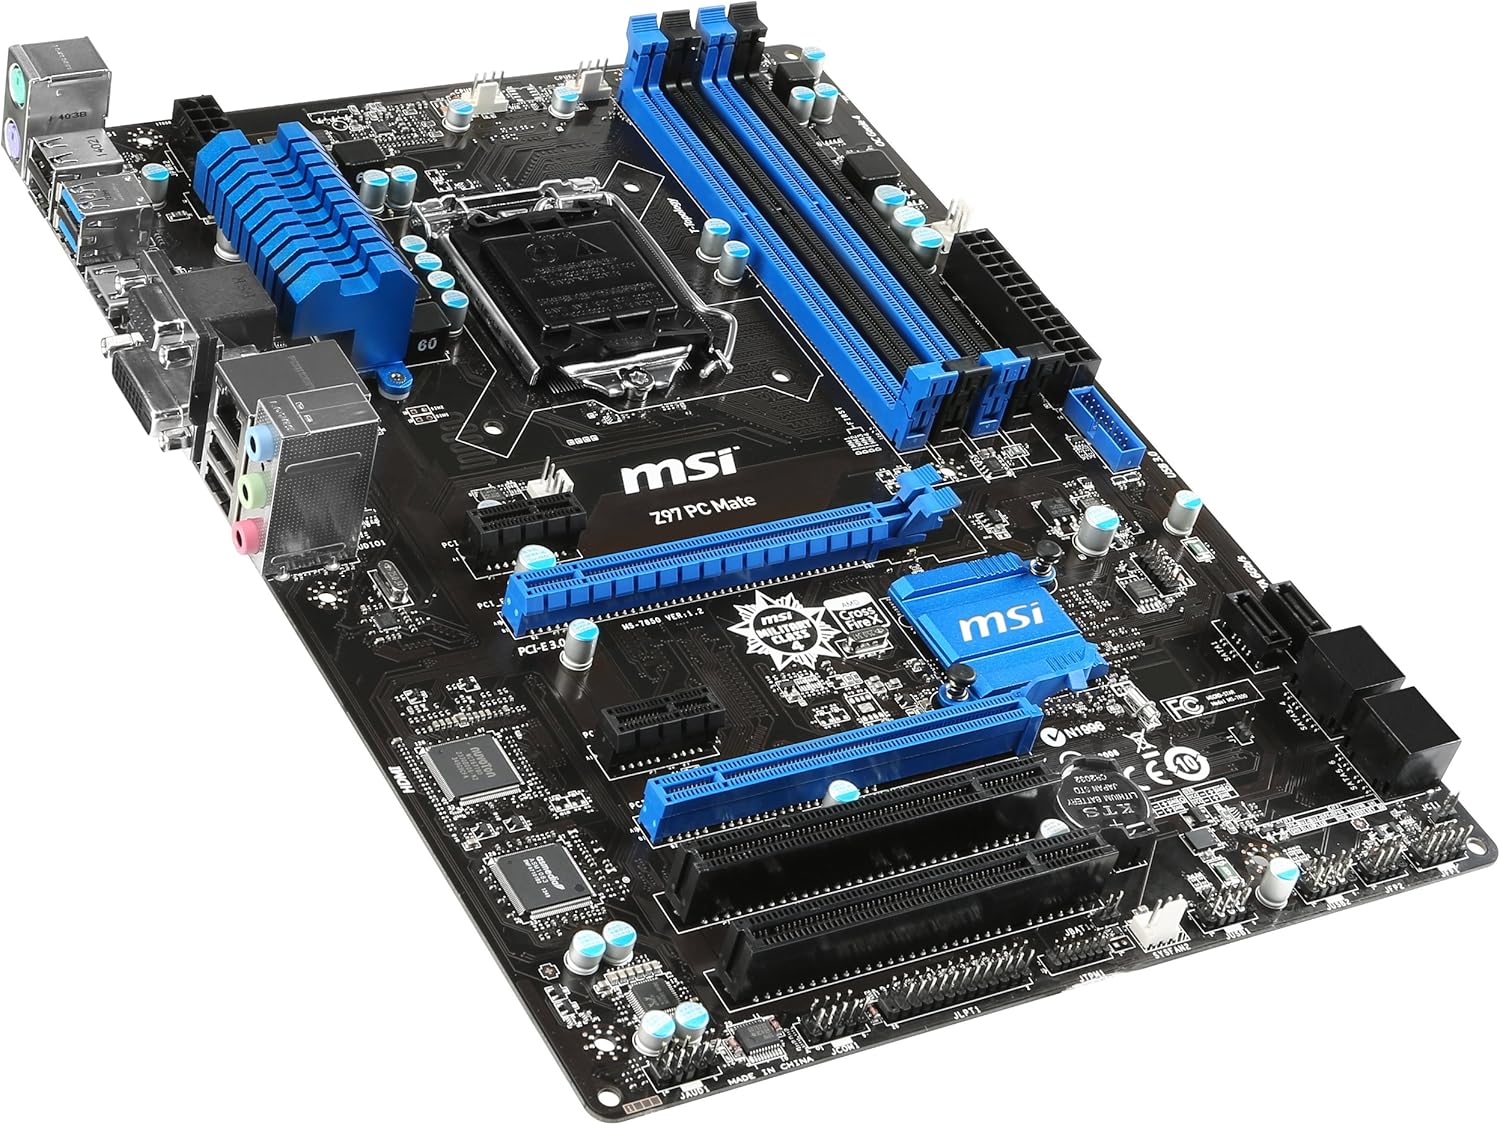
Figure 2: Angled view of the MSI Z97 PC Mate Motherboard. This perspective highlights the CPU socket area, RAM slots, and the heatsinks.
3. Installing the CPU
- Locate the LGA 1150 CPU socket on the motherboard.
- Gently push down the load lever and pull it to the side to open the CPU socket.
- Carefully align the CPU with the socket, ensuring the golden triangle on the CPU matches the triangle on the socket. Do not force the CPU into the socket.
- Lower the load plate and push the load lever back into place to secure the CPU.
- Apply thermal paste and install the CPU cooler according to its manufacturer's instructions.
4. Installing Memory (RAM)
The Z97 PC Mate supports DDR3 memory. Refer to the motherboard manual for specific memory configurations and dual-channel setup.
- Open the clips at both ends of the DIMM slots.
- Align the notch on the DDR3 memory module with the key in the DIMM slot.
- Press down firmly on both ends of the memory module until the clips snap into place.
5. Installing Expansion Cards
The motherboard features 2 PCI-E x16 3.0, 2 PCI-E x1, and 2 PCI slots.
- Remove the corresponding slot cover from your PC case.
- Align the expansion card with the chosen slot and press down firmly until it is fully seated.
- Secure the card with a screw to the case.
6. Connecting Storage Devices
The motherboard provides SATA 6Gb/s ports for connecting hard drives, SSDs, and optical drives.
- Connect one end of the SATA data cable to a SATA port on the motherboard.
- Connect the other end of the SATA data cable to your storage device.
- Connect a SATA power cable from your power supply to the storage device.
7. Connecting Front Panel Connectors
Connect the power button, reset button, HDD LED, power LED, and front panel USB/audio connectors to the appropriate headers on the motherboard. Refer to the motherboard diagram for exact pin locations.
8. Connecting Power Supply
Connect the 24-pin ATX main power connector and the 8-pin CPU power connector from your power supply to the motherboard.
Operating Your Motherboard
Once all components are installed and connected, you can power on your system.
1. First Boot and BIOS Setup
- Connect your monitor, keyboard, and mouse to the rear I/O panel.
- Power on your system. Press the DEL key repeatedly during startup to enter the BIOS/UEFI setup utility.
- In the BIOS, you can configure boot order, system time, fan speeds, and other advanced settings.
- Save changes and exit the BIOS to continue with operating system installation.
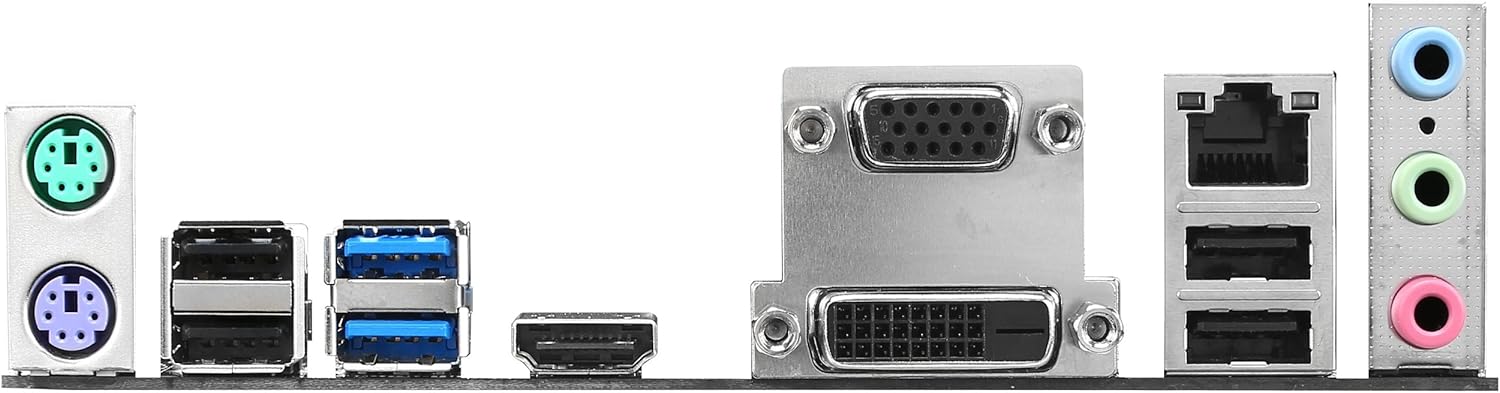
Figure 3: Rear I/O Panel. This image displays the various ports available on the back of the motherboard, including USB, Ethernet, audio jacks, and video outputs (VGA, DVI, HDMI).
2. Operating System Installation
Insert your operating system installation media (USB drive or DVD) and follow the on-screen prompts to install the OS.
3. Driver Installation
After OS installation, install the necessary drivers from the included driver CD/DVD or download the latest versions from the MSI website. This includes chipset drivers, audio drivers, LAN drivers, and any other peripheral drivers.
Maintenance
Regular maintenance helps ensure the longevity and optimal performance of your motherboard and system.
- Dust Removal: Periodically clean dust from inside your PC case, especially from fans and heatsinks, using compressed air. Ensure the system is powered off and unplugged before cleaning.
- BIOS Updates: Check the MSI website for the latest BIOS updates. BIOS updates can improve compatibility, stability, and performance. Follow MSI's instructions carefully when updating the BIOS.
- Driver Updates: Keep your drivers updated to ensure compatibility and optimal performance with new software and hardware.
- Cable Management: Ensure cables inside the case are neatly managed to improve airflow and prevent obstruction.
Troubleshooting
If you encounter issues, refer to the following common troubleshooting steps.
No Power / System Not Starting
- Verify all power cables (24-pin ATX, 8-pin CPU) are securely connected to the motherboard and power supply.
- Ensure the power supply switch is in the ON position.
- Check front panel power button connection to the motherboard.
- Test the power supply with another system or a power supply tester.
No Display Output
- Ensure the monitor is connected to the correct video output (either integrated graphics on the motherboard or a dedicated graphics card).
- Reseat the graphics card and memory modules.
- Try booting with only one RAM stick.
- Clear CMOS (refer to motherboard manual for jumper/button location).
System Instability / Crashes
- Check CPU and GPU temperatures to ensure they are within safe operating limits.
- Run memory diagnostic tools (e.g., MemTest86) to check for faulty RAM.
- Ensure all drivers are up to date.
- Check for loose connections or improperly seated components.
Specifications
Key technical specifications for the MSI Z97 PC Mate Motherboard:
| Feature | Specification |
|---|---|
| CPU Socket | LGA 1150 |
| Chipset | Intel Z97 |
| Form Factor | ATX |
| RAM Type | DDR3 |
| Memory Speed | 1600 MHz (Max) |
| Max RAM Capacity | 32 GB |
| PCI-E x16 Slots | 2 (PCI-E 3.0) |
| PCI-E x1 Slots | 2 |
| PCI Slots | 2 |
| SATA Ports | 6 (SATA 6Gb/s) |
| USB 3.0 Ports | 2 (Rear I/O) + 2 (Internal Header) |
| USB 2.0 Ports | 2 (Rear I/O) + 4 (Internal Headers) |
| Video Outputs | VGA, DVI, HDMI |
| LAN | Gigabit LAN |
| Dimensions (LxWxH) | 11.6 x 8.7 x 2.2 inches |
| Item Weight | 2.6 pounds |
Warranty and Support
MSI provides a limited warranty for its products. Please refer to the official MSI website for the most up-to-date warranty information specific to your region and product model.
For technical support, driver downloads, and further assistance, please visit the official MSI support page:
You can also refer to the comprehensive PDF user manual for more detailed diagrams and instructions: Download PDF User Manual