1. Introduction
The Sanotechnik Quick Line Steam Shower Cabin Relax combines the functionality of a modern shower with the relaxation of a steam bath. This unit is designed for optimal wellness and features a quick assembly system for ease of installation. Please read this manual thoroughly before installation and operation to ensure safe and correct usage.
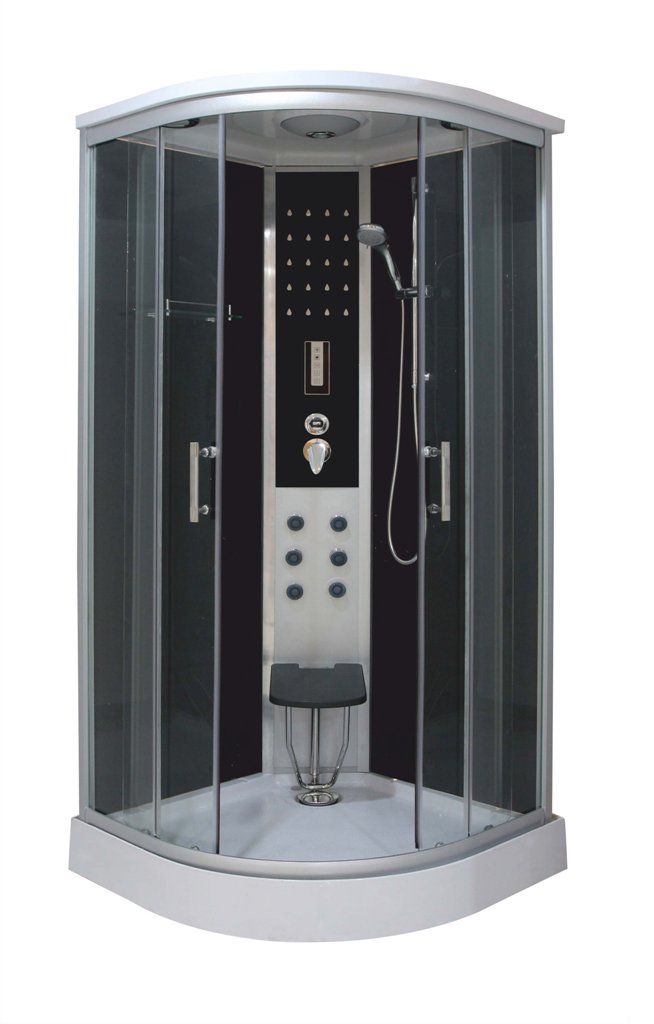
Figure 1: Front view of the Sanotechnik Quick Line Steam Shower Cabin Relax, showcasing its modern design with glass doors and integrated shower components.
2. Safety Instructions
Always observe the following safety precautions to prevent injury or damage to the product:
- Ensure proper electrical grounding and water connections are performed by a qualified professional.
- Do not use abrasive cleaners or sharp objects on glass or chrome surfaces.
- Keep children away from the steam shower unless supervised by an adult.
- Avoid prolonged exposure to high temperatures in the steam function, especially if you have health conditions. Consult a physician if unsure.
- Ensure adequate ventilation in the bathroom where the steam shower is installed.
- Do not modify the product in any way. Use only original replacement parts.
3. Setup and Installation
The Sanotechnik Quick Line system features a rapid assembly design, allowing for installation without screws or silicone for most connections. Refer to the detailed assembly instructions provided with your product for specific steps.
3.1 Quick Line Assembly System
The Quick Line system utilizes pre-assembled components and a unique aluminum profile for a stable, watertight frame construction. This design eliminates the need for screws and silicone in many areas, simplifying the assembly process.
- Preparation: Unpack all components and verify against the parts list in the separate assembly manual. Ensure the installation area is level and has appropriate water and electrical connections.
- Frame Assembly: Connect the pre-assembled aluminum profiles as instructed. The precise manufacturing ensures a secure and watertight fit.
- Glass Panel Installation: Carefully insert the 5 mm safety glass panels into the designated profiles.
- Door Installation: Mount the sliding doors with double wheels onto the tracks.
- Component Connection: Install the shower head, adjustable hand shower, massage jets, glass shelf, radio, fan, and LED lighting according to the manual.
- Steam Unit Connection: Connect the steam generator as per the electrical and plumbing instructions.
- Final Checks: Before first use, check all connections for leaks and ensure all electrical components function correctly.
Note: Professional installation is recommended for plumbing and electrical connections.
4. Operating Instructions
4.1 Shower Functions
- Overhead Shower: Turn the diverter knob to activate the main shower head for a refreshing rain effect.
- Hand Shower: Adjust the hand shower to your desired height and angle. Use the diverter to switch water flow to the hand shower.
- Massage Jets: Activate the 6 adjustable massage jets for a stimulating hydro-massage. Adjust water pressure and direction as desired.
4.2 Steam Function
- Activation: Press the "Steam" button on the control panel. The steam generator will begin to heat water.
- Temperature/Time: Use the control panel to set desired steam temperature and duration. Refer to the specific control panel manual for detailed instructions.
- Safety: Do not enter the cabin until steam production has stabilized. Use the foldable seat for comfort during steam sessions.
4.3 Multimedia and Lighting
- Radio: Turn on the radio via the control panel. Use the controls to select stations and adjust volume.
- LED Lighting: Activate the LED lighting for ambient illumination within the cabin.
- Fan: Use the integrated fan to improve air circulation and reduce humidity after use.
5. Maintenance and Care
Regular cleaning and maintenance will prolong the life and appearance of your steam shower cabin.
- Daily Cleaning: After each use, rinse the interior surfaces with clean water to remove soap residue. Use a soft cloth to wipe down glass and chrome.
- Weekly Cleaning: Use a mild, non-abrasive bathroom cleaner for a more thorough cleaning of all surfaces. Avoid cleaners containing harsh chemicals, ammonia, or abrasive particles.
- Glass Care: To prevent water spots, use a squeegee on the glass panels after each shower.
- Steam Generator Descaling: Periodically descale the steam generator according to the manufacturer's instructions for the specific unit. This is crucial in hard water areas.
- Drain Maintenance: Regularly clean the drain to prevent blockages.
- Inspection: Periodically check all hoses, connections, and seals for wear or leaks.
6. Troubleshooting
| Problem | Possible Cause | Solution |
|---|---|---|
| No steam production | Power supply issue, water supply off, steam generator fault, scale buildup. | Check power connection. Ensure water supply is open. Refer to steam generator manual. Descale unit. |
| Water leaks | Loose connections, damaged seals, improper installation. | Inspect all plumbing connections. Check seals around glass panels and doors. Re-tighten or replace as needed. Consult professional if persistent. |
| Poor water pressure | Clogged shower head/jets, low household water pressure. | Clean shower head and massage jets. Check household water supply. |
| Radio not working | Power issue, antenna not connected, faulty unit. | Check power to the unit. Ensure antenna is properly connected. |
If you encounter problems not listed here or if solutions do not resolve the issue, please contact Sanotechnik customer support.
7. Specifications
| Brand: | Sanotechnik |
| Model: | Quick Line Relax |
| Dimensions (L x W x H): | 90 x 90 x 215 cm |
| Glass Thickness: | 5 mm Safety Glass |
| Door Style: | Sliding Doors |
| Frame Material: | Aluminium (Chrome-look) |
| Features: | Overhead Shower, Adjustable Hand Shower, 6 Massage Jets, Glass Shelf, Radio, Fan, LED Lighting, Foldable Seat, Steam Function |
| Assembly System: | Quick Line (screw-less, silicone-free for main connections) |
8. Warranty and Support
For information regarding warranty coverage, terms, and conditions, please refer to the warranty card included with your product or visit the official Sanotechnik website. For technical support, spare parts, or service inquiries, please contact Sanotechnik customer service through their official channels.