1. Introduction
The SunSun CHJ-1503 ECO adjustable water pump is engineered for efficient water circulation and decorative fountain effects in various aquatic environments such as ponds, pools, and garden fountains. This manual provides essential information for the safe installation, operation, and maintenance of your pump to ensure optimal performance and longevity.

Image: SunSun CHJ-1503 ECO pump operating as a fountain in a pond with fish and water lilies, demonstrating its decorative function.
2. Safety Instructions
Please read and understand all safety warnings and instructions before operating the pump. Failure to follow these instructions may result in electric shock, fire, or serious injury.
- Always disconnect the power supply before performing any maintenance, installation, or cleaning tasks on the pump.
- Do not operate the pump dry. Ensure it is fully submerged in water during operation to prevent overheating and damage.
- Ensure the electrical outlet is properly grounded and protected by a Ground Fault Circuit Interrupter (GFCI) or Residual Current Device (RCD).
- Do not use the pump if the power cord or plug is damaged. Contact qualified personnel for repair or replacement.
- Keep the pump and its electrical connections away from children and pets.
- This pump is designed for water circulation in ponds, pools, and fountains. Do not use it for other liquids or purposes.
- Avoid lifting the pump by its power cord.
3. Package Contents
Carefully unpack all components and verify that all items are present and undamaged. If any parts are missing or damaged, contact your retailer.

Image: Detailed exploded diagram of the SunSun CHJ-1503 ECO pump, labeling all individual parts and components for assembly and maintenance.
| No. | Description |
|---|---|
| 1 | Fountain Nozzle 1 |
| 2 | Fountain Nozzle 2 |
| 3 | Fountain Nozzle 3 |
| 4 | Fountain Base |
| 5 | Extension Tube |
| 6 | Connection Tube |
| 7 | Threaded Ring |
| 8 | Connector |
| 9 | Regulator |
| 10 | Outlet Nut |
| 11 | Outlet 1 |
| 12 | Outlet 2 |
| 13 | Elbow Outlet |
| 14 | Filter Basket |
| 15 | Filter Basket |
| 16 | Filter Sponge |
| 17 | Fixing Pin |
| 18 | Flow Control Valve |
| 19 | Pump Body |
| 20 | Bearing |
| 21 | Rotor Unit |
| 22 | O-ring Seal |
| 23 | Motor Housing |
| 24 | Suction Cups |
| 25 | Rubber Feet |
4. Specifications
The SunSun CHJ-1503 ECO pump offers the following technical specifications:

Image: Chart illustrating the flow rate and head height performance of various SunSun CHJ pump models, including the CHJ-1503.
- Model Number: 50330 (CHJ-1503)
- Dimensions (L x W x H): 46 x 35.51 x 30 cm (Pump body: 274 x 85 x 100 mm)
- Weight: 1.64 Kilograms
- Maximum Flow Rate: 1500 Liters per hour
- Power Consumption: 25 Watts
- Maximum Head Height: 1.8 Meters
- Material: Acrylonitrile Butadiene Styrene (ABS)
- Ingress Protection (IP) Rating: IPX8 (Suitable for continuous submersion in water)
- Power Source: Electric Cable (Cable length: 10 m)

Image: Technical diagram showing the dimensions and various components of the SunSun CHJ-1503 ECO pump and its accessories, including cable length.
5. Setup
Follow these steps to set up your SunSun CHJ-1503 ECO water pump:
- Choose Location: Place the pump in a stable, submerged position within your pond, pool, or fountain basin. Ensure it is on a flat surface and not obstructed by debris. The integrated suction cups (24) and rubber feet (25) can help secure its position.
- Assemble Fountain Components:
- Attach the desired fountain nozzle (1, 2, or 3) to the fountain base (4).
- Connect the extension tube (5) to the fountain base (4) if additional height is required.
- Secure the assembled fountain column to the pump body (19) using the threaded ring (7) and connector (8).
- Connect Hoses (if not using fountain): If using the pump for general water circulation or to feed a filter, attach appropriate hoses to Outlet 1 (11) or Outlet 2 (12) using the provided connectors and the elbow outlet (13) if needed.
- Submerge Pump: Carefully place the pump into the water, ensuring it is fully submerged before connecting to power.
- Connect to Power: Plug the pump into a properly grounded electrical outlet with GFCI/RCD protection.
6. Operation
Once installed, operating your pump is straightforward:
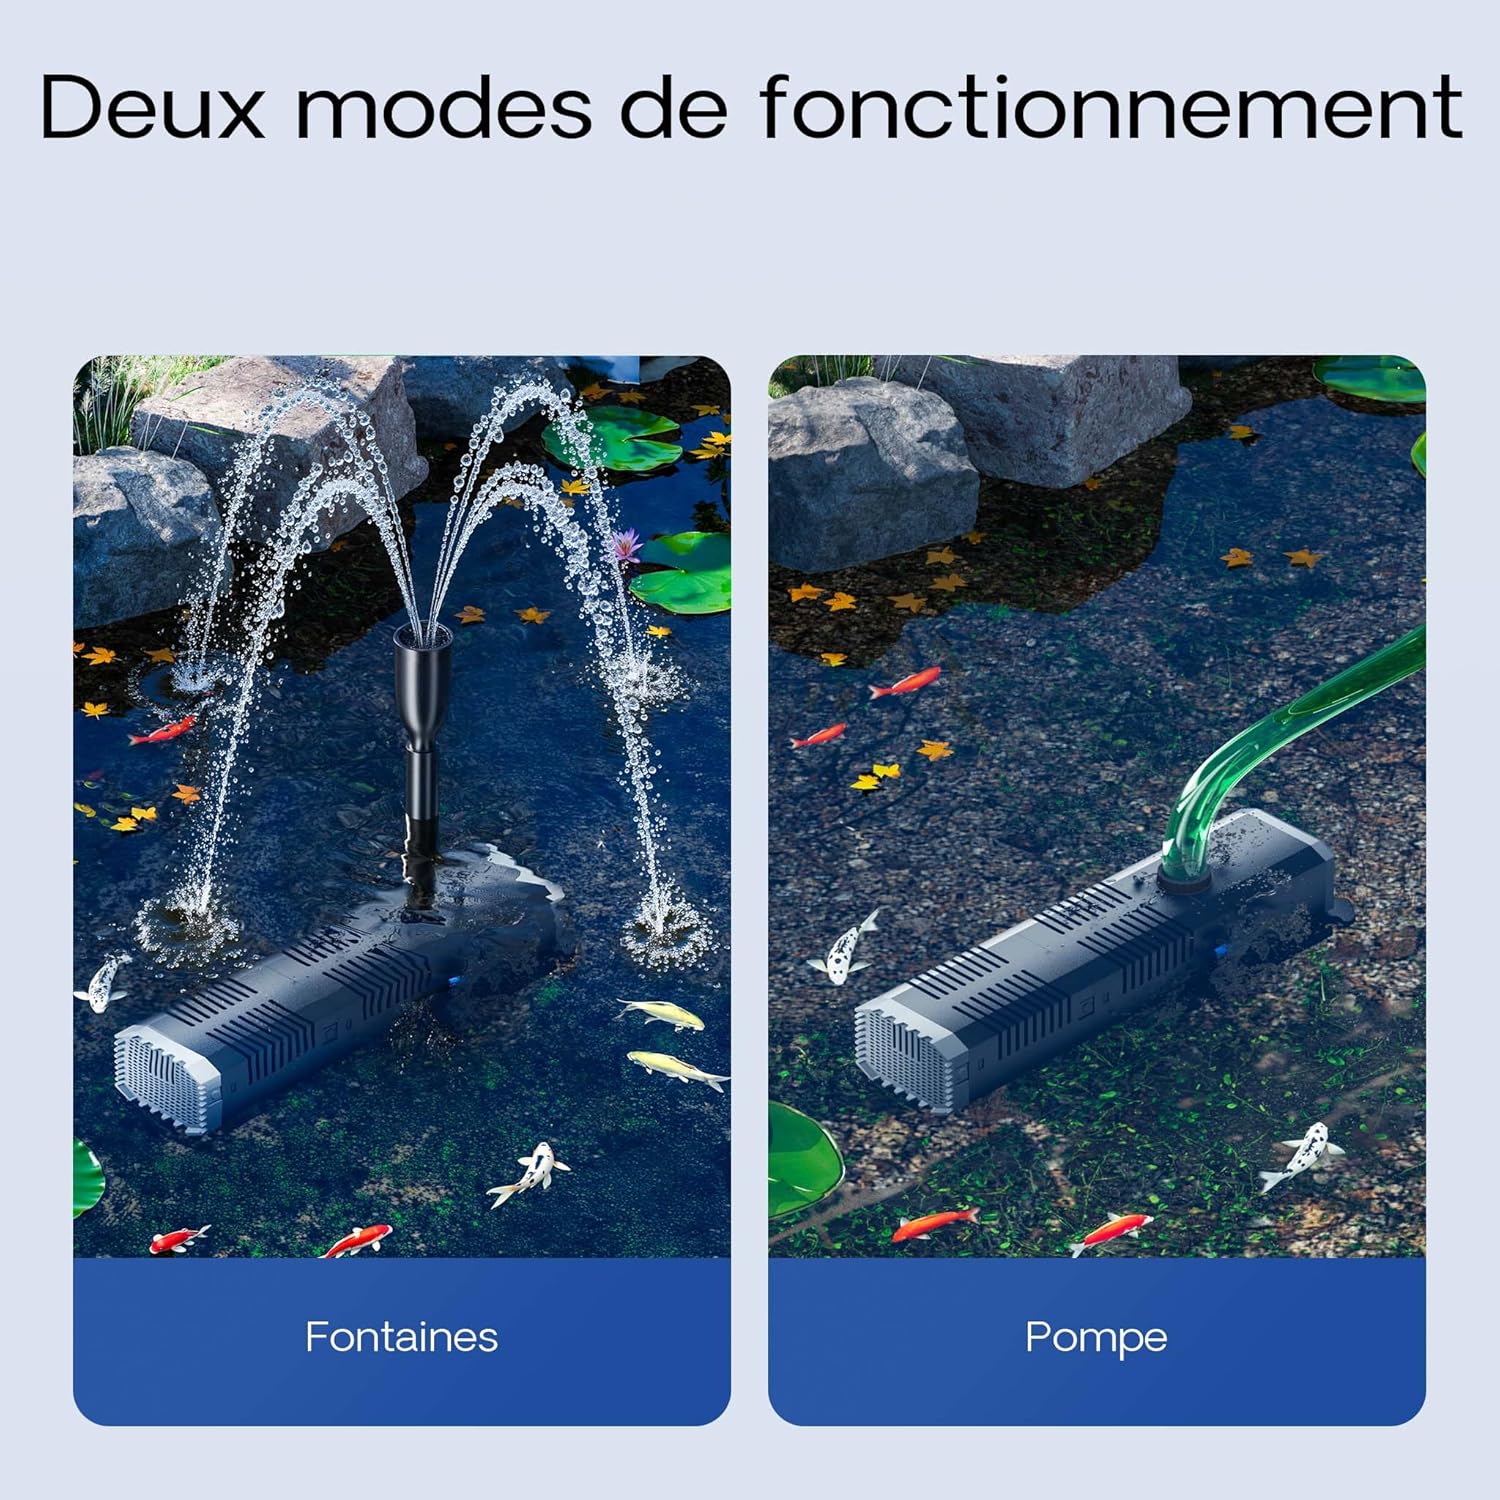
Image: The pump can operate in two modes: creating decorative fountain jets or functioning as a standard water pump for circulation.
- Starting the Pump: The pump will begin operating once connected to a power source.
- Adjusting Flow Rate: The pump features an integrated flow control valve (18). Rotate the regulator (9) or adjust the valve to precisely control the water flow rate according to your needs. This allows for optimization of fountain height or circulation intensity.
- Changing Fountain Effects: If using the fountain function, you can change the water spray pattern by interchanging the fountain nozzles (1, 2, 3). Experiment with different nozzles to achieve desired aesthetic effects.

Image: Examples of different fountain spray patterns, such as bell and classic shapes, achievable with the interchangeable nozzles.

Image: Close-up view of the flow regulation valve, indicating the mechanism for adjusting water output.
7. Maintenance
Regular maintenance is crucial for the longevity and efficient operation of your pump. The pump is designed for easy, tool-free access for cleaning.

Image: Step-by-step visual guide demonstrating how to disassemble the pump for cleaning and maintenance.
- Disconnect Power: Always unplug the pump from the power source before any maintenance.
- Remove Filter Cover: Press the side clips to remove the filter cover.
- Access Main Casing: Press the clips on the main casing to open it. The filter sponge (16) can be cleaned or replaced at this stage.
- Remove Base: Remove the base by sliding it in the direction of the arrow.
- Remove Pump Body: Rotate the pump body (19) more than 90 degrees to the left to detach it.
- Clean Rotor Unit: Carefully pull out the rotor unit (21) for cleaning. The ceramic shaft (visible in image PT04) is wear-resistant but should be inspected for debris. Clean the impeller and the inside of the motor housing (23) with a soft brush and clean water.
- Reassemble: Reassemble all components in reverse order, ensuring all seals (22) are correctly seated.

Image: Close-up view of the durable ceramic shaft and impeller, emphasizing its robust construction for long-term use.
8. Troubleshooting
If you encounter issues with your pump, refer to the following common problems and solutions:
| Problem | Possible Cause | Solution |
|---|---|---|
| Pump does not start | No power supply Impeller jammed Damaged motor | Check power connection and GFCI/RCD Disconnect power and clean impeller/rotor area Contact customer support |
| Low flow rate or weak fountain | Clogged filter or nozzle Flow control valve closed Air in pump Pump not fully submerged | Disconnect power and clean filter sponge and nozzles Adjust flow control valve (18) to open position Ensure pump is fully submerged and free of air pockets Ensure water level is adequate |
| Pump is noisy | Debris in impeller Worn impeller/shaft Pump not stable | Disconnect power and clean impeller/rotor area Inspect impeller and ceramic shaft (PT04) for wear; replace if necessary Ensure pump is securely placed on a flat surface using suction cups/rubber feet |
9. Warranty and Support
For warranty information or technical support, please refer to the product packaging or contact your retailer. Keep your purchase receipt as proof of purchase.
For further assistance, you may visit the official SunSun website or contact their customer service department.