1. Introduction
This manual provides essential information for the safe and efficient installation, operation, and maintenance of your SunSun CTP-12000 SuperECO Pond Filter Pump. Please read these instructions carefully before using the product and retain them for future reference.
The SunSun CTP-12000 is a high-performance, energy-efficient pond pump designed for continuous operation in various aquatic environments, including ponds, fountains, and hydroponic systems. It features a robust design with a copper-free ceramic shaft for durability and includes integrated protection functions.
2. Safety Instructions
WARNING: Always disconnect the pump from the power supply before performing any installation, maintenance, or cleaning tasks.
- Ensure the power supply voltage matches the pump's specifications.
- The pump must be connected to a properly grounded outlet.
- Do not operate the pump dry (without water), as this can cause severe damage.
- Do not lift or carry the pump by its power cable.
- Keep children and pets away from the pump during operation.
- Regularly inspect the power cable and pump for any signs of damage. Do not use if damaged.
- This pump is designed for water use only within specified temperature ranges.
3. Package Contents
Verify that all components are present in the package:

Image: Exploded view of the pump showing all individual parts and their corresponding numbers.
| No. | Component Name |
|---|---|
| 1 | Flow control valve |
| 2 | Filter basket |
| 3 | Rotor housing |
| 4 | Hose nozzle (25/32/38 mm) |
| 5 | Hose nozzle (38/50 mm) |
| 6 | Nut |
| 7 | Connecting piece |
| 8 | Seal |
| 9 | Rotor |
| 10 | O-ring |
| 11 | Bearing |
| 12 | Motor housing |
| 13 | Base |
| 14 | Rubber feet |
4. Setup
4.1 Placement Options
The SunSun CTP-12000 pump can be used either submerged in water or externally. For external use, a skimmer or pre-filter is typically required to prevent large debris from entering the pump.
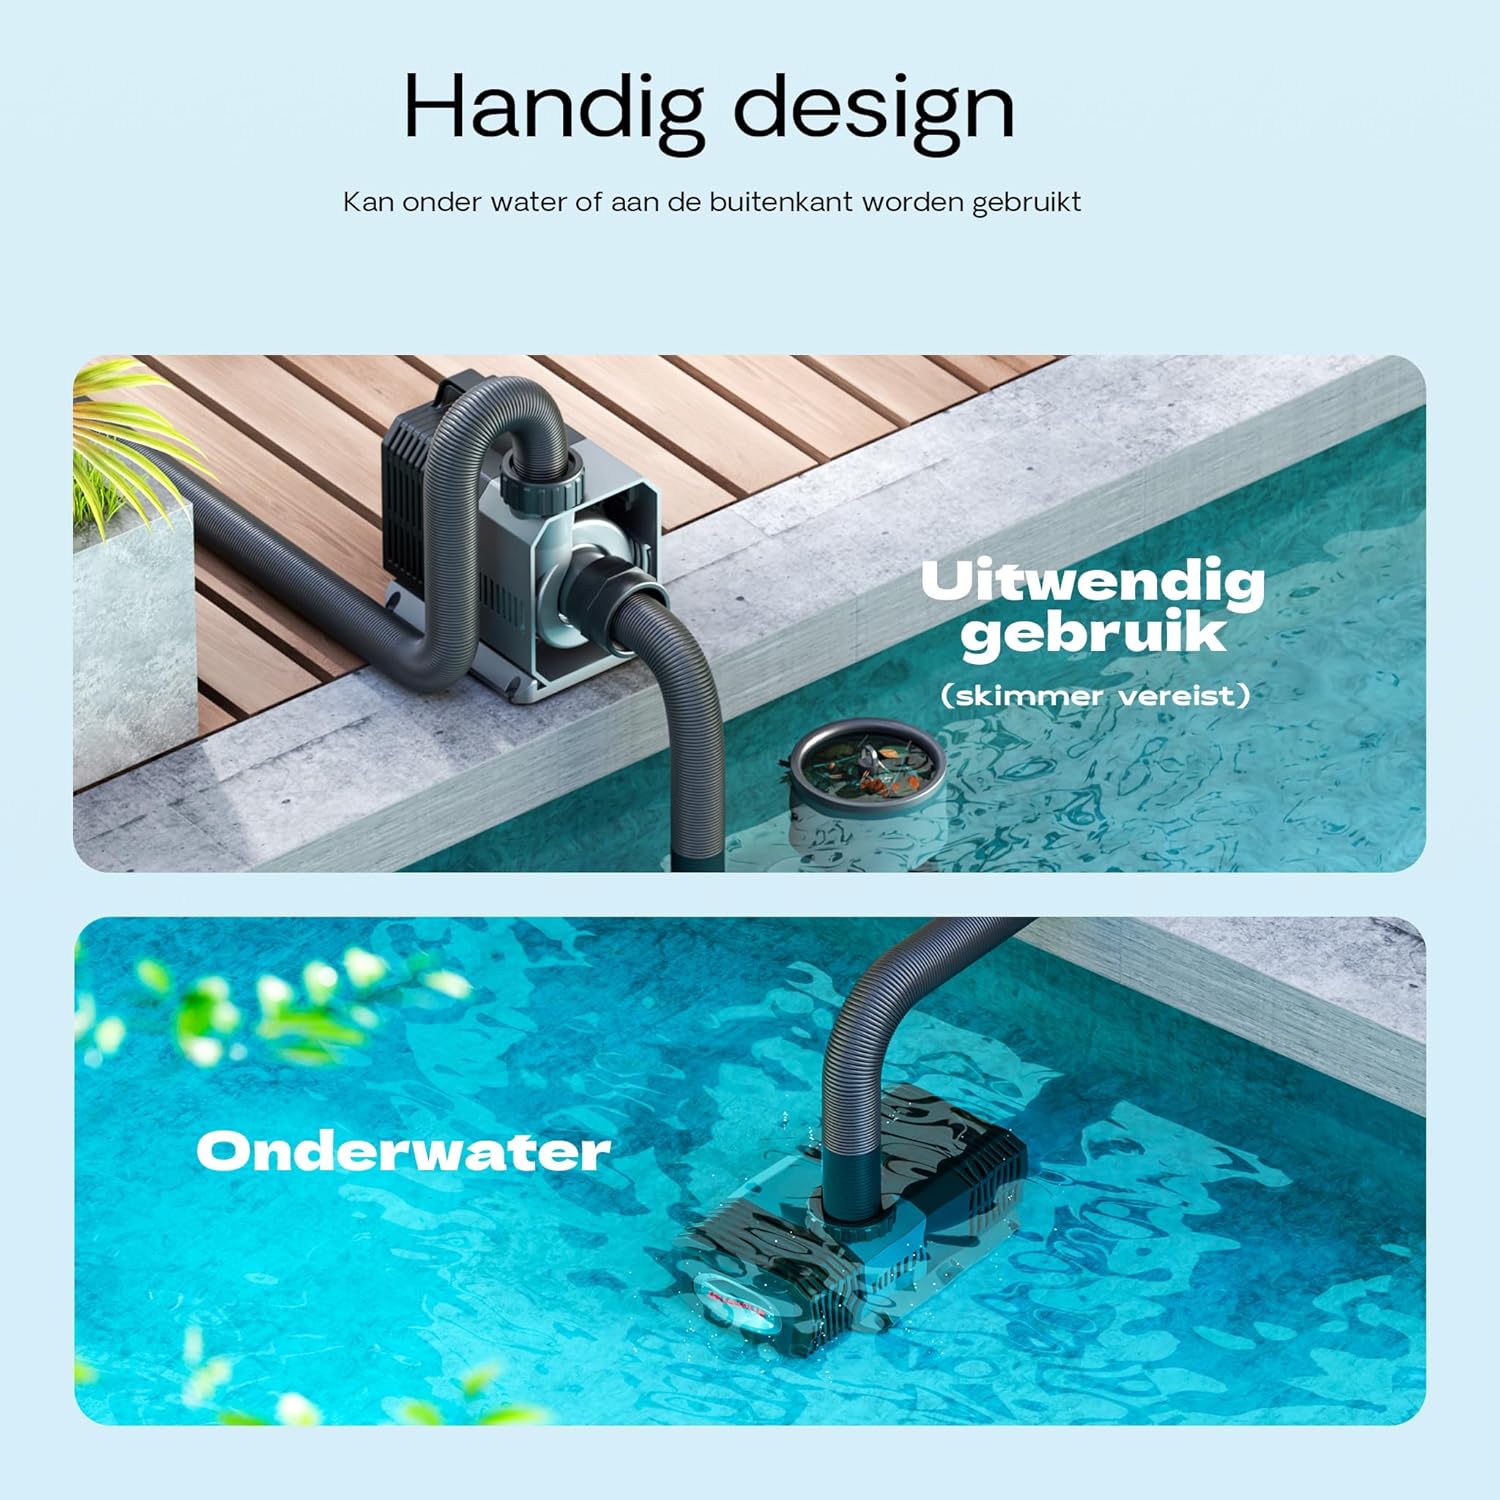
Image: Illustration of the pump's versatile placement options: external (with skimmer) or fully submerged.

Image: The pump set up for external use, positioned on the edge of a pond with hoses connected.
4.2 Hose Connection
Attach the appropriate hose nozzle (components 4 or 5) to the pump outlet. The pump supports hose diameters of 25mm, 32mm, 38mm, and 50mm. Ensure a secure, leak-free connection.
4.3 Flow Rate Adjustment
The pump features an adjustable flow control valve (component 1) to regulate the water flow. Rotate the valve to increase or decrease the flow rate according to your pond's size and water level requirements.

Image: Detail of the adjustable flow control valve on the pump, allowing for quick and easy flow regulation.
5. Operation
Once the pump is correctly installed and connected to the appropriate hoses, plug it into a grounded electrical outlet. The pump is designed for continuous operation. Ensure the pump is always submerged in water when operating in submersible mode, or properly primed if used externally, to prevent damage.
The SuperECO design ensures energy-efficient operation, minimizing power consumption while maintaining high flow rates.
6. Maintenance
Regular maintenance is crucial for the longevity and optimal performance of your pump. Always disconnect the pump from the power supply before any maintenance.
6.1 Cleaning the Filter Basket and Rotor
- Disconnect Power: Unplug the pump from the electrical outlet.
- Remove Filter Basket: Rotate the filter basket (component 2) and press the release button to detach it from the motor housing.
- Access Rotor: Hold the slide button and rotate the rotor housing (component 3) to open it.
- Clean Rotor and Shaft: Carefully remove the rotor (component 9) and pump shaft. Clean all components thoroughly with clean water and a soft brush to remove any debris or buildup.
- Check Seals: Inspect the O-ring (component 10) and other seals (component 8) for wear or damage. Ensure they are correctly positioned.
- Reassemble: Reassemble the pump in reverse order, ensuring all parts click securely into place.

Image: Step 1 shows disconnecting the pump. Step 2 shows rotating the filter basket to unlock it.

Image: Step 3 illustrates pressing a button to remove the filter basket. Step 4 shows holding a slide button to rotate the rotor housing.

Image: Step 5 demonstrates removing the rotor and shaft for cleaning. Step 6 highlights checking the red seal's position before reassembly.
7. Troubleshooting
| Problem | Possible Cause | Solution |
|---|---|---|
| Pump does not start | No power supply Blocked impeller/rotor Overheating protection activated | Check power connection and fuse Clean impeller/rotor (see Maintenance) Disconnect power, allow to cool, then restart |
| Reduced flow rate | Clogged filter basket Blocked hoses Impeller/rotor dirty Flow control valve partially closed | Clean filter basket Clear hoses of debris Clean impeller/rotor (see Maintenance) Adjust flow control valve to open position |
| Pump is noisy | Debris in impeller Pump not fully submerged (if applicable) Vibrations | Clean impeller/rotor Ensure pump is fully submerged Check rubber feet (component 14) for proper placement |
| Water leakage | Loose hose connections Damaged seals/O-rings | Tighten hose connections Inspect and replace damaged seals/O-rings |
8. Specifications

Image: Detailed dimensions of the pump and available hose nozzle sizes (25mm, 32mm, 38mm, 47mm, 50mm).
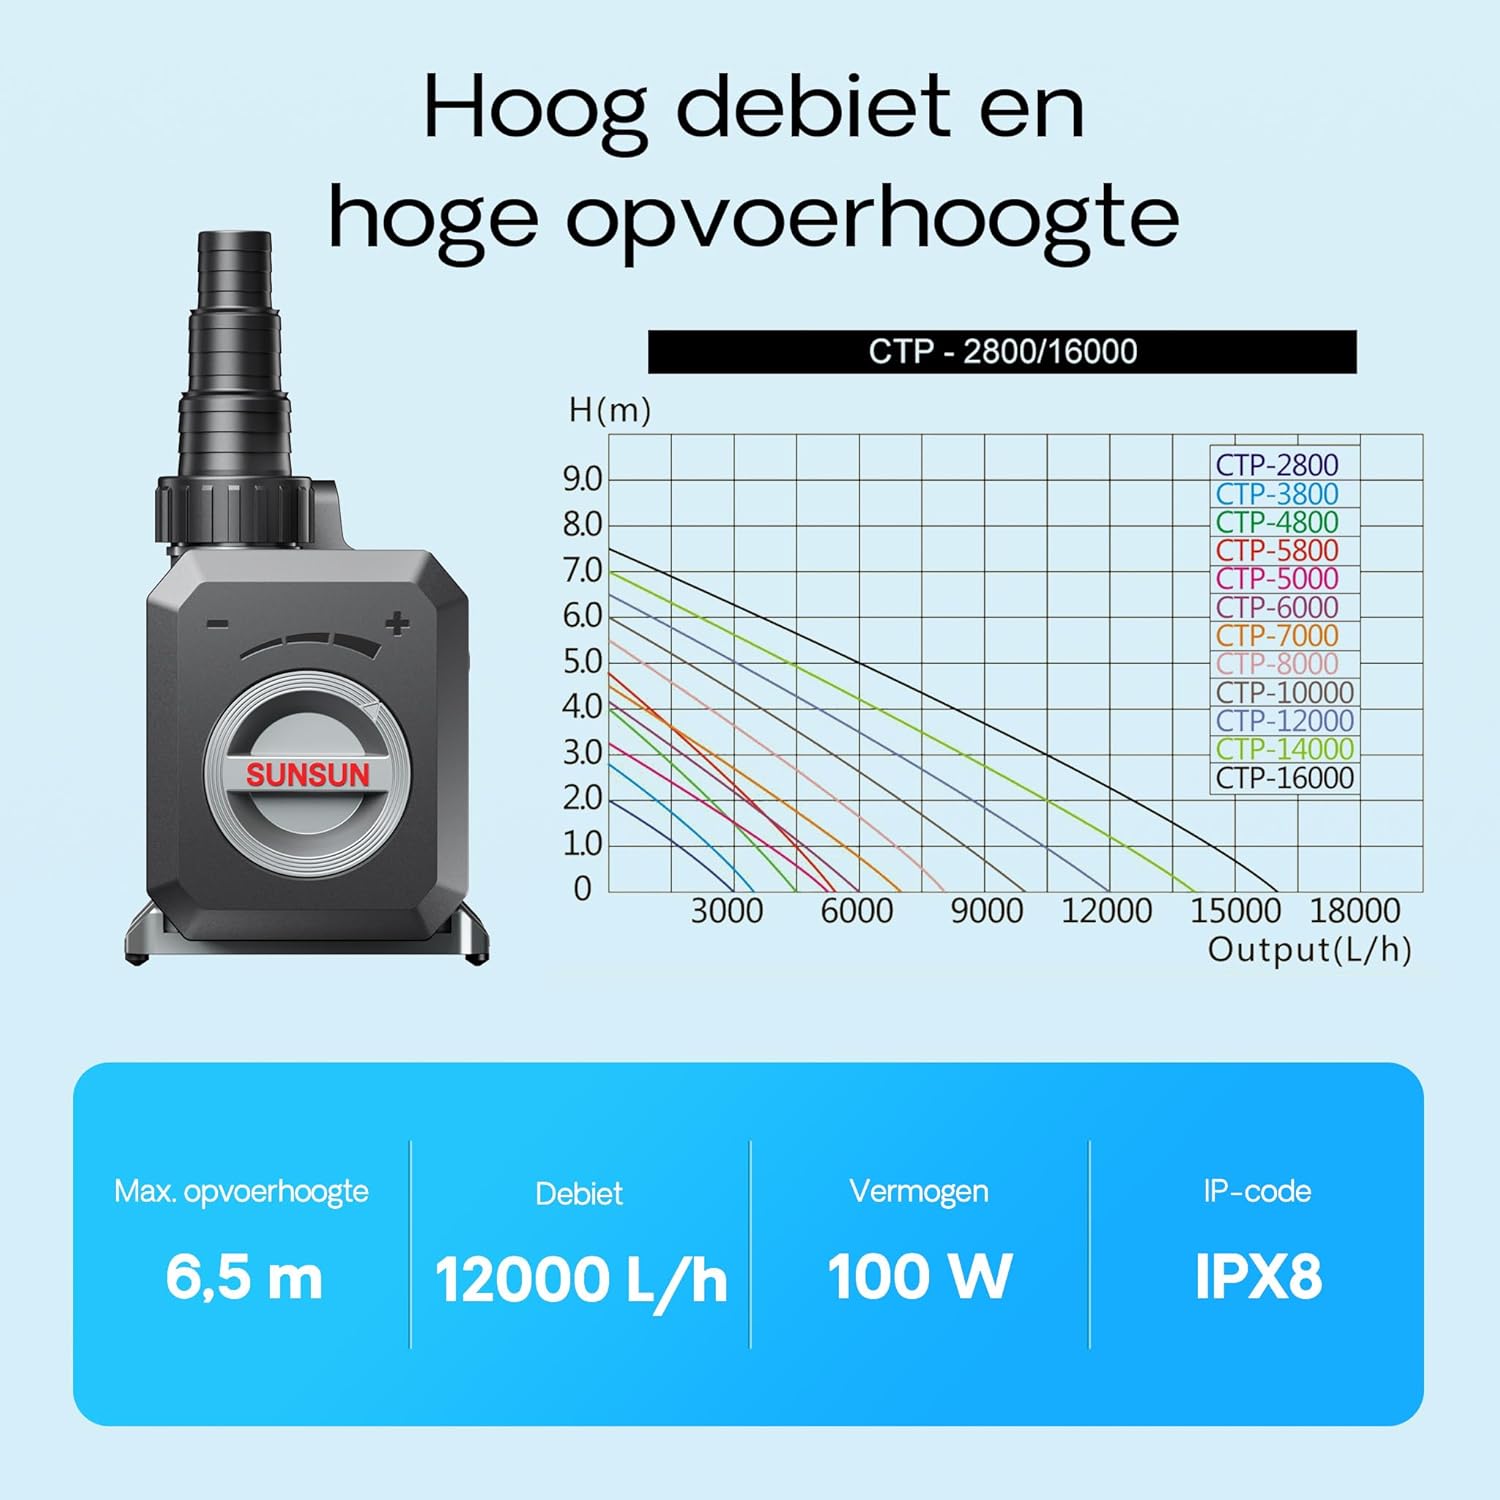
Image: Performance graph illustrating the relationship between flow rate and head height for different CTP pump models, with key specifications for the CTP-12000.
- Model: CTP-12000
- Brand: SunSun
- Maximum Flow Rate: 12000 Liters Per Hour (L/h)
- Power Consumption: 100W
- Maximum Head Height: 6.5 meters
- Cable Length: 10 meters
- Hose Connections: 25mm, 32mm, 38mm, 50mm
- Product Dimensions (L x W x H): 20.8 cm x 13.8 cm x 15.8 cm
- Material: ABS, PC
- IP Code: IPX8 (Protection against continuous immersion in water)
- Special Features: Copper-free ceramic shaft, Overheating protection, Blockage protection, Rust-resistant.
9. Warranty and Support
For warranty information or technical support, please refer to the documentation provided with your purchase or contact SunSun customer service directly. Keep your proof of purchase for warranty claims.