1. Introduction
Thank you for choosing the RICOO S2722 TV Wall Mount. This manual provides essential instructions for safe installation, proper operation, and maintenance of your new wall mount. Please read this manual thoroughly before installation and keep it for future reference.
The RICOO S2722 is an articulating and swivel TV wall mount designed for televisions ranging from 32 to 55 inches, supporting VESA standards up to 200x200 mm, and a maximum weight capacity of 20 kg. It offers flexible viewing angles with swivel and tilt capabilities.
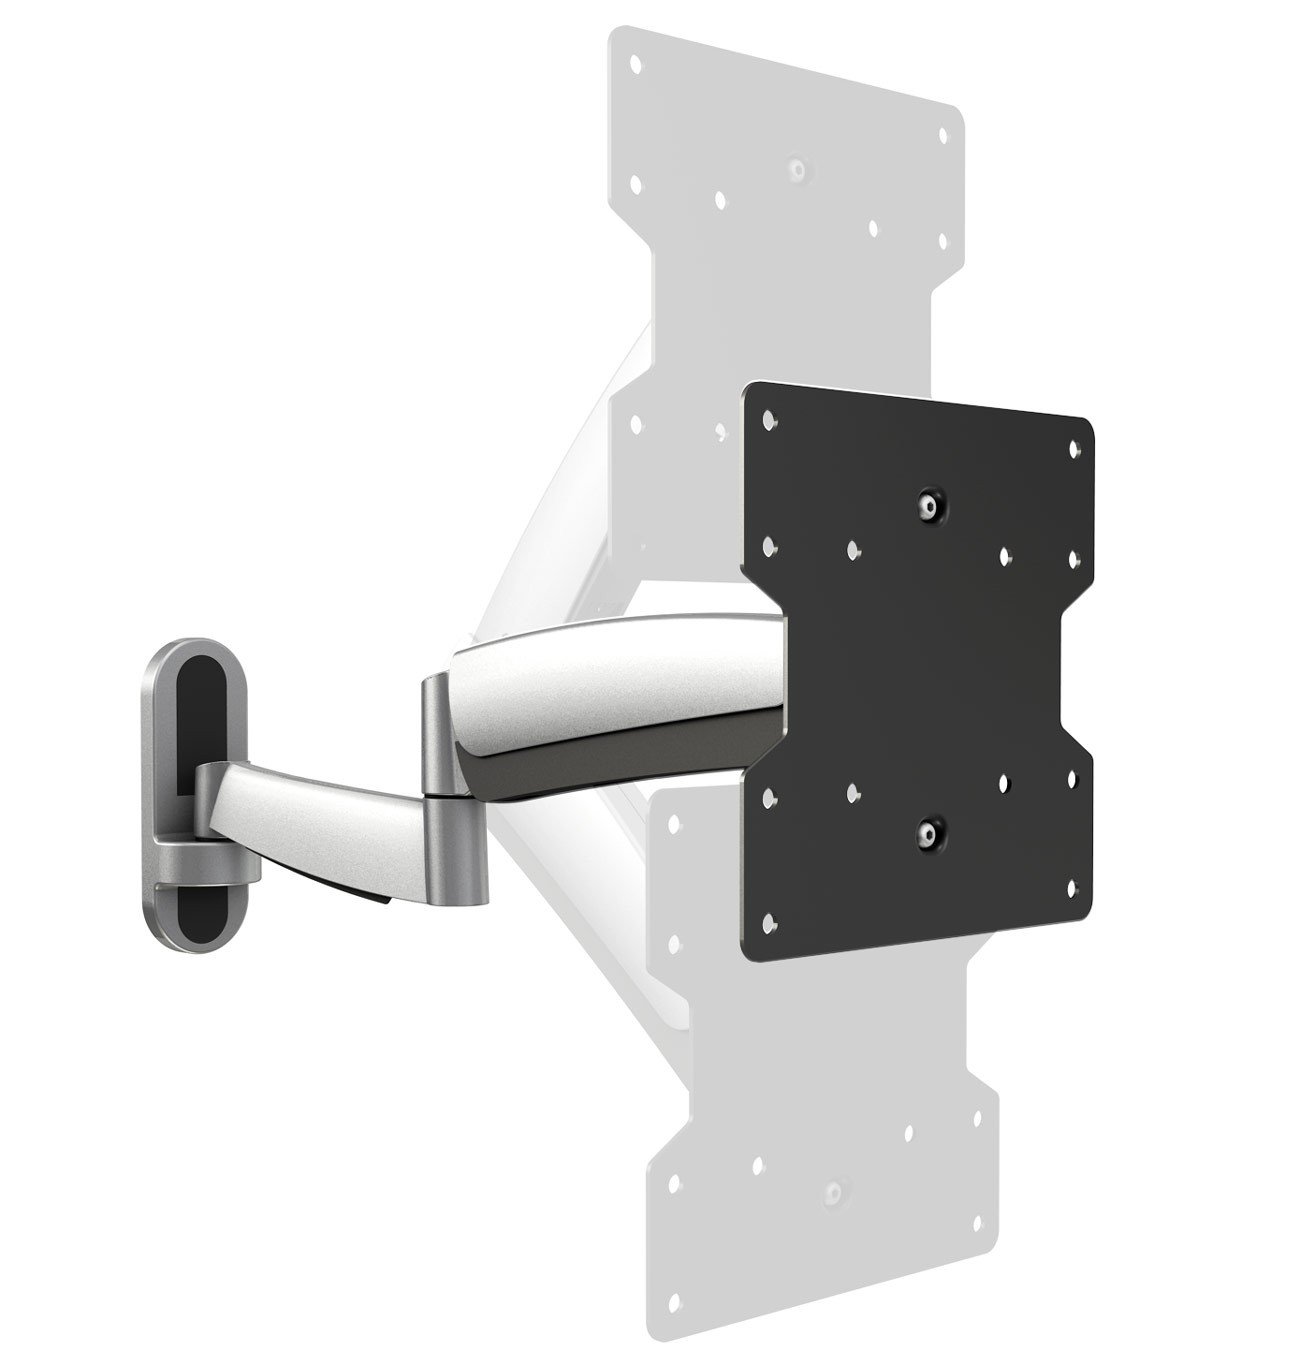
Figure 1: Front view of the RICOO S2722 TV Wall Mount.
2. Safety Information
WARNING: Failure to read and follow all instructions may result in personal injury, property damage, or voiding of your warranty.
- Weight Capacity: Do not exceed the maximum load capacity of 20 kg (44 lbs). This mount is intended for use only with the maximum weights indicated. Use with products heavier than the maximum weights indicated may result in instability causing possible injury.
- Screen Size: Compatible with TVs from 32 to 55 inches. Ensure your TV's VESA pattern and weight are within the specified limits.
- VESA Compatibility: This mount supports VESA patterns 100x100, 100x200, 200x100, and 200x200 mm. Verify your TV's VESA pattern before installation.
- Wall Type: This mount is designed for installation on solid concrete walls, brick walls, or wood stud walls. Do not install on drywall alone.
- Professional Installation: If you are unsure about the installation process or the suitability of your wall, consult a qualified professional.
- Children: Keep children away from the installation area. Small parts may be a choking hazard.
- Tools: Use appropriate tools for installation. Ensure all fasteners are securely tightened but do not overtighten.
3. Package Contents
Please check that all components are present and undamaged before beginning installation. If any parts are missing or defective, contact RICOO customer support.
Typically included components:
- Wall mount assembly (articulating arm and wall plate)
- VESA TV plate
- Mounting hardware kit (various screws, washers, spacers for TV and wall)
- Hex keys for adjustments
- Instruction manual
4. Setup and Installation
4.1 Pre-Installation Checks
Before you begin, ensure your TV and wall are compatible with the mount.
- Check TV Weight: Ensure your TV weighs no more than 20 kg (44 lbs).
- Check VESA Pattern: Measure the horizontal and vertical distance between the mounting holes on the back of your TV. This mount supports VESA 100x100, 100x200, 200x100, and 200x200 mm.
- Check TV Dimensions: Consider the overall dimensions of your TV to ensure it fits your desired viewing area and does not interfere with adjacent walls or furniture when articulated.
- Wall Structure: Identify your wall type (wood stud, concrete, brick). Ensure the wall can safely support the combined weight of the mount and your TV.

Figure 2: Measure VESA distances (A and B) on your TV.

Figure 3: Consider overall TV dimensions (C and D).
4.2 Attaching the VESA Plate to the TV
- Carefully place your TV face down on a soft, clean surface to prevent scratches.
- Align the VESA TV plate with the mounting holes on the back of your TV.
- Select the appropriate screws, washers, and spacers from the hardware kit that fit your TV's mounting holes. Use spacers if the TV back is uneven or if cables need clearance.
- Securely fasten the VESA plate to the TV using a screwdriver. Do not overtighten.

Figure 4: Attaching the VESA plate to the TV.
4.3 Mounting the Wall Plate to the Wall
- Determine the desired height and position for your TV. Use a pencil to mark the drilling locations for the wall plate.
- Use a stud finder to locate wood studs if installing on a wood stud wall. For concrete or brick walls, use appropriate anchors (not always included, may need to be purchased separately).
- Drill pilot holes at the marked locations. Ensure the holes are level using a spirit level.
- Attach the wall plate of the mount to the wall using the provided lag bolts and washers. Tighten securely.

Figure 5: Securing the wall mount to the wall.
4.4 Attaching the TV to the Wall Mount
- With assistance, carefully lift the TV (with the VESA plate attached) and hook it onto the articulating arm of the wall mount.
- Ensure the TV is securely seated on the mount.
- Tighten any safety screws or locking mechanisms on the mount to prevent accidental dislodgement.

Figure 6: Attaching the TV to the wall mount arm.
4.5 Cable Management
Route your TV cables through the integrated cable management channels on the mount arm to maintain a tidy appearance and prevent cable damage.

Figure 7: Cable management through the mount arm.
5. Operation and Adjustment
The RICOO S2722 mount offers various adjustments for optimal viewing comfort:
- Swivel: The articulating arm allows you to swivel your TV left or right to achieve the desired viewing angle. Gently push or pull the TV to adjust its horizontal position.
- Tilt: The TV plate can be tilted up or down to reduce glare or optimize vertical viewing angles. Loosen the tilt adjustment knobs (if present), adjust the angle, and then re-tighten. The maximum tilt angle is 30 degrees.
- Extension/Retraction: The articulating arm allows you to extend the TV away from the wall or push it back closer to the wall.
- Level Adjustment: Some mounts include a post-installation leveling feature. If your TV appears slightly unlevel, refer to the specific instructions for your model to make minor rotational adjustments.
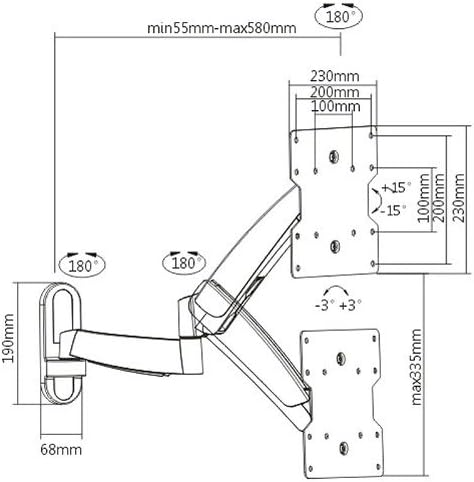
Figure 8: Dimensional drawing illustrating the mount's range of motion.
6. Maintenance
- Cleaning: Wipe the mount with a soft, dry cloth. Do not use abrasive cleaners or solvents.
- Periodic Checks: Periodically check all screws and connections to ensure they remain tight and secure. Re-tighten if necessary.
- Lubrication: Moving parts are generally maintenance-free. Do not apply lubricants unless specifically instructed by the manufacturer.
7. Troubleshooting
- TV is not level: Check if the wall plate was installed level. Some mounts allow for minor post-installation leveling adjustments. Refer to the specific mechanism on your mount.
- Mount feels loose: Ensure all wall mounting bolts and TV attachment screws are securely tightened. Do not overtighten.
- Difficulty adjusting movement: Check for any locking mechanisms that might be engaged. If the movement is too stiff or too loose, there might be tension adjustment screws (often requiring a hex key) that can be adjusted.
- Mount cannot hold TV weight: Re-verify your TV's weight against the mount's maximum capacity. If the TV is too heavy, the mount is not suitable. Ensure the wall anchors are appropriate for your wall type and correctly installed.
8. Specifications
| Feature | Specification |
|---|---|
| Model Number | S2722 |
| Mount Type | Wall Mount |
| Movement Type | Articulating, Swivel |
| Compatible TV Sizes | 32-55 inches (81-140 cm) |
| Maximum Load Capacity | 20 kg (44 lbs) |
| Supported VESA Standards | 100x100, 100x200, 200x100, 200x200 mm |
| Maximum Tilt Angle | 30 Degrees |
| Material | Aluminum, Iron, Steel Alloy |
| Item Weight | 3.5 kg |
9. Warranty and Support
9.1 Product Warranty
The RICOO S2722 TV Wall Mount comes with a 24-month warranty from the date of purchase. This warranty covers manufacturing defects and material faults under normal use. It does not cover damage caused by improper installation, misuse, accidents, or unauthorized modifications.
9.2 Customer Support
For technical assistance, missing parts, or warranty claims, please contact RICOO customer support. You can typically find contact information on the product packaging or the official RICOO website. Please have your model number (S2722) and proof of purchase ready when contacting support.
For more information, you may visit the RICOO store: RICOO Store on Amazon