1. Introduction
This manual provides essential instructions for the proper installation, operation, and maintenance of your C.E. Smith Trailer Hub Kit, Model 13311. This kit is designed to provide a reliable and efficient hub solution for your trailer axle. Please read this manual thoroughly before proceeding with installation or use to ensure safety and optimal performance.
2. Product Overview
The C.E. Smith Trailer Hub Kit (Model 13311) is a pre-assembled and pre-greased unit, ready for direct installation onto your trailer axle. It includes all necessary components for a complete hub replacement.
2.1 Key Features and Components
- Pre-assembled and Pre-greased: Ready for immediate installation, reducing setup time.
- Complete Kit: Includes the hub, dust cap, cotter pin, and wheel nuts.
- Spindle Compatibility: Designed for 1-1/16 inch spindles.
- Bolt Circle: 5 x 4.5 inch bolt pattern.
- Flange O.D.: 6-1/2 inches.
- Max Wheel Size: Suitable for wheels up to 14 inches.
- Hub I.D.: 1.98 inches.
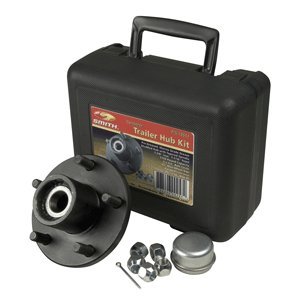
Figure 1: C.E. Smith Trailer Hub Kit, Model 13311. This image shows the complete hub assembly, including the pre-greased hub, dust cap, and wheel studs.
3. Setup and Installation
This hub kit is designed for straightforward replacement of an existing trailer hub. Ensure you have the correct tools and follow all safety precautions.
3.1 Safety Precautions
- Always use jack stands to support the trailer securely.
- Wear appropriate personal protective equipment (PPE), including gloves and eye protection.
- Ensure the trailer is on a level surface and the wheels are chocked.
3.2 Installation Steps
- Prepare the Trailer: Park the trailer on a level surface, engage the parking brake, and chock the wheels. Jack up the trailer axle until the wheel is off the ground and secure it with jack stands.
- Remove Old Hub:
- Remove the wheel from the old hub.
- Carefully pry off the dust cap.
- Remove the cotter pin and castle nut (or retaining washer and nut).
- Slide the old hub off the spindle. Be prepared for grease to be present.
- Inspect Spindle: Clean and inspect the trailer spindle for any damage, wear, or corrosion. Ensure it is clean and smooth before installing the new hub.
- Install New Hub:
- Carefully slide the new, pre-greased hub onto the spindle.
- Install the spindle nut, tightening it to the manufacturer's specifications while rotating the hub to seat the bearings.
- Back off the nut slightly, then re-tighten to a snug fit, ensuring the hub spins freely with minimal play.
- Insert a new cotter pin through the castle nut and spindle hole, bending the ends to secure it.
- Tap the new dust cap into place with a rubber mallet.
- Reattach Wheel: Mount the wheel onto the new hub and tighten the lug nuts to the manufacturer's recommended torque specifications.
- Final Check: Lower the trailer, remove the chocks, and perform a final check of all connections and ensure the wheel spins freely.
4. Operating Considerations
Once installed, the trailer hub operates as part of your trailer's wheel assembly. Proper operation involves regular checks and adherence to load limits.
- Load Capacity: Always adhere to the maximum load capacity of your trailer and its components, including the hubs. Overloading can lead to premature wear and failure.
- Pre-Trip Inspection: Before each trip, visually inspect the hubs for any signs of damage, leaks, or loose components.
- Temperature Check: During long trips, periodically check the temperature of the hubs by hand (carefully, as they can be hot). Excessive heat can indicate bearing issues.
5. Maintenance
Regular maintenance is crucial for extending the life of your trailer hubs and ensuring safe operation. While this kit comes pre-greased, periodic inspection and re-greasing are necessary.
- Greasing: Depending on usage and environmental conditions, trailer hubs typically require re-greasing every 12 months or 12,000 miles, or more frequently for marine applications. Use a high-quality marine-grade wheel bearing grease.
- Bearing Inspection: During re-greasing, inspect the bearings for pitting, corrosion, or excessive wear. Replace bearings if any damage is observed.
- Seal Inspection: Check the grease seals for cracks, tears, or signs of leakage. Replace seals as needed to prevent water and dirt intrusion.
- Dust Cap: Ensure the dust cap remains securely in place to protect the bearings from contaminants.
6. Troubleshooting
This section addresses common issues you might encounter with your trailer hub kit.
6.1 Common Issues and Solutions
- Excessive Heat from Hub:
- Cause: Over-tightened bearings, insufficient grease, worn bearings, or brake drag.
- Solution: Check bearing adjustment, add grease, inspect/replace bearings, check brake function.
- Unusual Noise (Grinding, Squealing):
- Cause: Worn or damaged bearings, lack of lubrication.
- Solution: Inspect and replace bearings, re-grease.
- Wheel Wobble or Play:
- Cause: Loose bearing adjustment, worn bearings, loose lug nuts.
- Solution: Adjust bearing nut, replace bearings, tighten lug nuts.
- Grease Leaking from Dust Cap:
- Cause: Over-greasing, damaged dust cap, worn grease seal.
- Solution: Do not over-fill, replace dust cap, replace grease seal.
If you are unable to resolve an issue, consult with a qualified trailer mechanic.
7. Specifications
| Feature | Specification |
|---|---|
| Model Number | 13311 |
| Spindle Size | 1-1/16 inches |
| Bolt Circle | 5 x 4.5 inches |
| Flange O.D. | 6-1/2 inches |
| Maximum Wheel Size | 14 inches |
| Hub I.D. | 1.98 inches |
| Item Weight | 9.8 Pounds |
| Item Dimensions (LxWxH) | 10 x 8 x 4 inches |
| Brand | SMITH (C.E. Smith) |
8. Warranty Information
C.E. Smith products are manufactured to high-quality standards. Specific warranty details may vary. Please refer to the original product packaging or the official C.E. Smith website for the most current and detailed warranty information regarding your Model 13311 Trailer Hub Kit.
Typically, warranties cover defects in materials and workmanship under normal use. Damage resulting from improper installation, neglect, accident, or modification is generally not covered.
9. Customer Support
For technical assistance, replacement parts, or further inquiries regarding your C.E. Smith Trailer Hub Kit, please contact C.E. Smith customer support. Contact information can usually be found on the product packaging or their official website.
When contacting support, please have your product model number (13311) and purchase details readily available.


