Product Overview
The Master Airbrush Cool Runner II Airbrush Kit is a professional multi-purpose airbrushing system designed for various applications. This kit includes a powerful dual-fan air compressor, three distinct airbrushes, a 6-color acrylic paint set, and essential cleaning accessories.

Image: Complete Master Airbrush Cool Runner II Airbrush Kit showing the compressor, three airbrushes, paint set, and accessories.
Video: A product showcase highlighting the features and capabilities of the Master Airbrush kit.
Components Included
Your Master Airbrush Cool Runner II Kit comes with the following items:
Cool Runner II Air Compressor (Model TC-320)
This superior performance 1/5 HP single-piston compressor features two cooling fans for extended continuous running time without overheating. It includes a pressure regulator with a gauge and a water trap filter for clean, moisture-free dry air.

Image: The Cool Runner II Air Compressor (Model TC-320) with its integrated airbrush holder.

Image: An internal diagram of the Cool Runner II compressor, illustrating the dual fan system for efficient cooling.
Airbrushes
The kit includes three versatile Master Airbrushes:
- Model G22 Dual-Action Airbrush: Features a 1/3 oz. gravity feed fluid cup and a 0.3mm tip, ideal for fine detail lines up to 1-1/2 inches.
- Model S68 Precision Dual-Action Siphon Feed Airbrush: Equipped with a 0.35mm tip and a 3/4 oz. siphon bottle, suitable for a range of spray patterns.
- Model E91 Single-Action Siphon Feed Airbrush: Comes with a 0.8mm tip and two 3/4 oz. siphon bottles, excellent for broader coverage.

Image: A visual representation of the three airbrush models: G22, S68, and E91.
Paint Set & Additional Accessories
- U.S. Art Supply Primary Colors Water-Based Acrylic Airbrush Paint Kit: 6 opaque colors (Bright Sapphire Blue, Grass Green, Bright Yellow, Bright Red, Deep Black, White) in 1 oz. bottles, plus reducer and cleaner.
- Cleaning Brush Set: For thorough maintenance of your airbrushes.
- Double Sided Color Mixing Wheel: A helpful tool for color theory and mixing.
- 6-Foot Braided Nylon Airbrush Hose: With 1/8" BSP female fittings.
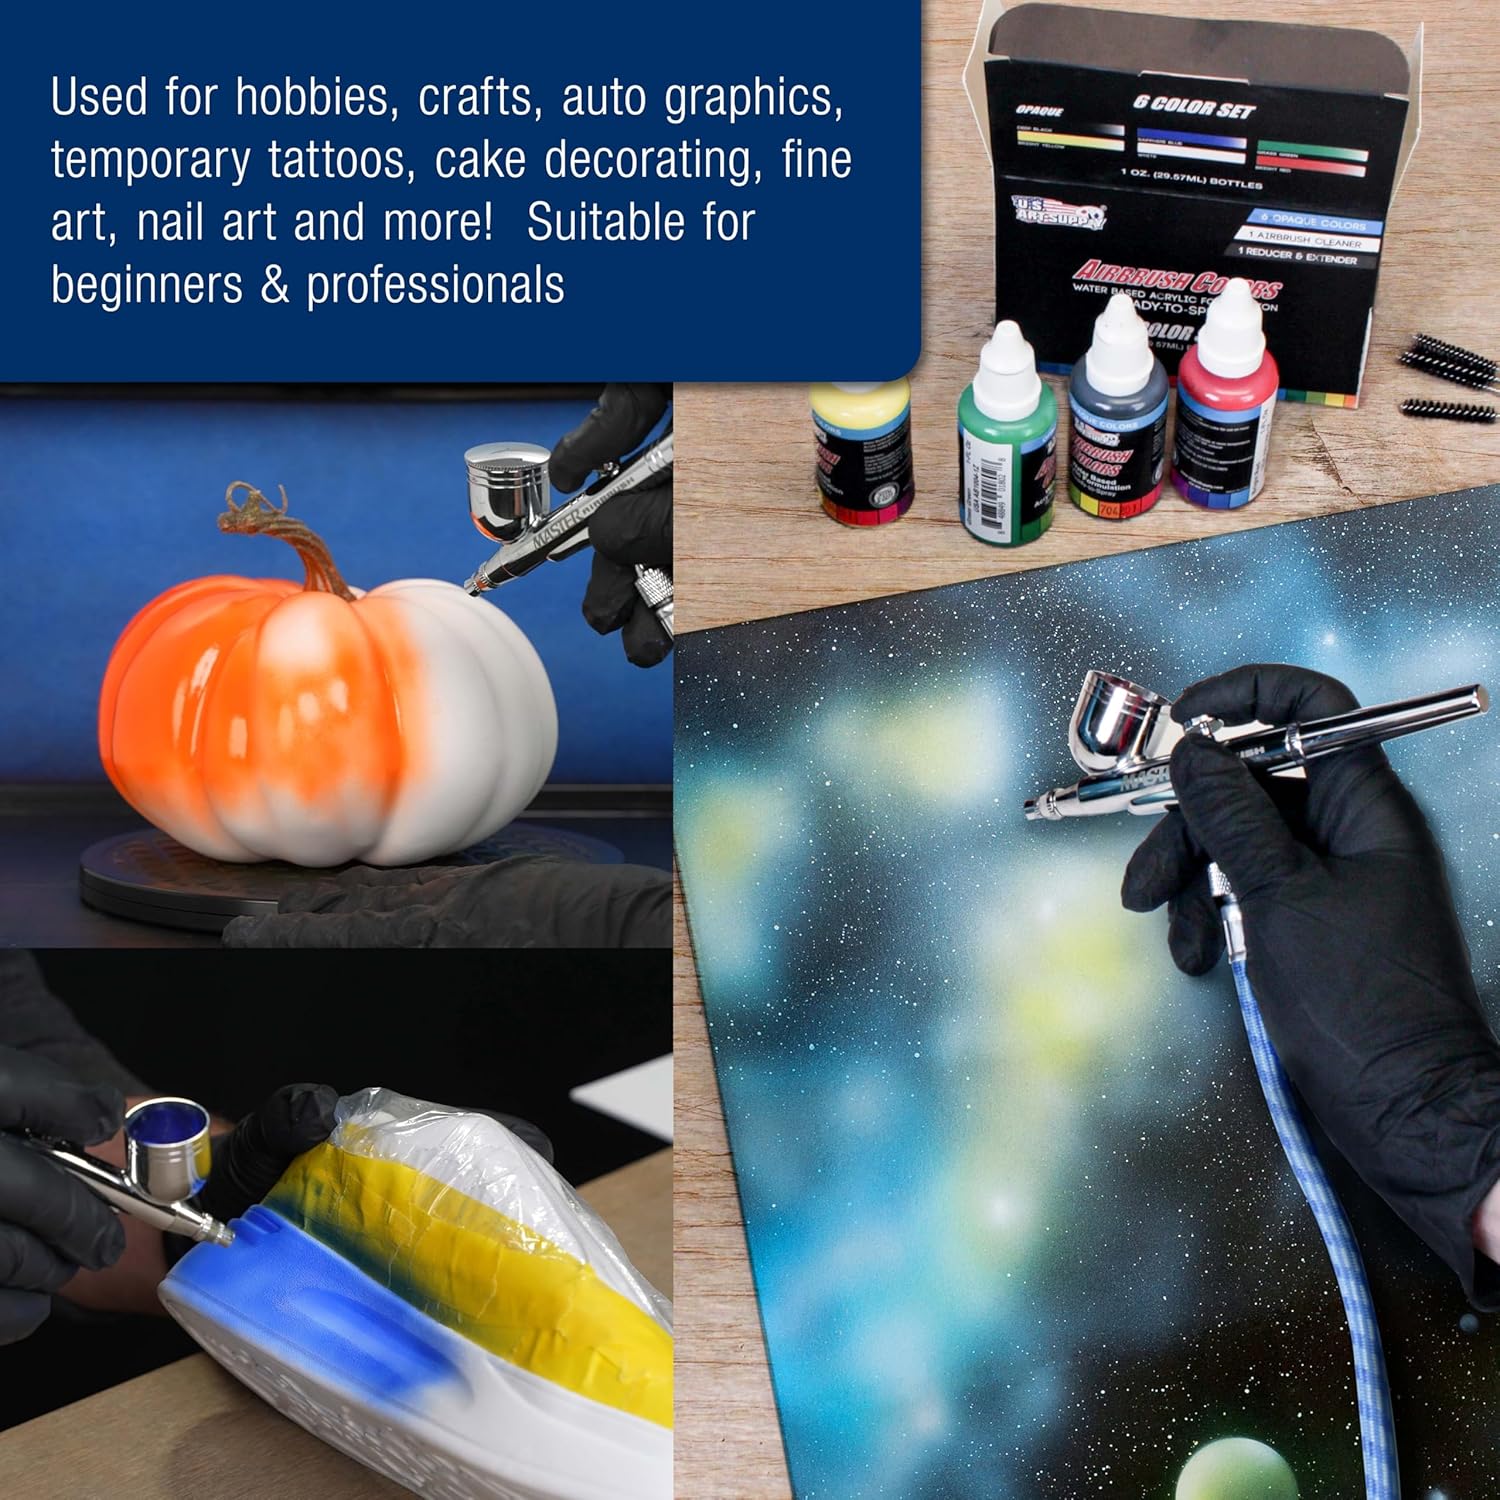
Image: The included 6-color acrylic paint set, along with airbrush reducer and cleaner.
Setup Instructions
Follow these steps to set up your Master Airbrush Cool Runner II Kit:
- Unpack Components: Carefully remove all items from their packaging. Inspect for any damage.
- Position Compressor: Place the compressor on a stable, level surface. Ensure adequate ventilation around the unit.
- Attach Airbrush Holder: Secure the dual airbrush holder to the compressor as shown in the product images.
- Connect Air Hose: Connect one end of the 6-foot braided nylon air hose to the air outlet on the compressor's pressure regulator. Connect the other end to your chosen airbrush. Ensure connections are secure to prevent air leaks.
- Power Connection: Plug the compressor's power cord into a suitable electrical outlet (120 Volts).
- Prepare Airbrush: Fill the airbrush's fluid cup or siphon bottle with your desired airbrush-ready paint. If using concentrated paint, dilute it with the included reducer to achieve the correct consistency.
Video: A demonstration of setting up the Master Airbrush Deluxe Kit, including connecting the airbrush to the compressor.
Operating Instructions
Once your kit is set up, follow these guidelines for effective airbrushing:
- Turn On Compressor: Flip the power switch on the compressor to the 'ON' position. The compressor will build pressure and then automatically shut off when it reaches 57 PSI. It will cycle on and off to maintain pressure during use.
- Adjust Air Pressure: Use the pressure regulator knob to set the desired air pressure for your project. Start with a lower PSI and gradually increase as needed.
- Test Spray: Before applying to your final surface, perform a test spray on a scrap piece of material to check paint consistency and spray pattern.
- Airbrush Control: For dual-action airbrushes (G22, S68), press down on the trigger for air, then pull back for paint. For single-action (E91), air and paint flow simultaneously when the trigger is pressed.
- Maintain Distance: Hold the airbrush approximately 2-6 inches from your surface, adjusting based on the desired line thickness and coverage.
- Consistent Movement: Move your hand in smooth, even strokes to ensure uniform paint application.
Video: A user demonstrating the application of paint with the airbrush set on various materials.
Video: A demonstration showcasing the different materials that can be airbrushed with this kit, such as fabric, ceramic, and canvas.
Maintenance and Cleaning
Proper cleaning and maintenance are crucial for the longevity and optimal performance of your airbrush kit.
- Immediate Cleaning: Clean your airbrush immediately after each use, especially when changing colors or finishing a session.
- Flush with Cleaner: Empty any remaining paint from the fluid cup/bottle. Fill with airbrush cleaner (or appropriate solvent for your paint type) and spray through until the spray runs clear.
- Disassemble Airbrush: Carefully disassemble the airbrush according to its specific model instructions. Pay attention to the nozzle, needle, and fluid tip.
- Clean Components: Use the provided cleaning brushes and airbrush cleaner to thoroughly clean all paint-contacting parts. Ensure no paint residue remains.
- Reassemble: Reassemble the airbrush carefully, ensuring all parts are correctly aligned and tightened.
- Compressor Maintenance: Periodically drain any accumulated moisture from the water trap filter on the compressor.
Tip: A spray pot or cleaning pot (not included in this standard kit) can be very helpful for cleaning airbrushes effectively by containing overspray and fumes.
Troubleshooting Common Issues
| Problem | Possible Cause | Solution |
|---|---|---|
| No air from airbrush | Compressor off, hose disconnected, air valve clogged. | Check power, reconnect hose, clean airbrush. |
| Paint sputtering or inconsistent spray | Paint too thick, clogged nozzle/needle, low air pressure. | Dilute paint, clean airbrush thoroughly, increase air pressure. |
| Airbrush leaks paint | Loose nozzle, damaged O-rings, bent needle. | Tighten nozzle, replace O-rings, straighten/replace needle. |
| Compressor runs constantly | Air leak in system, faulty pressure switch. | Check all connections for leaks, contact customer support if switch is faulty. |
Technical Specifications
| Feature | Detail |
|---|---|
| Brand | Master Airbrush |
| Model Name | TC 320 (Compressor) / KIT-SP19-20 (Kit) |
| Voltage | 120 Volts |
| Power Source | Corded Electric |
| Motor Horsepower | 0.2 Horsepower (1/5 HP) |
| Noise Level | 30 Decibels |
| Air Flow Capacity | 0.8 Cubic Feet Per Minute |
| Hose Length | 6 Feet |
| Item Weight | 11.75 Pounds |
| Airbrush Models Included | G22 (0.3mm), S68 (0.35mm), E91 (0.8mm) |
Warranty and Customer Support
Master Airbrush is dedicated to customer satisfaction. This product is backed by a trusted brand. For any questions, technical assistance, or warranty claims, please refer to the contact information provided in your product packaging or visit the official Master Airbrush store online.
You can find more information and products at the Master Airbrush Store.