Introduction
This manual provides essential instructions for the safe and effective use, setup, operation, and maintenance of your Powerbuilt 640980 10 Gallon Portable Shop Air Tank. Please read this manual thoroughly before operating the air tank to ensure proper function and to prevent injury or damage. Keep this manual for future reference.
The Powerbuilt 10 Gallon Portable Shop Air Tank is designed to provide a portable source of compressed air for various applications, including roadside assistance, camping, job sites, and off-road activities. Its heavy-duty steel construction ensures durability and reliability.
Important Safety Information
WARNING: Failure to follow these safety instructions may result in serious injury, property damage, or death.
- Always wear appropriate eye protection when operating or servicing the air tank.
- Do not exceed the maximum operating pressure of 125 PSI.
- Never modify the air tank or its components. Unauthorized modifications can lead to tank failure and serious injury.
- Inspect the tank, hose, and fittings for damage before each use. Do not use if any part is damaged or leaking.
- Keep children and bystanders away from the air tank during operation.
- Do not use the air tank to store or dispense any type of liquid or flammable gas. This product is designed for compressed air only.
- Regularly drain moisture from the tank to prevent corrosion and maintain tank integrity.
- If the tank loses air pressure rapidly or shows signs of damage, discontinue use immediately and have it inspected by a qualified professional.
- This product contains chemicals known to the State of California to cause cancer and birth defects or other reproductive harm. Wash hands after handling.
Product Overview and Components
Familiarize yourself with the key components of your Powerbuilt Portable Shop Air Tank:

Figure 1: Overall view of the Powerbuilt 10 Gallon Portable Shop Air Tank.
- 10 Gallon Steel Tank: Heavy-duty construction for durability.
- Carry Handle: Integrated handle for easy portability.
- 45" Rubber Hose: Provides extended reach for various applications.
- Built-in Pressure Gauge: Displays the remaining air volume in the tank.
- Shut-Off Valve: Controls air flow from the tank and prevents accidental leakage.
- Dual Foot Bars with Rubber Caps: Provides stability and protects surfaces.
- Drain Valve: Located at the bottom of the tank for moisture removal.
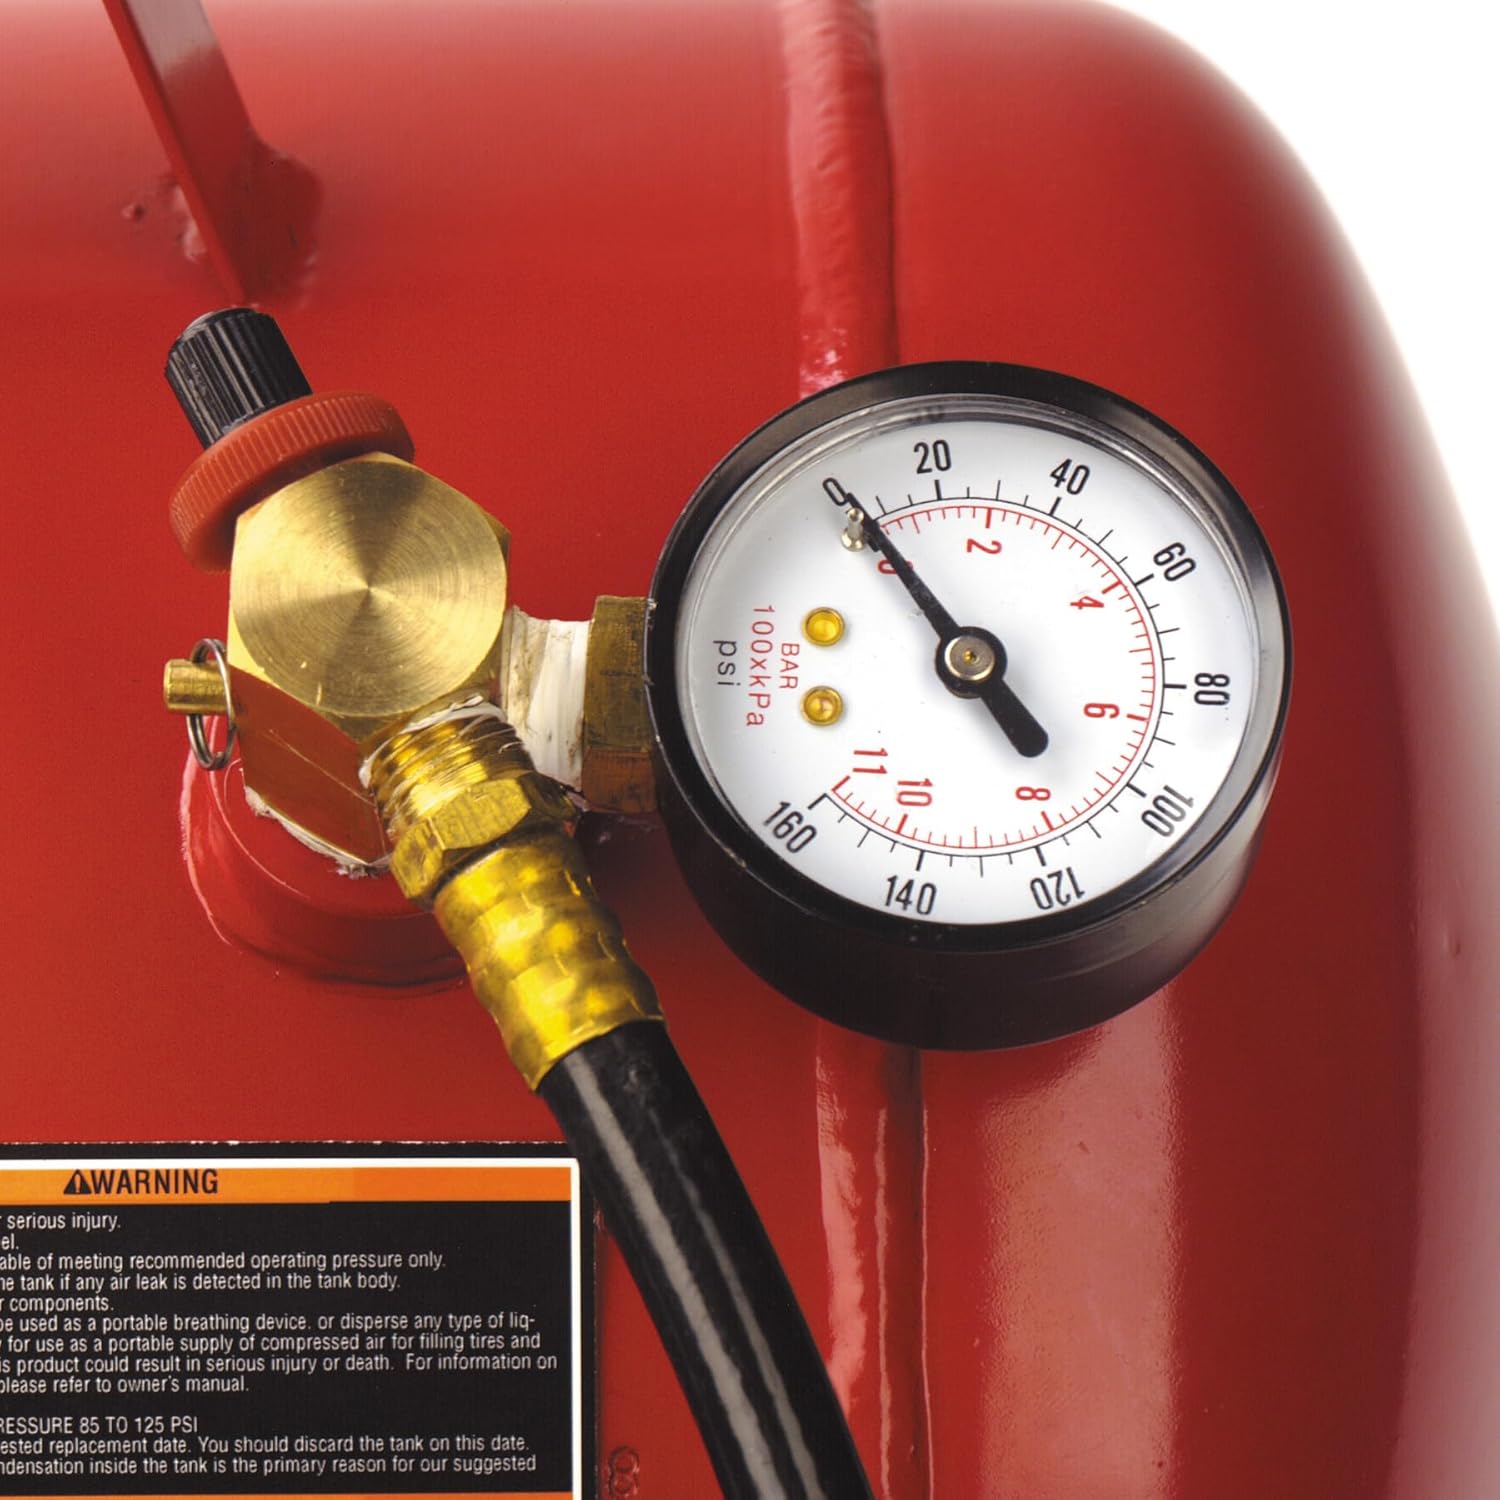
Figure 2: Detailed view of the pressure gauge and shut-off valve assembly. The gauge indicates current tank pressure, and the valve controls air release.

Figure 3: Close-up of the brass fitting at the end of the 45-inch rubber hose, designed for secure connection to various air tools or tire valves.
Setup
- Unpacking and Inspection: Carefully remove the air tank from its packaging. Inspect the tank, hose, gauge, and all fittings for any signs of shipping damage. Do not use the tank if any damage is observed.
- Positioning: Place the air tank on a stable, level surface. Ensure the dual foot bars are firmly on the ground to prevent tipping.
- Initial Connection (for filling): Connect the air tank to an external air compressor (not included) using a suitable air hose and quick-connect fittings. Ensure all connections are secure to prevent air leaks.
Operation
Filling the Air Tank
- Ensure the shut-off valve on the air tank is in the closed position.
- Connect your external air compressor's hose to the inlet valve on the Powerbuilt air tank.
- Turn on your air compressor and begin filling the tank. Monitor the built-in pressure gauge on the Powerbuilt tank.
- Fill the tank to your desired pressure, up to a maximum of 125 PSI. DO NOT EXCEED 125 PSI.
- Once the desired pressure is reached, turn off your air compressor and disconnect the hose from the air tank.
Using the Air Tank
- Connect the 45" rubber hose to the air tank's outlet fitting. Ensure it is securely attached.
- Attach the appropriate air tool or inflation accessory to the end of the 45" hose.
- Slowly open the shut-off valve to release compressed air. Adjust the valve to control the airflow as needed for your application.
- Monitor the pressure gauge during use to keep track of the remaining air volume.
- When finished, close the shut-off valve completely and disconnect the air tool/accessory.

Figure 4: The Powerbuilt Portable Air Tank in use, demonstrating its application for inflating a car tire. The 45-inch hose provides ample reach.
Maintenance
- Drain Moisture Regularly: Compressed air contains moisture which can accumulate inside the tank and cause corrosion. To prevent this, regularly open the drain valve located at the bottom of the tank to release any accumulated water. This should be done after each use or at least weekly, depending on usage frequency and humidity.
- Inspect Hose and Fittings: Periodically check the 45" rubber hose and all brass fittings for cracks, wear, or leaks. Replace any damaged components immediately.
- Clean the Tank: Wipe down the exterior of the tank with a damp cloth to remove dirt and debris. Avoid using harsh chemicals that could damage the paint or labels.
- Storage: Store the air tank in a cool, dry place away from direct sunlight and extreme temperatures. It is recommended to store the tank with a small amount of air pressure (e.g., 10-20 PSI) to help maintain the integrity of the seals, but ensure it is not fully pressurized for long-term storage.
Troubleshooting
| Problem | Possible Cause | Solution |
|---|---|---|
| Air tank does not hold pressure / loses air rapidly. |
|
|
| Low air pressure output. |
|
|
| Pressure gauge not working. |
|
|
Specifications
- Model Number: 640980
- Capacity: 10 Gallons (37.85 Liters)
- Maximum Pressure: 125 PSI
- Hose Length: 45 inches
- Material: Heavy-Duty Alloy Steel
- Product Dimensions (L x W x H): 24 x 12.63 x 15 inches
- Item Weight: Approximately 28.6 pounds
- Features: Built-in Gauge, Carry Handle, Shut-Off Valve, Dual Foot Bars, Drain Valve
Warranty and Support
Powerbuilt products are designed and manufactured to meet or exceed applicable ASME, ANSI, and US government quality standards. This Powerbuilt air tank is backed by a lifetime warranty on all tools, ensuring quality and reliability.
For warranty claims, technical assistance, or product support, please contact Powerbuilt customer service. Refer to the product packaging or the official Powerbuilt website for the most current contact information.
You can visit the official Powerbuilt store for more information: Powerbuilt Store


