1. Introduction
This user manual provides comprehensive instructions for the Hannspree Hanns.G HP195DCB 18.5-inch HD LED Monitor. Please read this manual thoroughly before operating your monitor to ensure proper setup, usage, and maintenance. Keep this manual for future reference.
2. Package Contents
Before proceeding with the setup, please verify that all items listed below are included in your package:
- Hannspree Hanns.G HP195DCB 18.5-inch HD LED Monitor
- Monitor Stand (Base and Vertical Support)
- Power Cable
- HDMI Cable
- User Manual (Quick Start Guide)
3. Setup and Assembly
3.1 Attaching the Stand
- Carefully remove the monitor and stand components from the packaging.
- Attach the vertical support to the base. Align the two small holes on the vertical support with the corresponding protrusions on the base. Push until you hear a "click" sound, indicating it's securely fastened.
- Attach the assembled stand to the back of the monitor. Align the stand's mounting mechanism with the slot on the back of the monitor. Push firmly until it clicks into place. Ensure the monitor is stable on a flat surface.

Figure 1: Assembled Hannspree Hanns.G HP195DCB Monitor.
3.2 Connecting the Monitor
Locate the ports on the back of your monitor for connections.
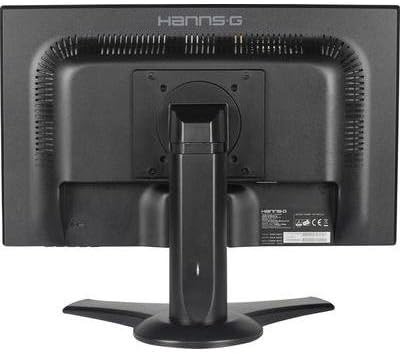
Figure 2: Rear ports of the Hannspree Hanns.G HP195DCB Monitor.
- Power Connection: Connect one end of the power cable to the monitor's power input port and the other end to a standard electrical outlet.
- Video Connection:
- HDMI: Connect one end of the HDMI cable to the HDMI port on the monitor and the other end to the HDMI output port on your computer or video source.
- VGA (D-Sub): Connect one end of the VGA cable to the VGA port on the monitor and the other end to the VGA output port on your computer or video source.
- Audio Connection (Optional):
- Audio In: If using VGA, connect an audio cable from your computer's audio output to the monitor's Audio In port.
- Audio Out: Connect headphones or external speakers to the Audio Out port for sound.
4. Operating Instructions
4.1 Powering On/Off
To power on the monitor, press the power button located on the back of the monitor. Press it again to power off.
4.2 On-Screen Display (OSD) Menu Navigation
The monitor features a joystick control on the back for navigating the OSD menu and adjusting settings.
- Press (Click): Powers the monitor on/off.
- Move Right: Opens the main OSD menu panel with options like Input, Picture, Color Setting, Audio, and Color.
- Move Down: Adjusts the volume.
- Move Up: Changes the input source (Input).
- Move Left: Modifies the display brightness settings (SmartImage modes like EasyRead, Office, Photo, Movie, Game, Economy, LowBlue Mode, Off).
Navigate through the menu options by moving the joystick. Press the joystick to confirm selections.
4.3 Extending or Duplicating Display (Windows Example)
After connecting your monitor to a computer, you can configure how your desktop is displayed:
- Ensure both the monitor and computer are powered on.
- On your computer, search for "Duplicate or extend content to a connected display" or navigate to Display Settings.
- In the display settings, you will see options to "Duplicate these displays" (show the same content on both screens) or "Extend these displays" (use the monitor as an additional screen). Select "Extend these displays" for a multi-monitor setup.
- You can rearrange the display order by dragging the monitor icons in the settings to match their physical arrangement, which affects cursor movement between screens.
- Confirm changes to apply the new display configuration.
5. Maintenance
Proper maintenance ensures the longevity and optimal performance of your monitor.
- Cleaning the Screen: Gently wipe the screen with a soft, lint-free cloth. For stubborn marks, dampen the cloth with a small amount of water or a specialized screen cleaner. Avoid using harsh chemicals or abrasive materials.
- Cleaning the Casing: Use a soft, dry cloth to wipe the monitor casing.
- Ventilation: Ensure the ventilation openings on the monitor are not blocked to prevent overheating.
- Power Off: Always power off the monitor and unplug it from the power outlet before cleaning or if it will be unused for an extended period.
6. Troubleshooting
If you encounter issues with your monitor, refer to the following common troubleshooting steps:
- No Power:
- Check if the power cable is securely connected to both the monitor and the power outlet.
- Ensure the power outlet is functioning correctly by plugging in another device.
- No Signal / Blank Screen:
- Verify that the video cable (HDMI or VGA) is securely connected to both the monitor and your computer.
- Ensure the correct input source is selected on the monitor using the OSD menu (move joystick Up).
- Check if your computer is powered on and not in sleep mode.
- Image Quality Issues (Blurry, Distorted, Incorrect Colors):
- Adjust the monitor's resolution to its native resolution (1366 x 768) through your computer's display settings.
- Check the video cable for damage or loose connections. Try a different cable if available.
- Reset monitor settings to factory defaults via the OSD menu.
- No Sound:
- Ensure the volume is not muted or set too low on both the monitor and your computer.
- If using an audio cable, ensure it is correctly connected to the Audio In/Out ports.
- If using HDMI, ensure your computer's audio output is set to the HDMI device.
If the problem persists after trying these steps, please contact customer support.
7. Specifications
| Feature | Specification |
|---|---|
| Brand | Hannspree |
| Model | HP195DCB |
| Screen Size | 18.5 Inches (47 cm) |
| Display Technology | LED |
| Resolution | 1366 x 768 Pixels (HD) |
| Maximum Resolution | 1366 x 768 |
| Aspect Ratio | 16:9 |
| Brightness | 250 cd/m² |
| Contrast Ratio | 1000:1 |
| Response Time | 5 ms |
| Refresh Rate | 75 Hz |
| Connectivity Technology | D-Sub (VGA), DVI |
| Special Features | Height Adjustment, Tilt Adjustment, Swivel Adjustment |
| Mounting Compatibility | VESA Wall Mount |
| Power Consumption | 22 Watts |
| Product Dimensions | 44.42 x 45.62 x 21.72 cm |
| Product Weight | 3.38 kg |
8. Warranty and Support
For warranty information and technical support, please refer to the warranty card included in your product packaging or visit the official Hannspree website. You can typically find support resources, FAQs, and contact information there.