
Introduction
This manual provides essential information for the safe and effective operation, maintenance, and troubleshooting of your BLACK+DECKER REVIVA 12V Hammer Drill (REVCHD12C). Please read this manual thoroughly before using the tool and retain it for future reference.
The REVIVA 12V MAX* Hammer Drill/Driver features a tool housing made with Tritan™ Renew 50% certified recycled material. It is designed for versatility, offering hammer, drill, and screwdriver modes for various applications.
Important Safety Information
Always follow basic safety precautions to reduce the risk of fire, electric shock, and personal injury. Keep your work area clean and well-lit. Do not operate power tools in explosive atmospheres, such as in the presence of flammable liquids, gases, or dust.
- Wear appropriate personal protective equipment, including safety glasses, hearing protection, and gloves.
- Secure the workpiece before drilling.
- Ensure the drill bit is properly secured in the chuck.
- Do not force the tool; let the tool do the work at the proper speed.
- Keep hands clear of rotating parts.
- Disconnect the tool from the charger before making any adjustments or changing accessories.
Product Components
Familiarize yourself with the key components of your hammer drill:
- Chuck: Holds drill bits and screwdriver bits.
- Torque Collar/Mode Selector: Adjusts torque settings and selects between drill, hammer, and screwdriver modes.
- Speed Selector: Controls the operating speed (low/high).
- Trigger Switch: Activates the tool and controls speed based on pressure.
- Forward/Reverse Button: Changes the direction of rotation.
- LED Work Light: Illuminates the work area.
- Integrated Battery: Provides power to the tool.
- Charging LED Indicator: Shows charging status.
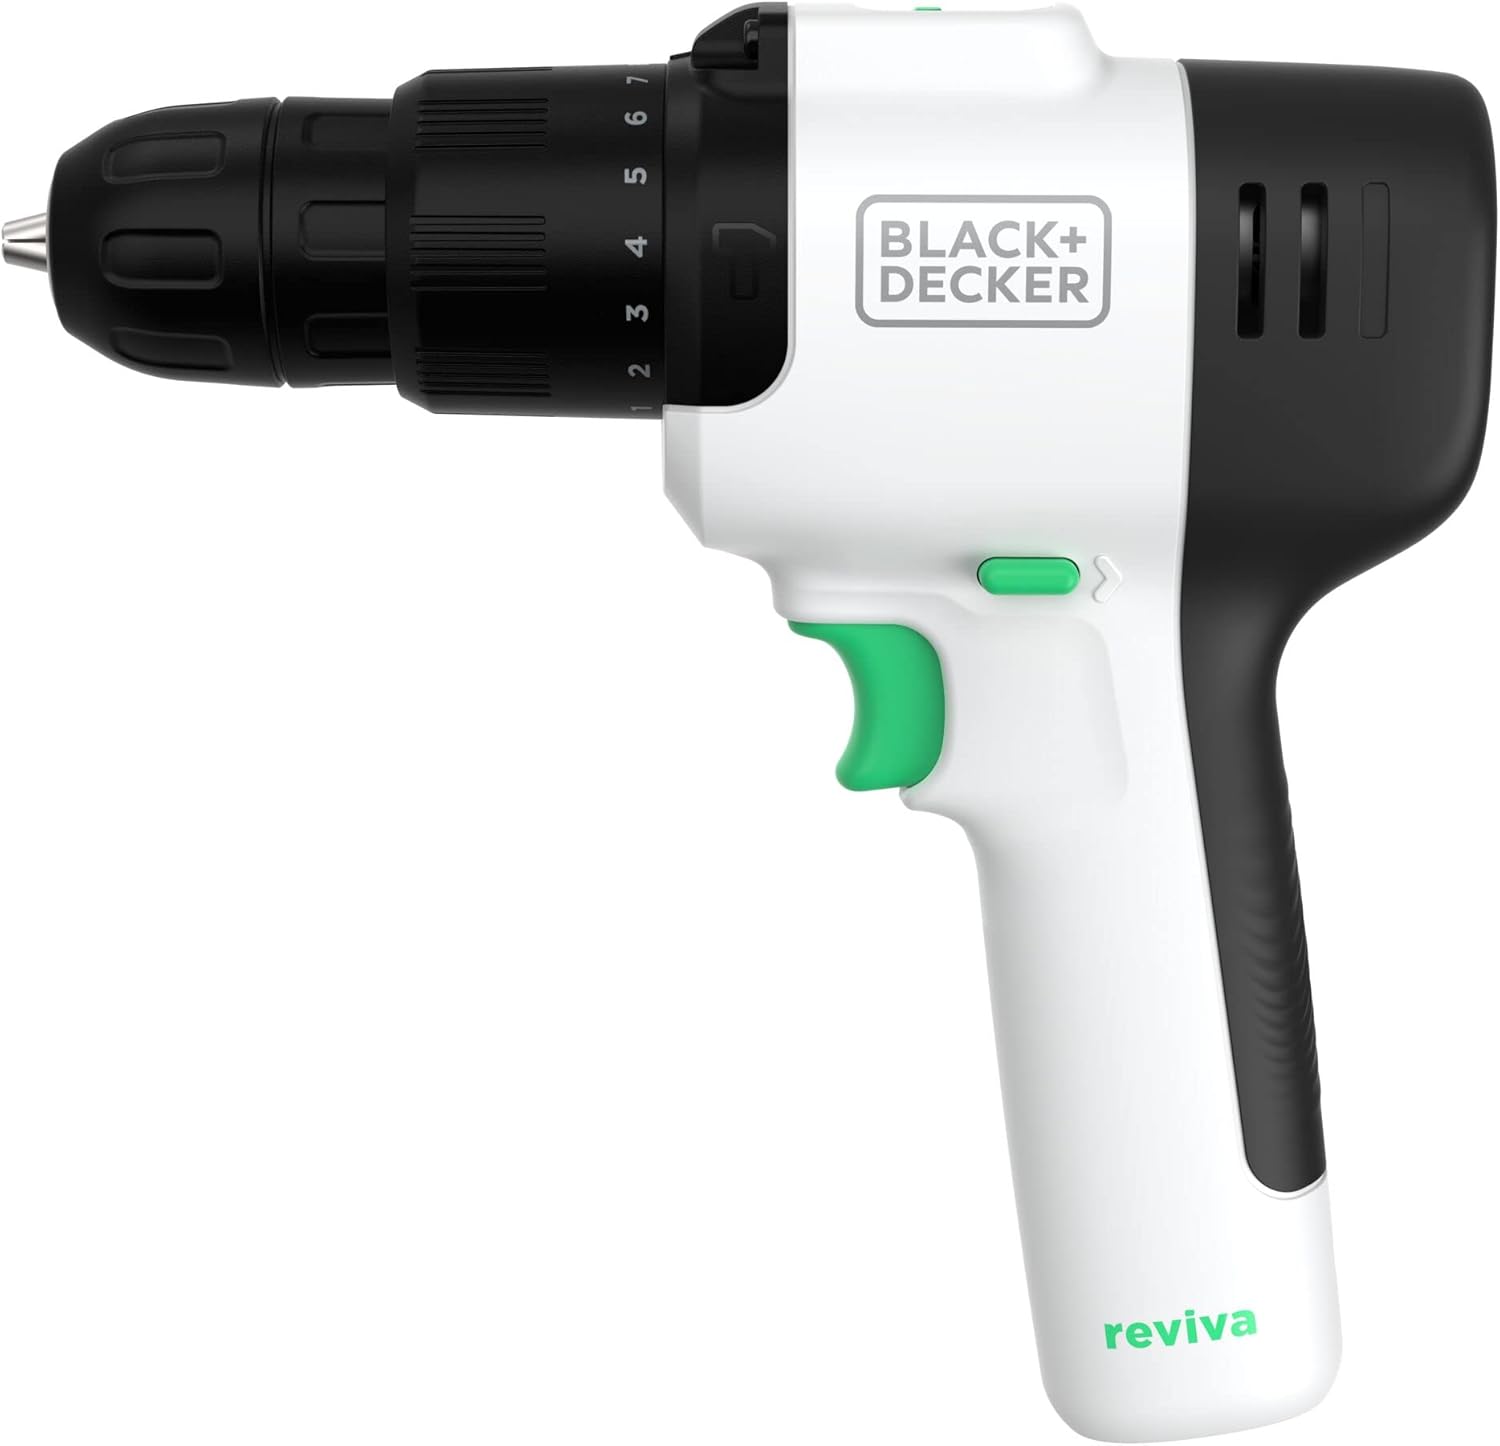
Figure 1: Front view of the BLACK+DECKER REVIVA 12V Hammer Drill, showing the chuck, torque collar, and handle.
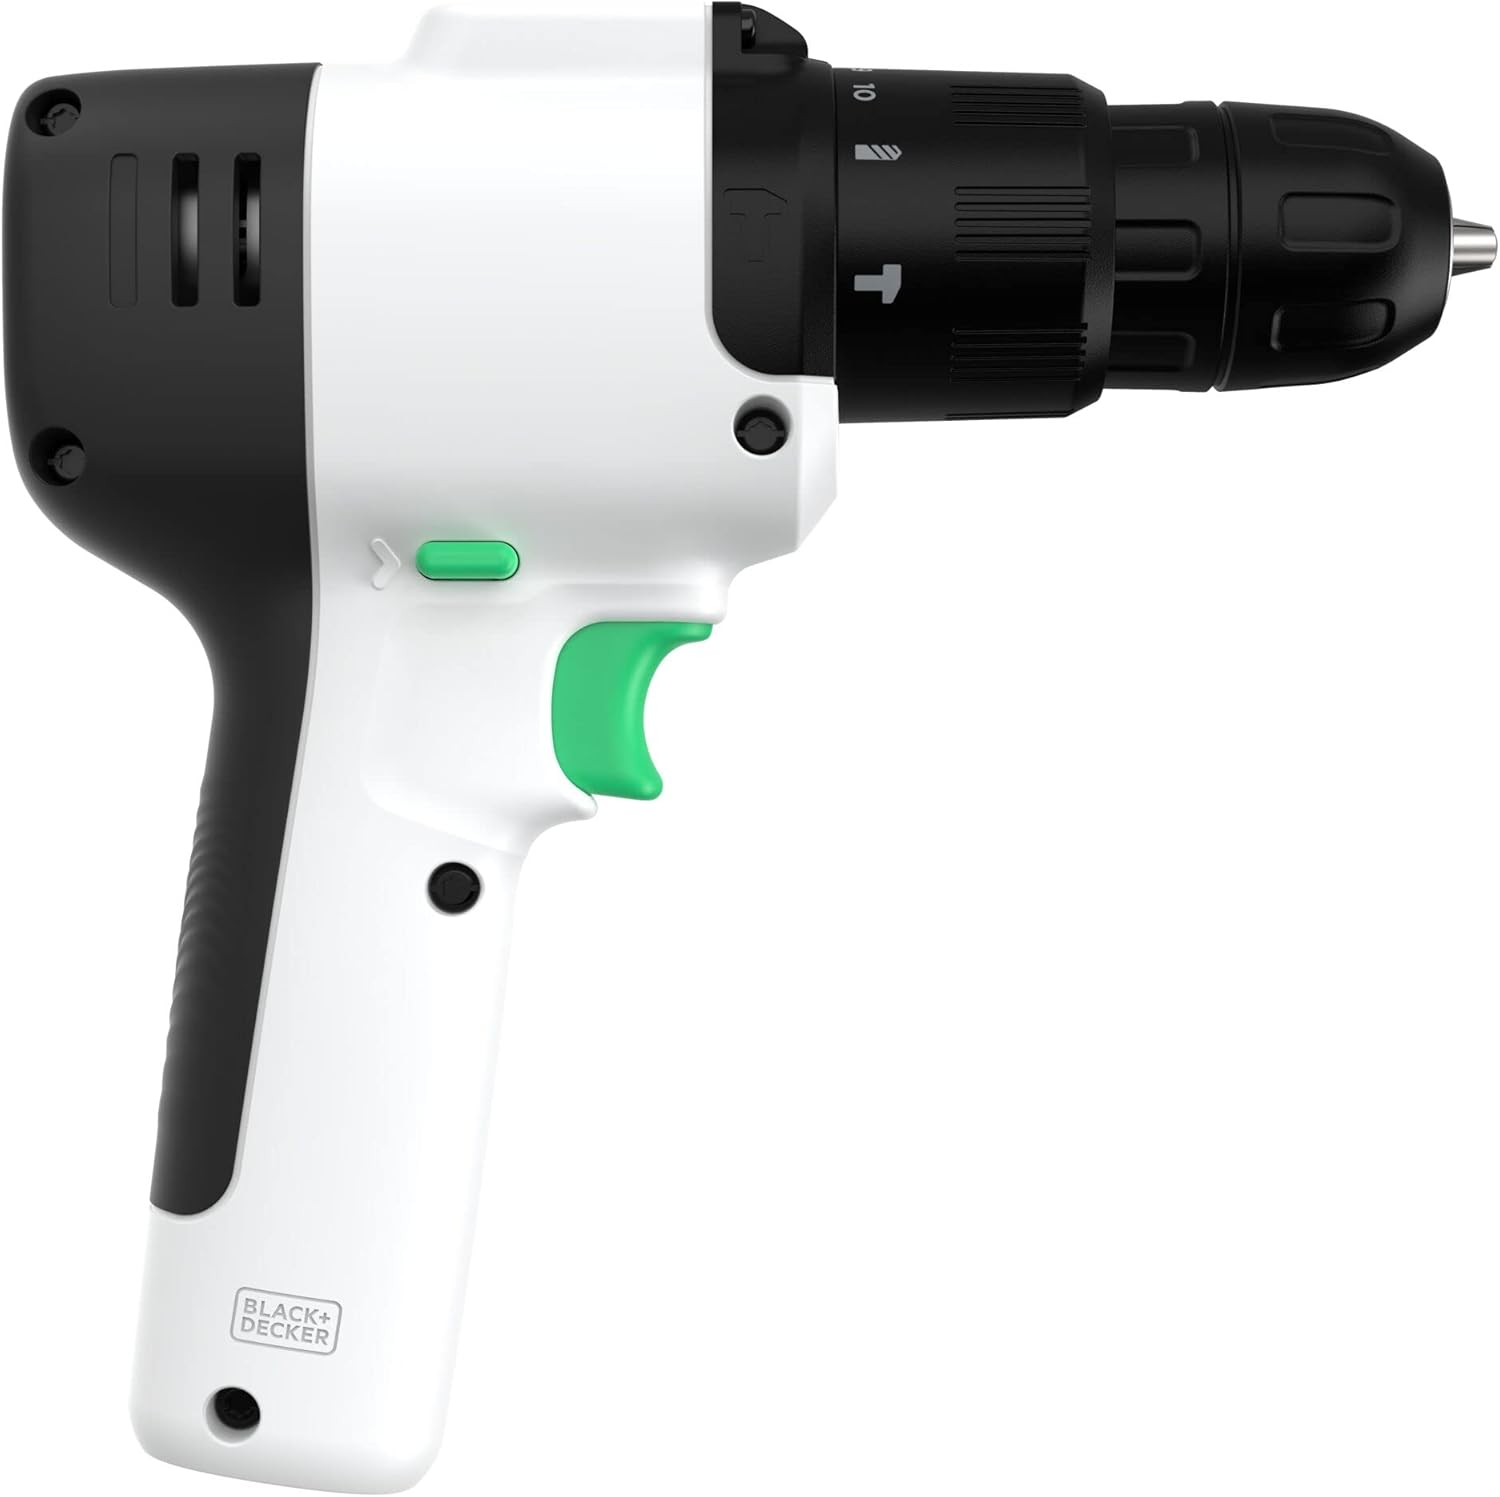
Figure 2: Side view of the BLACK+DECKER REVIVA 12V Hammer Drill, highlighting the trigger, forward/reverse switch, and ventilation.
Setup and Charging
Charging the Battery
The REVIVA 12V Hammer Drill features an integrated battery. Before first use, fully charge the tool.
- Connect the charger to a standard electrical outlet.
- Plug the charger into the charging port on the tool.
- The charging LED light will illuminate to indicate charging is in progress.
- Charging is complete when the LED light turns off.
Note: The tool is supplied with a charger and a double-ended bit.
Installing and Removing Bits
- Ensure the tool is off and the forward/reverse button is in the center (locked) position.
- Rotate the chuck counter-clockwise to open the jaws.
- Insert the desired drill bit or screwdriver bit fully into the chuck.
- Rotate the chuck clockwise to tighten the jaws securely around the bit. Hand-tighten firmly.
- To remove a bit, rotate the chuck counter-clockwise and pull the bit out.
Operating Instructions
Selecting Operating Mode
The REVIVA hammer drill offers three operating modes:
- Hammer Drill Mode: For drilling into concrete and brick. Select this mode by rotating the torque collar to the hammer icon.
- Drill Mode: For drilling into wood, metal, or plastic. Select this mode by rotating the torque collar to the drill icon.
- Screwdriver Mode: For driving and removing screws. This mode has adjustable torque settings from 1 to 10. Select this mode by rotating the torque collar to the desired number (1 for low torque, 10 for high torque).

Figure 3: Illustration of the three operating modes (Hammer, Drill, Screwdriver) available on the REVIVA 12V Hammer Drill.
Adjusting Speed and Direction
- Speed Selector: Use the speed selector switch (typically located on top of the tool) to choose between low speed (position 1) for high torque applications and high speed (position 2) for faster drilling or driving.
- Forward/Reverse Button: Push the button to the left for forward rotation (drilling/driving screws in) and to the right for reverse rotation (removing screws). Center position locks the trigger.

Figure 4: Close-up view of the forward/reverse selector switch, located above the trigger, allowing for easy change of rotation direction.
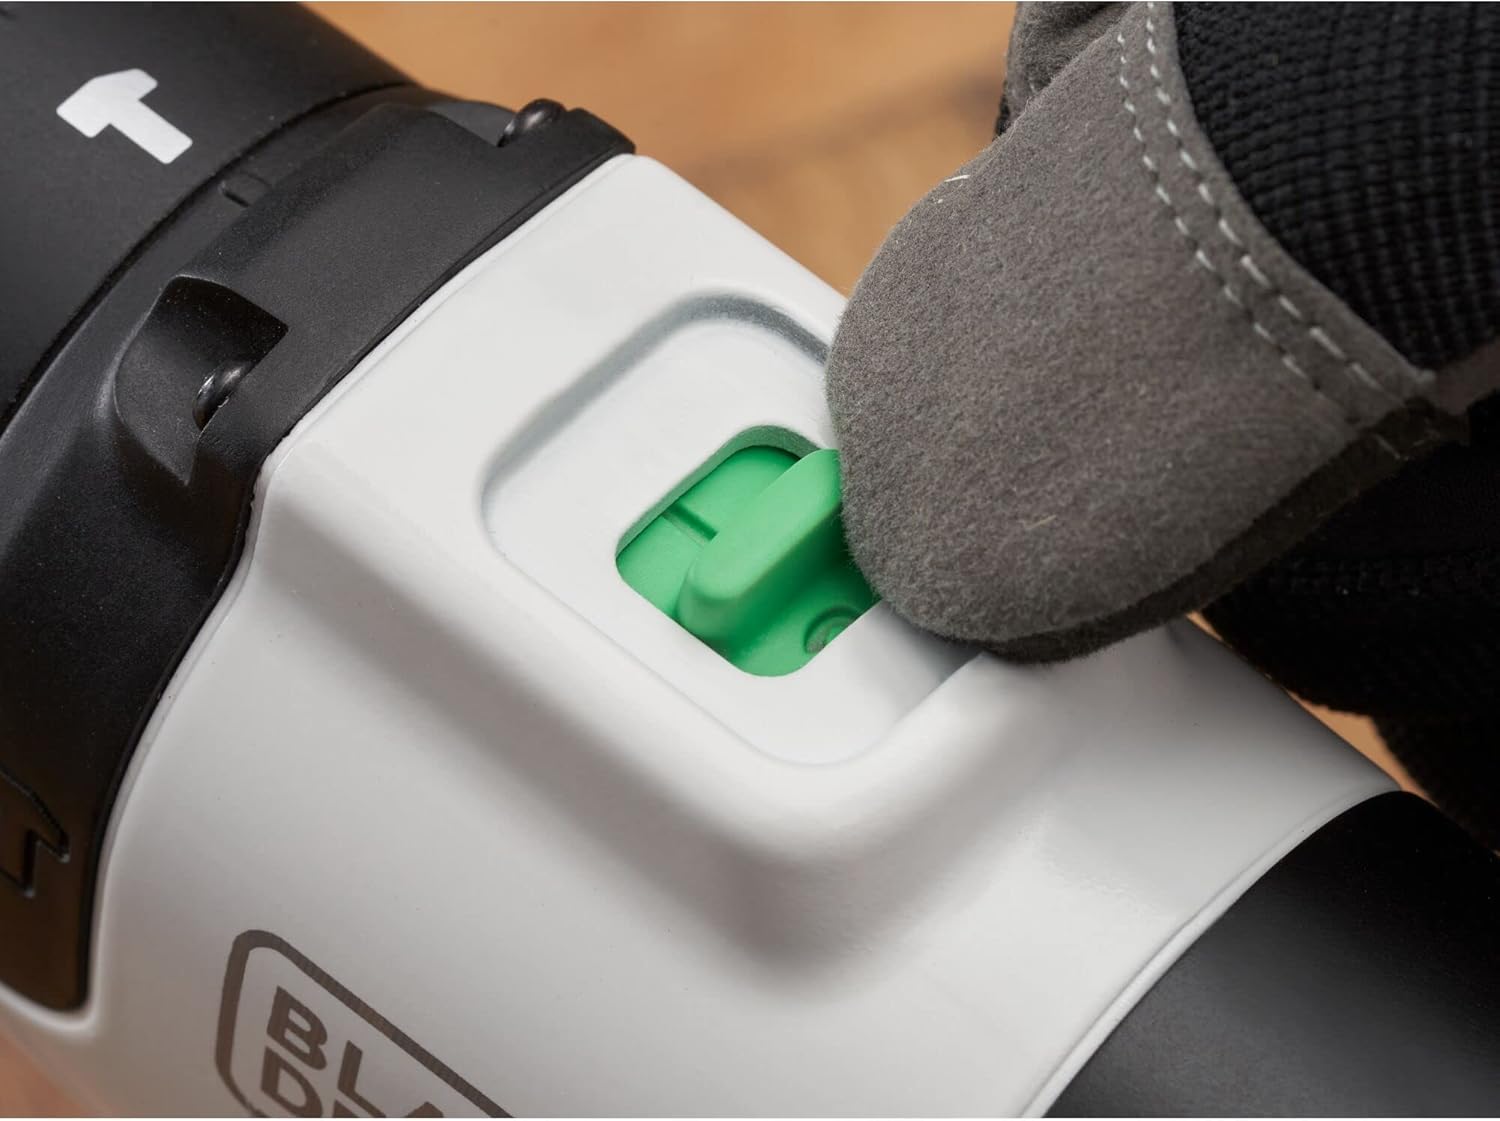
Figure 5: Close-up view of the speed selector switch, positioned on the top of the drill, used to toggle between two speed settings.
Operating the Drill
- Select the appropriate mode and speed for your task.
- Position the bit on the workpiece.
- Press the trigger switch to start the tool. The LED work light will illuminate.
- Apply steady, even pressure. Do not force the drill.
- Release the trigger to stop the tool.

Figure 6: A user demonstrating the hammer drill in action, drilling into a concrete block.

Figure 7: A user drilling into a wooden plank using the drill with a spade bit.
Maintenance
Regular maintenance ensures optimal performance and extends the life of your tool.
- Cleaning: Keep the ventilation slots clear of dust and debris. Use a soft, damp cloth to clean the tool's exterior. Do not use harsh chemicals or abrasive cleaners.
- Storage: Store the tool in a dry, secure location out of reach of children.
- Battery Care: Do not store the tool with a completely discharged battery. Recharge the battery periodically if not used for extended periods.
- Inspection: Periodically inspect the charger cord for damage. If damaged, have it replaced by a qualified service technician.
Troubleshooting
| Problem | Possible Cause | Solution |
|---|---|---|
| Tool does not start. | Battery is discharged. Forward/reverse button is in the center (locked) position. | Charge the battery. Push the forward/reverse button to the left or right. |
| Reduced power or short operating time. | Battery not fully charged. Battery nearing end of life. | Ensure battery is fully charged. Contact customer service for battery replacement options. |
| Bit slips in chuck. | Chuck not tightened sufficiently. Bit shank is dirty or damaged. | Retighten chuck firmly. Clean or replace the bit. |
| Overheating during use. | Excessive load or continuous operation. Blocked ventilation slots. | Allow the tool to cool down. Reduce load. Clear ventilation slots. |
Specifications
| Feature | Detail |
|---|---|
| Model Number | REVCHD12C |
| Brand | BLACK+DECKER |
| Voltage | 12V MAX* (Nominal 10.8V) |
| Power Source | Battery Powered (Integrated Lithium Ion) |
| Drill Type | Hammer Drill |
| Number of Speeds | 2 |
| Included Components | (1) Hammer Drill, (1) Charger, (1) Double-ended Bit |
| Item Weight | 3.14 pounds |
| Product Dimensions | 10.8 x 11.4 x 10.8 inches |
| Material | Metal, Plastic, Wood (Housing made with Tritan™ Renew 50% certified recycled material) |
| UPC | 885911896511 |
*Maximum initial battery voltage (measured without a workload) is 12 volts. Nominal voltage is 10.8 volts.
Warranty Information
BLACK+DECKER provides a limited warranty for this product. For detailed warranty terms and conditions, please refer to the warranty card included with your product or visit the official BLACK+DECKER website. Proof of purchase is required for all warranty claims.
Customer Support
If you have any questions or require assistance with your BLACK+DECKER REVIVA 12V Hammer Drill, please contact BLACK+DECKER customer support:
- Website: Visit the official BLACK+DECKER website for FAQs, service center locations, and contact information.
- Phone: Refer to your product packaging or the BLACK+DECKER website for the appropriate customer service phone number in your region.