
Sunbeam SB700
Sunbeam SB700 70-Stitch Domestic Sewing Machine User Manual
Model: SB700
Important Safety Instructions
When using an electrical appliance, basic safety precautions should always be followed, including the following:
- Read all instructions before using this sewing machine.
- Keep these instructions in a convenient place near the machine.
- Always unplug the machine from the electrical outlet immediately after using and before cleaning, removing covers, lubricating, or making any other user servicing adjustments.
- Do not allow to be used as a toy. Close attention is necessary when this appliance is used by or near children.
- Use this product only for its intended use as described in this manual. Use only attachments recommended by the manufacturer.
- Never operate this sewing machine if it has a damaged cord or plug, if it is not working properly, if it has been dropped or damaged, or dropped into water.
- Never drop or insert any object into any opening.
- Do not use outdoors.
- Do not operate where aerosol (spray) products are being used or where oxygen is being administered.
- To disconnect, turn all controls to the off position, then remove plug from outlet.
Product Overview
The Sunbeam SB700 is a versatile domestic sewing machine designed for a wide range of sewing projects. It features 70 stitch styles and patterns, adjustable stitch length, stitch width, and foot pressure, making it suitable for both beginners and experienced users. The machine includes a twin needle capability and a front-loading bobbin system for ease of use.
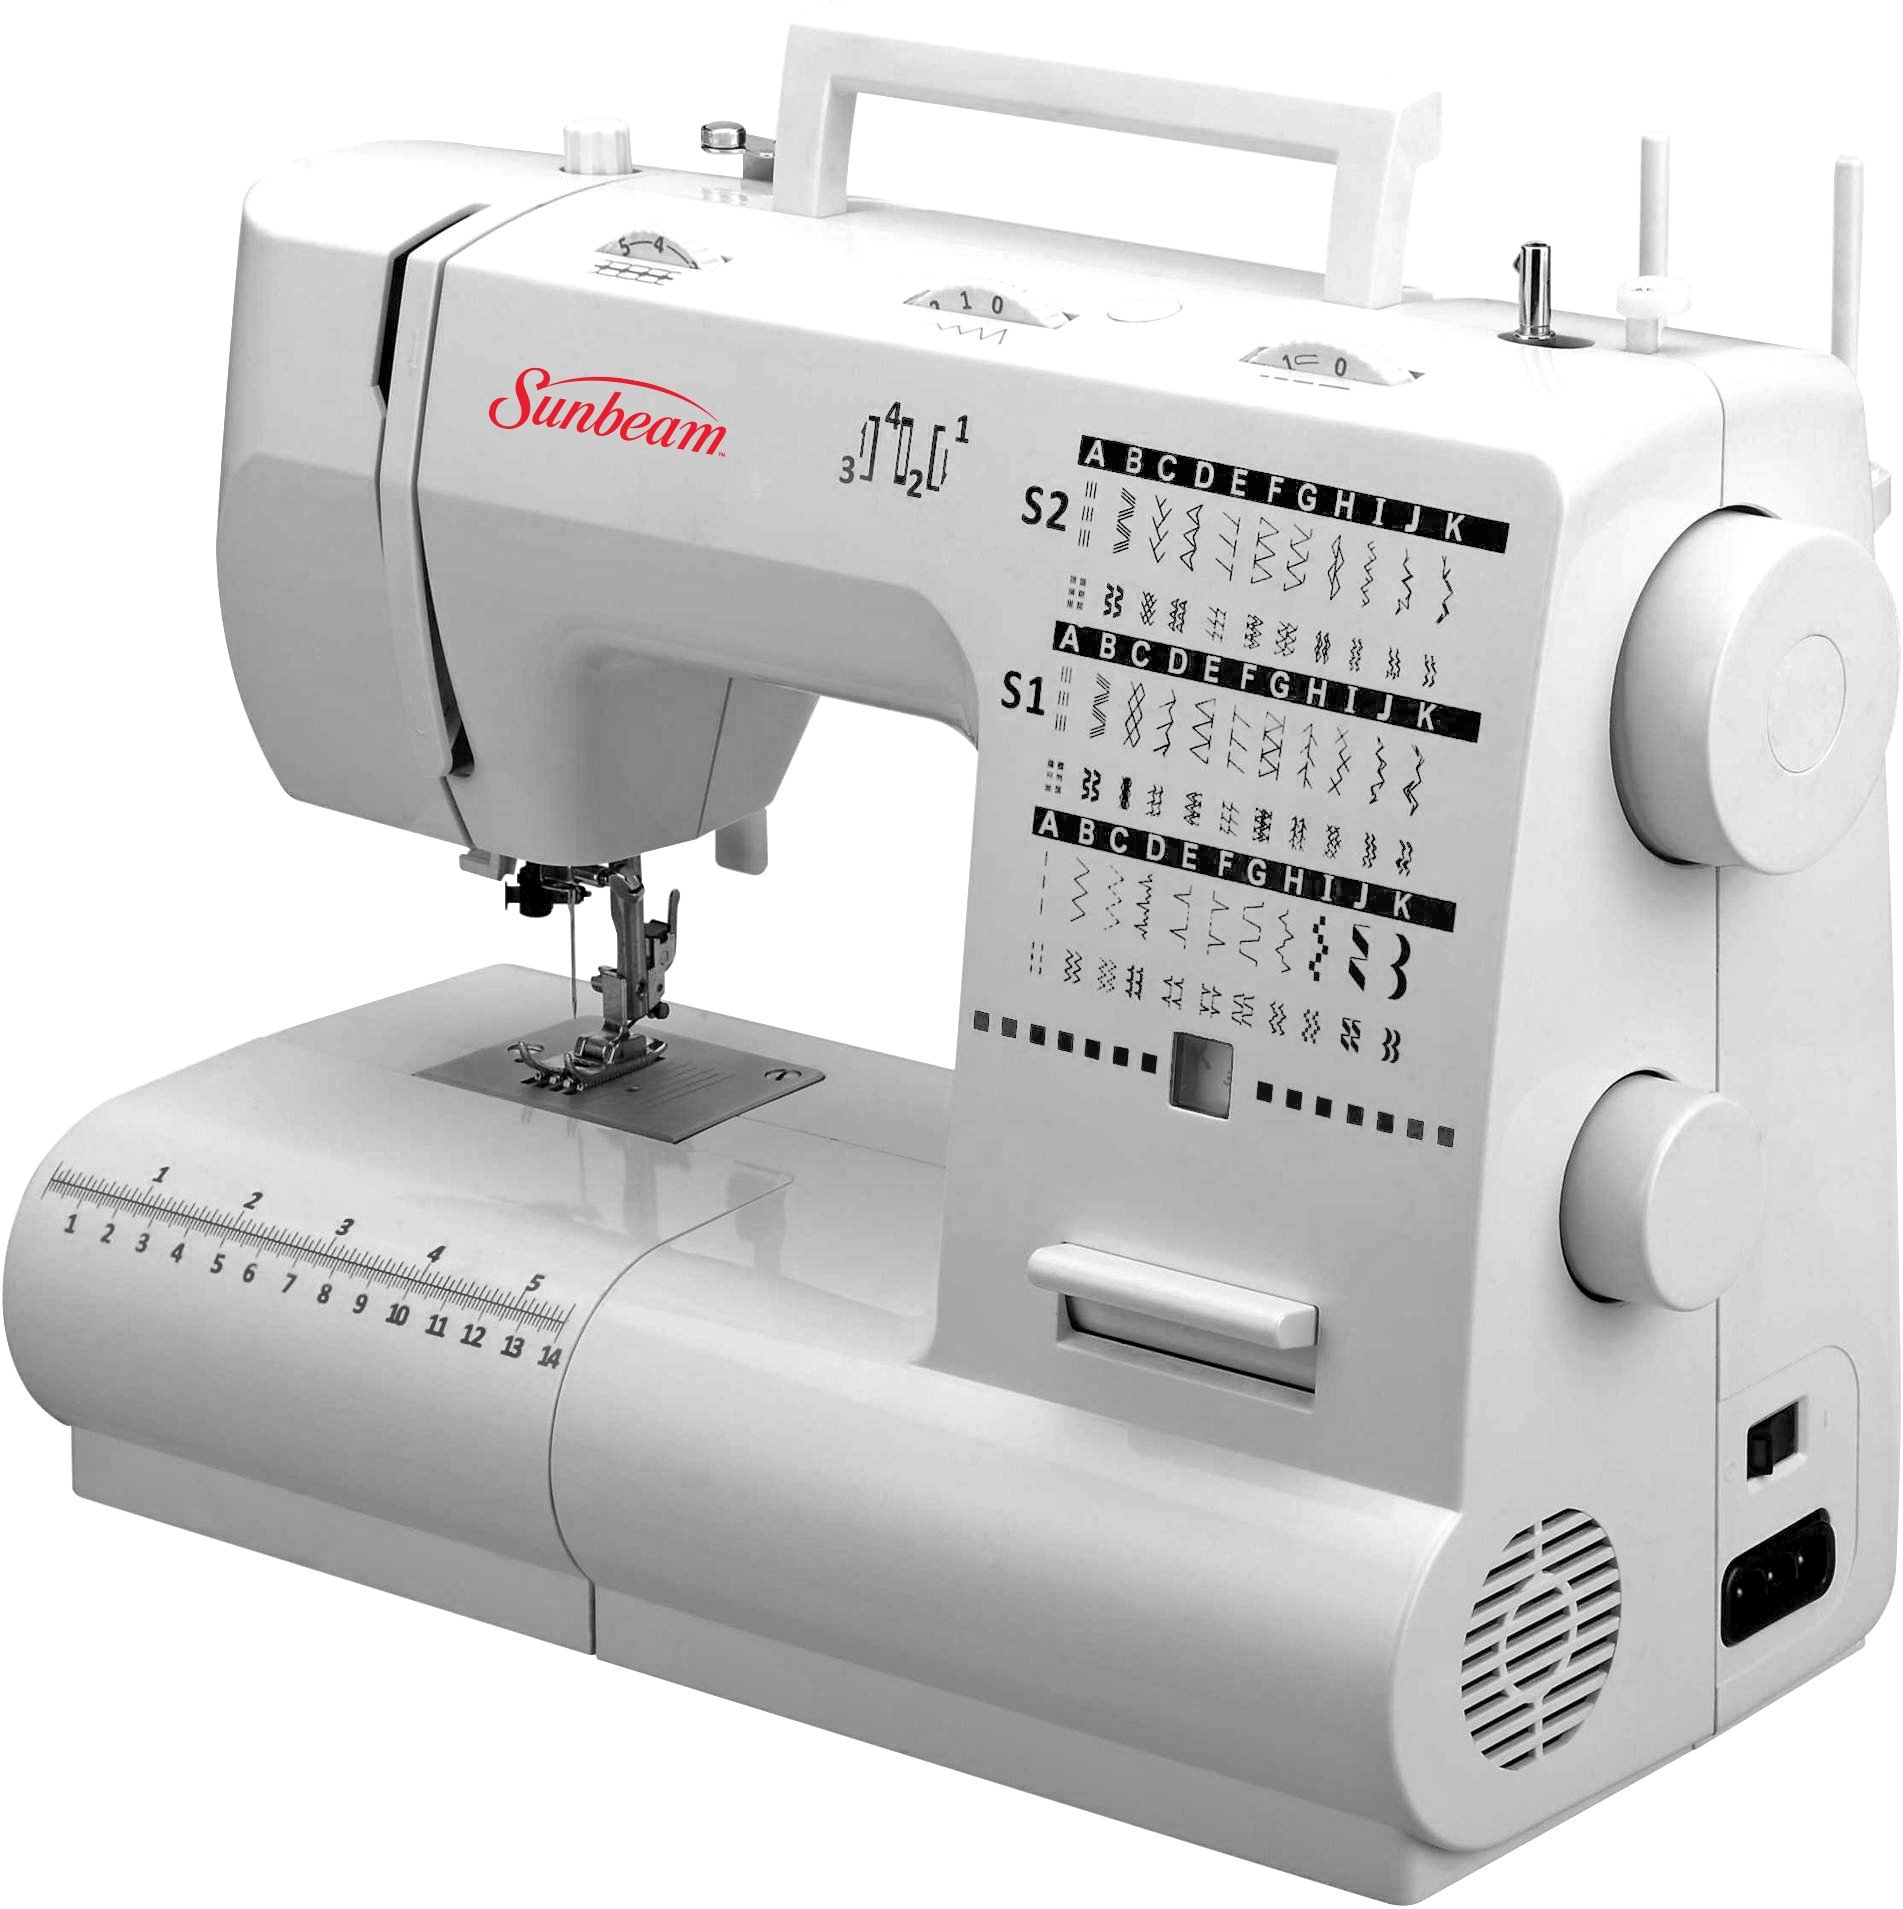
Image: The Sunbeam SB700 70-Stitch Domestic Sewing Machine, white in color, featuring various control dials and a sewing bed.
Key Features:
- 70 different easy-to-use stitch styles and patterns.
- Adjustable stitch length, stitch width, and foot pressure.
- Built-in buttonhole function.
- Twin needle capability with 3 needle positions.
- Shuttle hook system with front-loading bobbin.
- Powerful 70-watt ETL certified motor.
- Compact design with a built-in foldable carry handle.
Included Components:
The machine comes with essential accessories to get you started, including sewing thread, oil, various needles, and presser feet.
Setup
1. Unpacking and Placement
- Carefully remove the sewing machine from its packaging.
- Place the machine on a stable, flat surface with adequate lighting.
- Ensure the power switch is in the 'OFF' position before plugging in.
- Connect the foot controller plug to the machine's receptacle and the power cord to a suitable electrical outlet.
2. Winding the Bobbin
- Place a spool of thread on the spool pin.
- Guide the thread through the upper thread guide and around the bobbin winding tension disc.
- Place an empty bobbin onto the bobbin winder spindle.
- Wind the thread clockwise a few times around the bobbin.
- Push the bobbin winder spindle to the right.
- Gently press the foot controller to start winding. Stop when the bobbin is full.
- Cut the thread and push the bobbin winder spindle back to the left.
3. Threading the Upper Thread
- Raise the presser foot lifter.
- Turn the handwheel towards you to bring the needle to its highest position.
- Place a spool of thread on the spool pin.
- Guide the thread through the upper thread guide.
- Follow the numbered threading path down the right channel, up the left channel, and through the take-up lever from right to left.
- Continue guiding the thread down to the needle bar thread guide.
- Thread the needle from front to back. Pull about 6 inches of thread through the needle eye.
4. Inserting the Bobbin
- Open the bobbin cover plate located at the front of the sewing bed.
- Insert the wound bobbin into the bobbin case, ensuring the thread unwinds in the correct direction (usually counter-clockwise).
- Guide the bobbin thread through the tension spring of the bobbin case.
- Close the bobbin cover plate.
- Hold the upper thread lightly and turn the handwheel towards you to lower and raise the needle, catching the bobbin thread. Pull both threads under the presser foot and towards the back.
Operating Instructions
1. Turning On the Machine
Once the machine is plugged in and threaded, flip the power switch to the 'ON' position. The sewing light will illuminate.
2. Selecting Stitches
The Sunbeam SB700 offers 70 stitch patterns. Use the stitch selector dial on the front of the machine to choose your desired stitch. Refer to the stitch chart on the machine or in the full manual for visual guidance.
3. Adjusting Stitch Length and Width
Separate dials allow you to adjust the stitch length and width. Experiment with different settings on scrap fabric to achieve the desired look for your project. Generally, longer stitches are for thicker fabrics or basting, while shorter stitches are for finer details and stronger seams.
4. Adjusting Thread Tension
Proper thread tension is crucial for balanced stitches. The tension dial is usually located on the front of the machine. Adjust it incrementally. If the top thread appears loose on the bottom of the fabric, increase the tension. If the bottom thread appears loose on the top, decrease the tension. Test on scrap fabric.
5. Basic Sewing
- Place your fabric under the presser foot, aligning the edge with a seam guide if necessary.
- Lower the presser foot.
- Gently press the foot controller to start sewing. The harder you press, the faster the machine will sew.
- Guide the fabric gently; do not pull or push forcefully.
- To secure a seam, use the reverse lever/button at the beginning and end of your stitching.
- When finished, raise the needle to its highest position, lift the presser foot, and pull the fabric out. Cut the threads using the thread cutter on the machine.
6. Buttonhole Function
The SB700 includes a buttonhole function. Attach the designated buttonhole foot. Select the buttonhole stitch pattern. Follow the specific steps outlined in the comprehensive manual for precise buttonhole creation, which typically involves marking the buttonhole length and guiding the fabric through a series of steps.
7. Twin Needle Sewing
For decorative stitching or hemming, the machine supports twin needle use. Replace the single needle with a twin needle. Use two spools of thread, threading each needle separately. Ensure the stitch width is set appropriately to prevent the needles from hitting the presser foot.
Maintenance
Regular maintenance ensures the longevity and smooth operation of your sewing machine. Always unplug the machine before performing any maintenance.
1. Cleaning the Bobbin Area
- Remove the needle, presser foot, and bobbin.
- Open the bobbin cover and remove the bobbin case and shuttle hook.
- Use a small brush (often included with the machine) to remove lint and dust accumulation from the bobbin area, feed dogs, and around the shuttle hook.
- Reassemble the components carefully.
2. Oiling the Machine
Apply a small drop of sewing machine oil (included) to the designated oiling points, typically moving metal parts in the bobbin area and under the needle plate. Refer to the full manual for specific oiling locations. Do not over-oil.
3. Needle Replacement
Replace the needle regularly, especially after 8-10 hours of sewing or if it becomes bent or dull. Using a dull or bent needle can cause skipped stitches, thread breakage, or damage to your fabric. Loosen the needle clamp screw, remove the old needle, insert the new needle with the flat side facing the back, and tighten the screw securely.
Troubleshooting
This section addresses common issues you might encounter. For detailed solutions, consult the comprehensive user manual.
Common Issues and Solutions:
- Skipped Stitches: Ensure the needle is inserted correctly and is not bent or dull. Use the correct needle type and size for your fabric. Check upper and bobbin threading.
- Thread Breakage (Upper Thread): Check if the machine is threaded correctly, especially through all tension discs and the take-up lever. Ensure the thread tension is not too high. Use good quality thread. Check for burrs on the needle plate or needle eye.
- Thread Breakage (Bobbin Thread): Check if the bobbin is wound evenly and inserted correctly into the bobbin case. Ensure the bobbin thread is properly seated in the bobbin case tension spring.
- Bird Nesting (Thread tangling on the underside of fabric): This is often caused by incorrect upper thread tension (too loose) or improper threading. Re-thread the upper thread completely, ensuring it is seated firmly in all guides and tension discs. Check bobbin insertion.
- Machine Not Starting: Ensure the power cord is securely plugged in and the power switch is 'ON'. Check if the foot controller is properly connected.
- Uneven Stitches: Verify that both upper and bobbin threads are correctly tensioned. Ensure the presser foot pressure is appropriate for your fabric.
Specifications
| Feature | Detail |
|---|---|
| Brand | Sunbeam |
| Model Number | SB700 |
| Stitch Patterns | 70 |
| Motor Power | 70 Watts |
| Power Source | Corded Electric |
| Material | Metal, Plastic |
| Color | White |
| Item Weight | 10 pounds |
| Needle Positions | 3 |
| Bobbin System | Shuttle Hook with Front Loading Bobbin |
| Included Components | Sewing thread, oil, needles, feet |
| GTIN/UPC | 892013000265 |
Warranty and Support
Warranty Information:
This Sunbeam SB700 Domestic Sewing Machine is covered by a limited manufacturer's warranty. Please refer to the warranty card included with your product or visit the official Sunbeam website for specific terms, conditions, and duration of coverage. Keep your proof of purchase for warranty claims.
Customer Support:
For technical assistance, troubleshooting beyond this manual, or to inquire about replacement parts, please contact Sunbeam customer support. Contact details can typically be found on the official Sunbeam website or in the product packaging.
Online resources and FAQs may also be available on the Sunbeam brand website: Visit the Sunbeam Store on Amazon
Ask a question about this manual
Ask about setup, troubleshooting, compatibility, parts, safety, or missing instructions. Manuals+ will review the question and use this page’s manual context to help answer it.