1. Product Overview
The HP 2013 D9Y32AA UltraSlim Docking Station is designed to expand the connectivity of compatible HP EliteBook notebooks. It provides additional display, network, and device connections through a simple one-click slide-in mechanism, enhancing productivity.
Key features include multiple USB 3.0 ports for high-speed data transfer, DisplayPort and VGA ports for video output, and an Ethernet/LAN port for network access. The docking station also includes a 65W power adapter to charge your notebook while docked.

Image 1.1: Top view of the HP 2013 D9Y32AA UltraSlim Docking Station, showcasing its sleek design.
2. Package Contents
- HP 2013 D9Y32AA UltraSlim Docking Station
- 65W Power Adapter
- Documentation (this manual)
3. Component Identification
Familiarize yourself with the various ports and features of your docking station:

Image 3.1: Rear view of the docking station, highlighting available ports.
- Power Connector: Connects the 65W power adapter.
- VGA Port: Connects to an external monitor with a VGA input.
- DisplayPort (2x): Connects to external monitors with DisplayPort input.
- USB 3.0 Ports (4x): Connects USB devices such as keyboards, mice, and external storage.
- Ethernet/LAN Port: Connects to a wired network.
- Audio Line-in Jack: Connects to an external microphone or audio input device.
- Audio Line-out Jack: Connects to external speakers or headphones.
- Security Cable Lock Slot: For attaching a security cable (lock not included).
4. Compatibility
This docking station is compatible with the following HP EliteBook and ZBook models:
- HP EliteBook 720 G1-G2, 725 G2-G4, 740 G1-G2, 745 G2-G4, 750 G1-G2, 755 G2-G4, 820 G1-G4, 840 G1-G4, 850 G1-G4, 1020 G1, 1040 G1-G3
- HP EliteBook Folio 9480m, 9470m
- HP EliteBook Revolve 810 G1, 810 G3
- HP Pro x2 612 G1
- HP ProBook 640 G2-G3
- HP ZBook 14, 14u G4, 15U G3-G4 Mobile Workstation
Please verify your notebook's compatibility before use.
5. Setup Instructions
Follow these steps to set up your HP UltraSlim Docking Station:
- Connect Power: Plug the 65W power adapter into the docking station's power connector, then plug the adapter into a wall outlet.
- Connect Peripherals: Connect your external monitor(s) to the DisplayPort or VGA ports on the docking station. Connect your keyboard, mouse, and other USB devices to the USB 3.0 ports. Connect an Ethernet cable for wired network access, if desired.
- Dock Your Notebook: Align your compatible HP EliteBook notebook with the docking station's connector. Gently slide the notebook onto the docking station until it clicks into place. Ensure a secure connection.
- Power On: Power on your notebook. The docking station will provide power and connect all peripherals automatically.
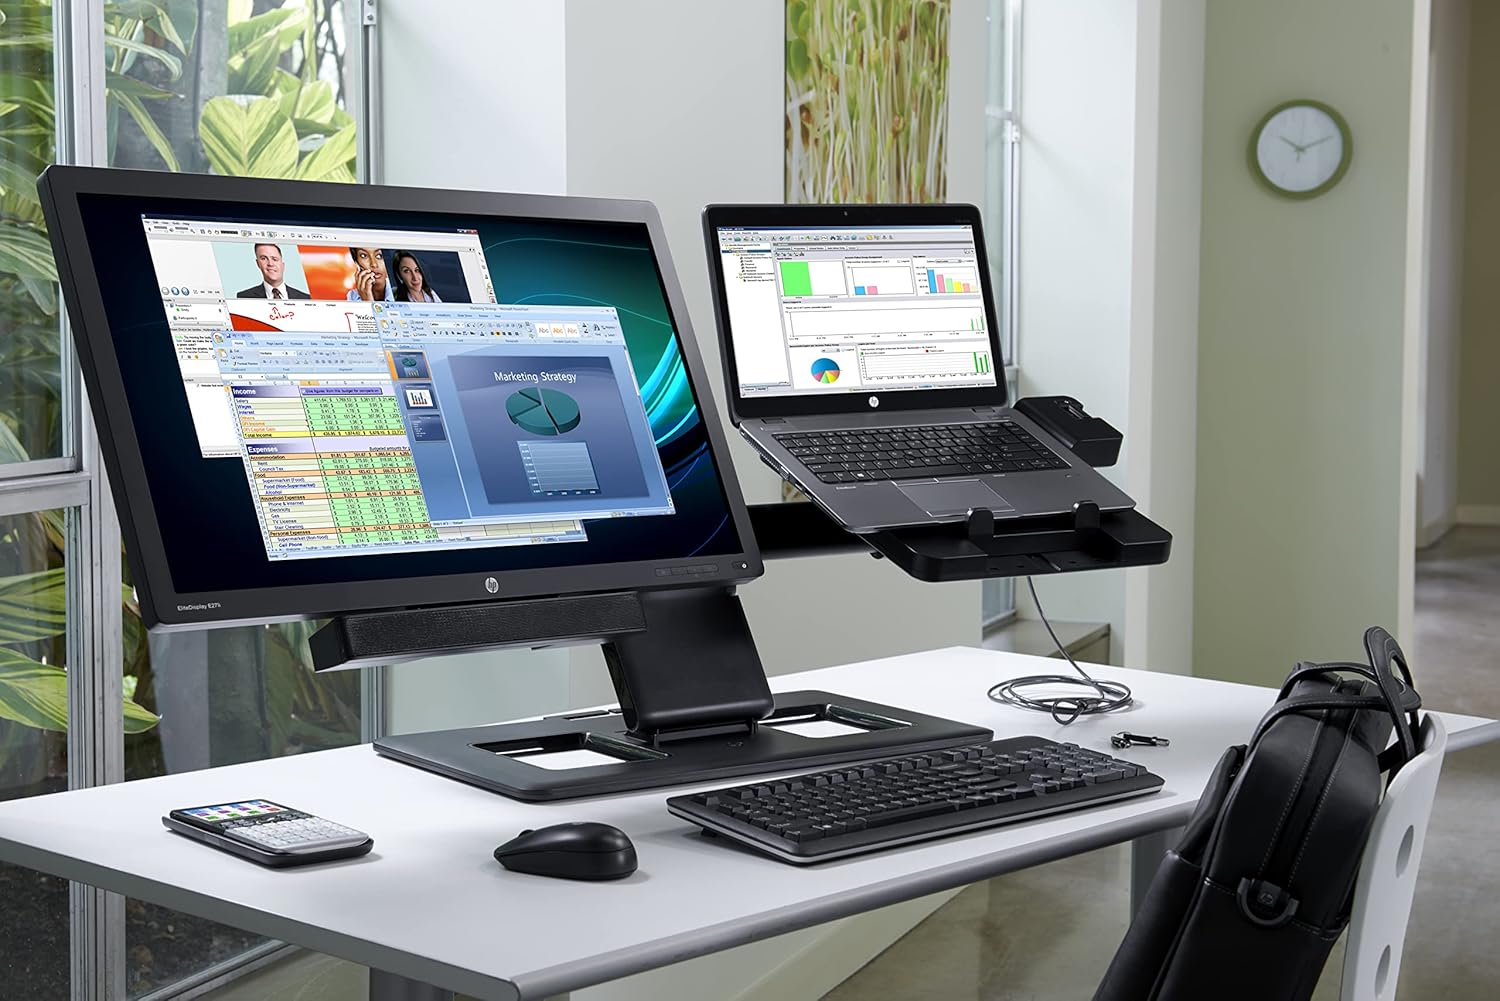
Image 5.1: An HP EliteBook notebook successfully docked and connected to external peripherals, demonstrating a typical workstation setup.
6. Operating Instructions
Once set up, operating the docking station is straightforward:
- Power Management: The docking station provides power to your notebook. You can power on or off your notebook as usual.
- External Displays: Your operating system should automatically detect and configure connected external displays. You can adjust display settings (e.g., extend, duplicate) through your notebook's display control panel.
- Undocking: To undock your notebook, ensure all applications are saved and closed. Safely remove any external storage devices. Then, press the release button on the docking station and gently lift your notebook.
7. Maintenance
To ensure optimal performance and longevity of your docking station:
- Cleaning: Use a soft, dry cloth to clean the exterior of the docking station. Avoid liquid cleaners or abrasive materials.
- Ventilation: Ensure the docking station is placed in a well-ventilated area to prevent overheating. Do not block any ventilation openings.
- Storage: When not in use for extended periods, disconnect the power adapter and store the docking station in a cool, dry place.
8. Troubleshooting
If you encounter issues, refer to the following common troubleshooting steps:
- No Power to Notebook:
- Ensure the 65W power adapter is securely connected to both the docking station and a working wall outlet.
- Verify the notebook is properly seated and clicked into the docking station.
- External Display Not Working:
- Check that display cables (DisplayPort, VGA) are securely connected to both the docking station and the monitor.
- Ensure the monitor is powered on and set to the correct input source.
- Update your notebook's graphics drivers.
- Try restarting your notebook while docked.
- USB Devices Not Recognized:
- Ensure USB devices are securely plugged into the docking station's USB 3.0 ports.
- Test the USB device by connecting it directly to your notebook.
- Restart your notebook.
- No Network Connectivity:
- Verify the Ethernet cable is securely connected to both the docking station and your network router/switch.
- Check your notebook's network settings.
- Ensure your network is active and functioning.
If problems persist, consult the HP support website for further assistance.
9. Specifications
| Feature | Specification |
|---|---|
| Model Number | D9Y32AA |
| Dimensions (LxWxH) | 16.57 x 4.06 x 8.23 inches (42.09 x 10.31 x 20.90 cm) |
| Item Weight | 1.69 pounds (0.77 kg) |
| Power Adapter | 65 Watts |
| Input Voltage | 18.5 Volts (DC) |
| Total USB Ports | 4 (USB 3.0) |
| Video Ports | 2x DisplayPort 1.2, 1x VGA |
| Network Port | 1x Ethernet/LAN |
| Audio Ports | 1x Line-in, 1x Line-out |
10. Warranty and Support
For warranty information and technical support, please refer to the official HP website or the documentation included with your HP EliteBook notebook. You can also visit www.hp.com/support for online resources and contact options.