1. Introduction
This manual provides instructions for the proper installation, operation, and maintenance of your Lowrider YBN Chain 1/2x1/8x112 Pink. This single-speed bicycle chain is designed for various bicycle types including beach cruisers, choppers, and track fixie bicycles. Please read this manual thoroughly before installation to ensure safe and optimal performance.
2. Safety Information
- Always wear appropriate safety gear, including gloves and eye protection, when working on your bicycle.
- Ensure the bicycle is stable and secured before beginning any work. A bike stand is recommended.
- Keep fingers and clothing clear of moving parts, especially when rotating the crankset or wheel.
- Improper chain installation can lead to serious injury or damage to your bicycle. If unsure, consult a professional bicycle mechanic.
- Dispose of old chain components responsibly.
3. Package Contents
Your Lowrider YBN Chain package should contain the following:
- 1 x Lowrider YBN Chain 1/2x1/8x112 Pink
- (Optional: Master link, if included with your specific chain model)
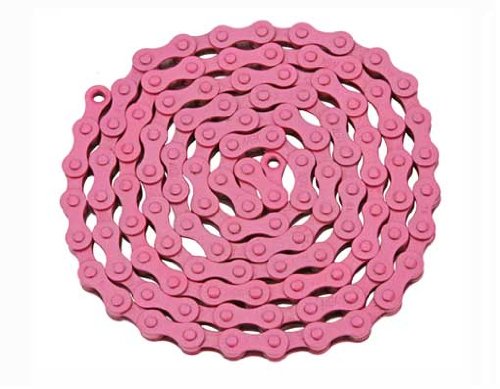
Image 1: Lowrider YBN Chain 1/2x1/8x112 Pink. This image shows the bicycle chain coiled, highlighting its pink color and general appearance.
4. Setup and Installation
4.1. Tools Required
- Chain breaker tool
- Measuring tape or old chain for length comparison
- Master link pliers (if using a master link)
- Gloves and rags
4.2. Removing the Old Chain
- Shift the bicycle into the smallest cog (rear) and smallest chainring (front) if applicable, or simply ensure the chain is slack on a single-speed.
- Locate the master link (if present) and use master link pliers to open it. If no master link, use a chain breaker tool to push out one of the chain pins.
- Carefully remove the old chain from the bicycle.
4.3. Sizing the New Chain
Correct chain length is crucial for proper function and safety.
- Lay the new Lowrider YBN Chain next to the old chain on a flat surface.
- Match the length of the new chain to the old chain. For single-speed bikes, ensure the chain is taut but not overly tight when installed, allowing for minimal slack.
- If the new chain is longer, use the chain breaker tool to remove excess links. Always remove links in pairs (an inner and an outer plate) to maintain proper chain structure.
4.4. Installing the New Chain
- Thread the new chain around the front chainring and rear cog. Ensure it is seated correctly on the teeth.
- Bring the two ends of the chain together.
- Using a Master Link (if applicable): Connect the two ends with the master link, ensuring it clicks securely into place. Use master link pliers if needed to fully seat the link.
- Using a Chain Pin: Insert a new chain pin (or the pin you partially pushed out if reusing) into the connecting links. Use the chain breaker tool to carefully push the pin through until it is flush with both outer plates. Be careful not to push it too far.
- Check the newly connected link for stiffness. If stiff, gently flex the chain side-to-side at the stiff link to loosen it.
5. Operating and Initial Checks
After installation, perform the following checks before riding:
- Chain Tension: For single-speed bikes, the chain should have a small amount of slack (approximately 1/2 inch of vertical movement) but should not be so loose that it can fall off the cog or chainring. Adjust wheel position in the dropouts if necessary to achieve proper tension.
- Smoothness: Slowly rotate the crankset backward and forward to ensure the chain runs smoothly through the drivetrain without catching, skipping, or making excessive noise.
- Lubrication: The chain may come pre-lubricated, but applying a fresh coat of bicycle-specific chain lubricant is recommended for optimal performance and longevity.
- Test Ride: Take a short, cautious test ride in a safe area to confirm proper function before extended use.
6. Maintenance
Regular maintenance extends the life of your chain and ensures smooth operation.
- Cleaning: Clean your chain regularly, especially after riding in wet or dirty conditions. Use a degreaser and a chain cleaning tool or brush to remove grime. Rinse thoroughly.
- Lubrication: After cleaning and drying, apply a thin layer of bicycle-specific chain lubricant to each roller. Wipe off any excess lubricant to prevent dirt attraction.
- Inspection: Periodically inspect the chain for signs of wear, such as stretched links, bent plates, or rust. A chain wear indicator tool can help determine when replacement is necessary.
- Storage: Store your bicycle in a dry environment to prevent rust and corrosion on the chain and other components.
7. Troubleshooting
| Problem | Possible Cause | Solution |
|---|---|---|
| Chain skipping or jumping | Incorrect chain tension, worn cog/chainring, stiff link, worn chain. | Adjust chain tension, inspect and replace worn drivetrain components, flex stiff links, replace chain if worn. |
| Excessive noise (squeaking, grinding) | Lack of lubrication, dirt/grime, stiff link. | Clean and lubricate chain, flex stiff links. |
| Chain falls off | Chain too loose, worn chainring/cog, bent chainring teeth. | Adjust chain tension, inspect and replace worn drivetrain components. |
8. Specifications
- Brand: Lowrider
- Model: YBN Chain 1/2x1/8x112 Pink
- Material: Alloy Steel
- Size: 1/2 inch x 1/8 inch x 112 links
- Strand Type: Single
- Item Weight: Approximately 0.8 Pounds
- UPC: 852682964350
- Part Number: 123124
9. Warranty Information
This Lowrider YBN Chain is covered by the manufacturer's standard warranty against defects in materials and workmanship. Please refer to the original product packaging or the Lowrider official website for specific warranty terms and conditions. The warranty typically does not cover damage resulting from improper installation, misuse, neglect, or normal wear and tear.
10. Customer Support
For technical assistance, questions regarding installation, or warranty claims, please contact Lowrider customer support. Contact information can typically be found on the product packaging or the official Lowrider website.