Introduction
This manual provides detailed instructions for the safe and proper use of your Britax Pavilion G4 Convertible Car Seat. Please read all instructions carefully before installation and use. Proper installation and use are crucial for ensuring the safety of your child.
The Britax Pavilion G4 Convertible Car Seat is designed with advanced safety features, including:
- SafeCell Technology: Features cells designed to compress in a crash, lowering the center of gravity and counteracting forward rotation.
- HUGS with SafeCell Technology: Manages crash energy and forward head movement while maintaining proper chest clip position.
- True Side Impact Protection: Offers a head restraint with energy-absorbing EPP foam, keeping the head, neck, and spine aligned, and deep side walls to distribute crash forces.
- Tangle-Free, Five-Point Harness: Distributes crash forces across the strongest parts of the body and provides a secure fit.
- Click & Safe Snug Harness Indicator: An audible aid for ensuring appropriate harness snugness.

Figure 1: Front view of the Britax Pavilion G4 Convertible Car Seat.
Setup and Installation
Proper installation is critical for child safety. Always refer to your vehicle's owner's manual for specific car seat installation instructions and LATCH system locations.
1. Choosing Installation Method
The Britax Pavilion G4 can be installed using either the vehicle's LATCH (Lower Anchors and Tethers for Children) system or the vehicle's seat belt. Choose the method appropriate for your child's weight and your vehicle's capabilities. Consult the car seat's labels for weight limits for each installation method.
2. Rear-Facing Installation (for infants and toddlers)
For rear-facing installation, ensure the car seat is reclined to the appropriate angle for your child's age and weight. The recline indicator on the side of the car seat must be within the acceptable range.

Figure 2: Securing the car seat using the LATCH system. Ensure the strap is pulled tightly for a secure fit.
LATCH Installation: Locate your vehicle's lower anchors. Attach the car seat's lower anchor connectors to the vehicle's lower anchors. Press down firmly on the car seat while pulling the LATCH strap to remove all slack. The car seat should not move more than one inch side-to-side or front-to-back at the belt path.
Seat Belt Installation: Route the vehicle's lap and shoulder belt through the designated rear-facing belt path. Buckle the seat belt and remove all slack by pressing down firmly on the car seat and pulling the shoulder belt. Lock the vehicle's seat belt according to your vehicle's owner's manual (usually by pulling the shoulder belt all the way out and letting it retract).
3. Forward-Facing Installation (for older toddlers and children)
For forward-facing installation, ensure the car seat is upright and securely installed. The top tether must always be used when forward-facing.
LATCH Installation: Attach the lower anchor connectors and tighten as described for rear-facing. Attach the top tether strap to the vehicle's top tether anchor and tighten it securely.
Seat Belt Installation: Route the vehicle's lap and shoulder belt through the designated forward-facing belt path. Buckle and lock the seat belt, removing all slack. Attach the top tether strap to the vehicle's top tether anchor and tighten it securely.

Figure 3: Adjustable headrest providing True Side Impact Protection.
Head Safety Features: The Britax Pavilion G4 incorporates advanced head safety technologies. The headrest is adjustable to ensure proper positioning for your child's height, providing optimal side impact protection. Ensure the harness straps are at or below the child's shoulders for rear-facing and at or above for forward-facing.
Video 1: Britax Head Safety Overview. This video demonstrates the importance of head safety in car seats and Britax's engineering approach to minimize head excursion during a crash.
Operating Instructions
1. Placing Your Child in the Seat
- Place your child in the car seat with their back flat against the seat back.
- Bring the harness straps over your child's shoulders and between their legs.
- Connect the buckle tongues into the buckle.
- Slide the chest clip up to armpit level.
2. Adjusting the Harness
Pull the harness adjustment strap located at the front of the car seat until the harness is snug against your child's body. The Click & Safe Snug Harness Indicator will provide an audible click when the harness is within the appropriate snugness range. Ensure you cannot pinch any excess webbing at your child's shoulder.
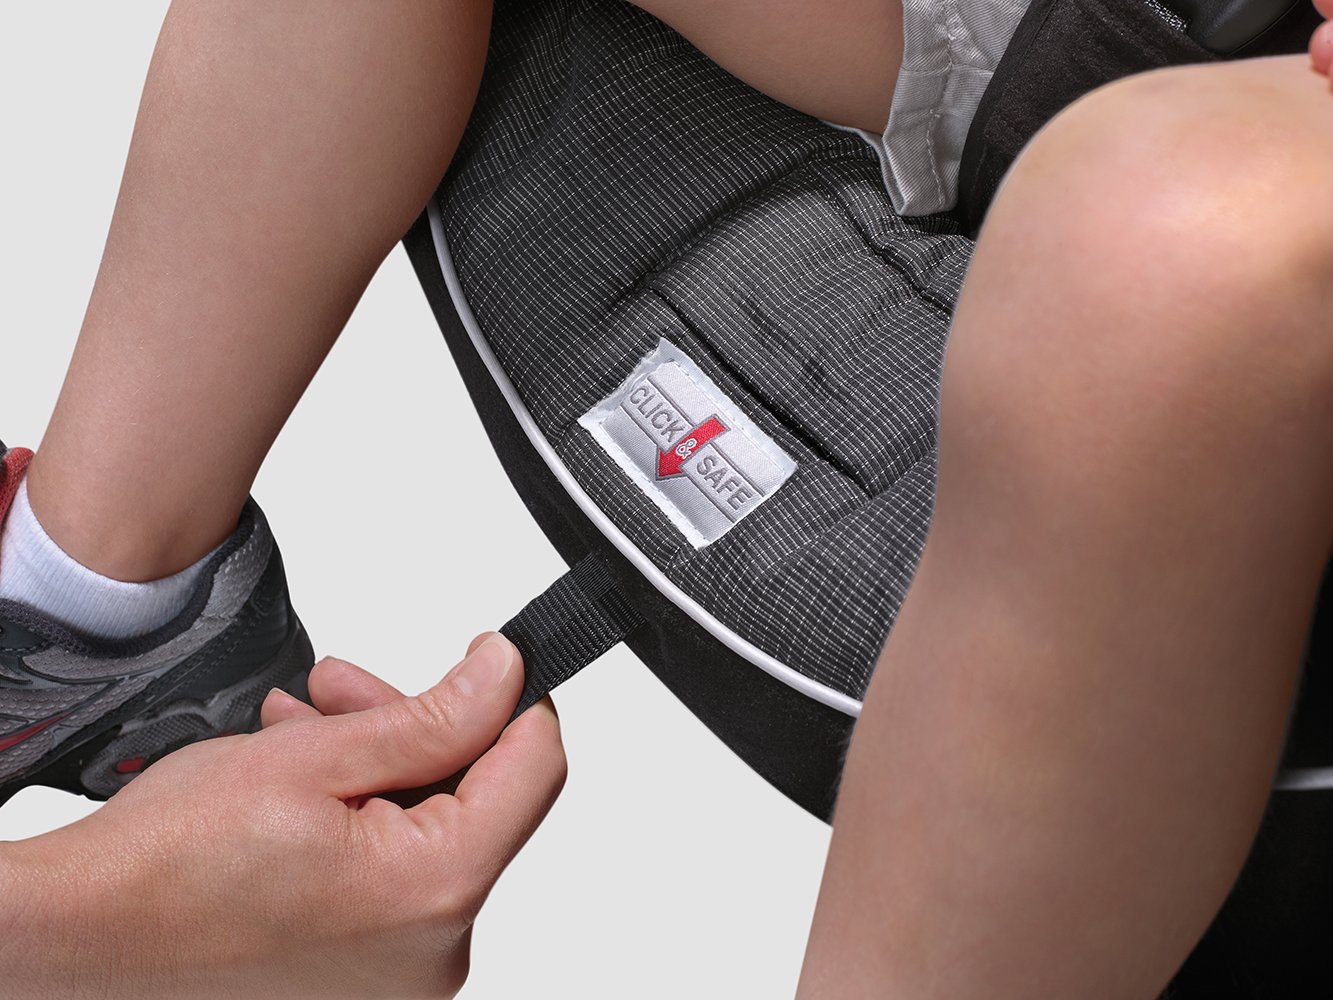
Figure 4: Adjusting the harness using the Click & Safe strap.
3. Adjusting Headrest and Harness Height
The headrest and harness height can be adjusted simultaneously without rethreading. Squeeze the adjustment handle at the top of the headrest and slide it up or down to position the harness straps correctly for your child's height.
Maintenance
1. Cleaning the Car Seat
Fabric Covers: The fabric cover can be removed for cleaning. Refer to the care label on the cover for specific washing instructions. Typically, machine wash with cold water on a gentle cycle and tumble dry on low heat or air dry.
Harness Straps: Wipe harness straps with a damp cloth. Do not machine wash, bleach, or iron harness straps, as this can weaken them.
Buckle and LATCH Connectors: Clean the buckle and LATCH connectors with a damp cloth. Do not use lubricants or harsh cleaning agents.

Figure 5: Removing a buckle pad for cleaning or adjustment.
2. Inspection
Regularly inspect the car seat for any signs of damage, wear, or missing parts. Check the harness straps, buckles, LATCH connectors, and the car seat shell. If any damage is found, discontinue use and contact Britax customer service.
Expiration Date: Car seats have an expiration date, typically found on a label on the car seat shell. Do not use the car seat past its expiration date.
Troubleshooting
1. Car Seat Feels Loose After Installation
- Ensure all slack has been removed from the LATCH strap or vehicle seat belt. Press down firmly on the car seat while tightening.
- Verify that the LATCH connectors or seat belt are routed through the correct belt path for your child's facing direction (rear-facing or forward-facing).
- If using a seat belt, ensure the vehicle's seat belt is locked.
- Check that the car seat does not move more than one inch side-to-side or front-to-back at the belt path.
2. Harness is Difficult to Tighten
- Ensure the harness straps are not twisted or caught under the child or car seat.
- Check that the chest clip is unbuckled and the buckle tongues are fully inserted into the buckle.
- Pull the harness adjustment strap straight out, not upwards or downwards.
3. Click & Safe Indicator Not Clicking
The Click & Safe indicator is an audible aid. If it does not click, continue to pull the harness adjustment strap until the harness is snug and you cannot pinch any excess webbing at your child's shoulder. The absence of a click does not necessarily mean the harness is unsafe, but rather that it may not have reached the specific tension threshold for the click. Always perform the pinch test.
Specifications
| Feature | Detail |
|---|---|
| Model Number | E9LP94U |
| Brand | Britax |
| Minimum Weight Recommendation | 5 Pounds |
| Maximum Weight Recommendation | 65 Pounds |
| Installation Type | LATCH, Vehicle Seat Belt |
| Orientation | Rear-Facing, Forward-Facing |
| Item Weight | 19.5 Pounds |
| Material Type | Foam |
| Color | Gridline |
| UPC | 652182712815 |
Warranty and Support
For warranty information, please refer to the documentation included with your car seat or visit the official Britax website. For technical support, replacement parts, or any questions regarding the use and installation of your Britax Pavilion G4 Convertible Car Seat, please contact Britax customer service directly.
Important: Always register your car seat with Britax to receive important safety notices and recall information.
You can find more information and contact details on the Britax Store on Amazon.


