
1. Product Overview
The GOK Low-Pressure Regulator Type EN71 RVS 8 is designed for safe and efficient connection of liquid gas cylinders up to 14 kg filling weight to gas appliances. This regulator ensures a stable operating pressure of 30 mbar and features an integrated overpressure safety device for enhanced user protection. It is suitable for use with high-pressure hoses (M 20 x 1.5 x RVS 8) and includes a wall mount for secure installation.
Key Features:
- Integrated overpressure safety device.
- Operating pressure: 30 mbar.
- Connection type: KLF x G 1/4 LH-KN.
- Designed for liquid gas cylinders up to 14 kg.
- Includes wall mount.
2. Safety Instructions
Read all instructions carefully before installation and use. Failure to follow these instructions may result in fire, explosion, property damage, personal injury, or death.
- Installation and maintenance must be performed by qualified personnel in accordance with national and local regulations.
- Ensure adequate ventilation in the area where the gas appliance and regulator are used.
- Always check for leaks after connecting the regulator and gas cylinder. Use a leak detection spray; never use an open flame.
- Do not use the regulator if it is damaged or shows signs of wear.
- Keep flammable materials away from the gas appliance and regulator.
- Never attempt to modify or repair the regulator.
- Ensure the gas cylinder is securely positioned and upright.
- Disconnect the gas cylinder when not in use or during transport.
3. Setup and Installation
This section outlines the steps for installing your GOK Low-Pressure Regulator. Ensure all components are compatible and in good condition before proceeding.
- Prepare the Gas Cylinder: Ensure the gas cylinder is upright and stable. Remove any protective caps from the cylinder valve.
- Connect the Regulator to the Cylinder: Attach the KLF connection of the regulator to the gas cylinder valve. Tighten the connection firmly by hand, then use an appropriate wrench to secure it, ensuring a gas-tight seal. Do not overtighten.
- Connect the High-Pressure Hose: Attach the high-pressure hose (M 20 x 1.5 x RVS 8) to the regulator's outlet. Ensure this connection is also tightened securely.
- Connect to the Appliance: Connect the other end of the high-pressure hose to your gas appliance. Verify all connections are tight.
- Mounting (Optional): If using the wall mount, secure the regulator to a stable surface using appropriate fasteners.
- Leak Test: Before opening the gas supply, apply a leak detection spray to all connections.
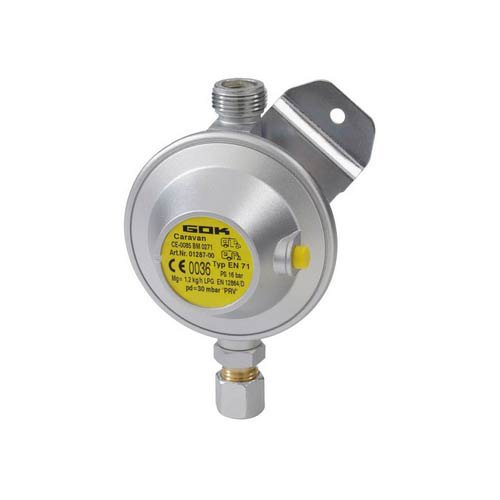
Figure 1: GOK Low-Pressure Regulator Type EN71 RVS 8. This image shows the compact design of the regulator with its connection points.
4. Operating Instructions
Follow these steps for safe operation of your gas appliance with the GOK regulator.
- Open Gas Supply: Slowly open the valve on the gas cylinder.
- Perform Leak Test: Immediately after opening the gas supply, re-apply leak detection spray to all connections. If bubbles appear, close the gas cylinder valve immediately and re-tighten the connections. Repeat the leak test until no bubbles are observed.
- Operate Appliance: Once the leak test is successful, you can operate your gas appliance according to its own instruction manual.
- Close Gas Supply: When finished using the appliance, always close the valve on the gas cylinder first. Allow any remaining gas in the hose to burn off, then turn off the appliance.
5. Maintenance
Regular inspection and maintenance are crucial for the safe and reliable operation of your regulator.
- Visual Inspection: Periodically inspect the regulator, hose, and connections for any signs of damage, cracks, corrosion, or wear. Replace any damaged components immediately.
- Hose Replacement: Gas hoses have a limited lifespan. Refer to the hose manufacturer's recommendations for replacement intervals, typically every 2-5 years.
- Regulator Replacement: Regulators also have a recommended service life, often around 10 years from the date of manufacture. Check the regulator for a manufacturing date stamp.
- Cleaning: Keep the regulator clean and free from dirt and debris. Use a soft, damp cloth for cleaning; do not use harsh chemicals or abrasive materials.
6. Troubleshooting
If you encounter issues with your GOK Low-Pressure Regulator, refer to the following common problems and solutions.
Problem: No gas flow or low pressure to the appliance.
- Check Gas Cylinder: Ensure the gas cylinder is not empty and its valve is fully open.
- Check Connections: Verify all connections (cylinder to regulator, regulator to hose, hose to appliance) are tight and free of leaks. Perform a leak test.
- Check for Kinks/Blockages: Inspect the high-pressure hose for any kinks or blockages.
- Regulator Malfunction: If the above steps do not resolve the issue, the regulator may be faulty. Do not attempt to repair it. Replace the regulator with a new, compatible unit.
If problems persist after following these troubleshooting steps, contact a qualified gas technician or the manufacturer for assistance.
7. Specifications
| Model Number | 01-287-00 |
| Type | EN71 |
| Operating Pressure | 30 mbar |
| Connection (Inlet) | KLF |
| Connection (Outlet) | G 1/4 LH-KN |
| Weight | 340 g |
| Dimensions (L x W x H) | 8 x 6 x 12.5 cm |
| Manufacturer | GOK |
8. Warranty and Support
GOK products are manufactured to high-quality standards. For specific warranty information, please refer to the documentation provided at the time of purchase or contact your retailer. In case of technical issues or questions not covered in this manual, please contact GOK customer support or your authorized dealer for assistance.
For further information, you may visit the official GOK website or consult your local gas appliance specialist.


