1. Introduction
Thank you for choosing the Think Gizmos TG504_SML Wireless Weather Station. This device provides comprehensive weather data, including indoor and outdoor temperature and humidity, barometric pressure, weather forecasts, and more. This manual will guide you through the setup, operation, and maintenance of your new weather station to ensure optimal performance and longevity.
2. Package Contents
Please check the package contents to ensure all items are present:
- 1 x Think Gizmos Wireless Weather Station Main Unit
- 1 x Outdoor Remote Sensor
- 1 x Mains Adapter (for main unit)
- 1 x User Manual

Image: The complete package contents, showing the main weather station unit, the remote outdoor sensor, the mains power adapter, and the instruction manual, all within the product box.
3. Product Overview
The Think Gizmos TG504_SML Weather Station consists of a main display unit and a wireless outdoor sensor. The main unit features a clear LED backlit display showing various data points, while the remote sensor collects outdoor environmental data.
3.1 Main Unit Display Features
The main unit's display provides the following information:
- Time (12/24 hour format) and Date
- Indoor Temperature (0°C to +50°C / +32°F to +122°F) and Humidity (20%-95%)
- Outdoor Temperature (-20°C to +60°C / -4°F to +140°F) and Humidity (20%-95%)
- Barometric Pressure Measurement and Trend Graph
- Visual Weather Forecast Display
- Moon Phase Display
- Sunrise and Sunset Times
- Max/Min Memory for Temperature and Humidity
- Alarm Clock with Snooze Feature
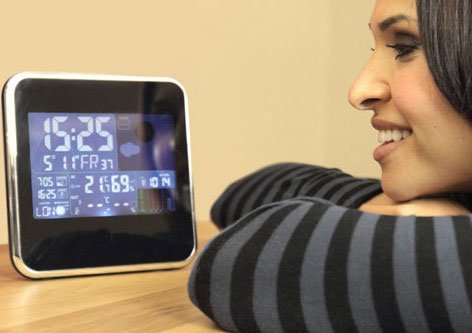
Image: A user viewing the main display unit of the weather station, highlighting its clear and informative screen.
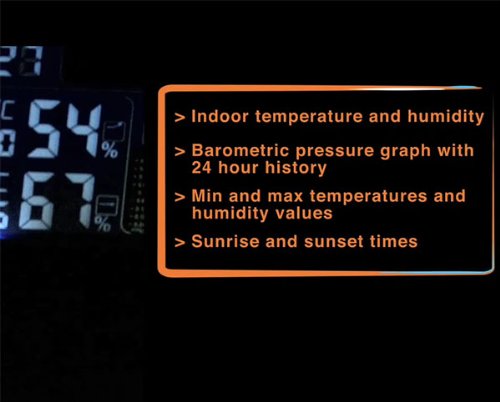
Image: A detailed view of the weather station's display, illustrating key data points such as indoor temperature and humidity, barometric pressure trends, and minimum/maximum recorded values.
3.2 Outdoor Remote Sensor
The compact outdoor remote sensor wirelessly transmits temperature and humidity data to the main unit. It is designed for both indoor and outdoor use.
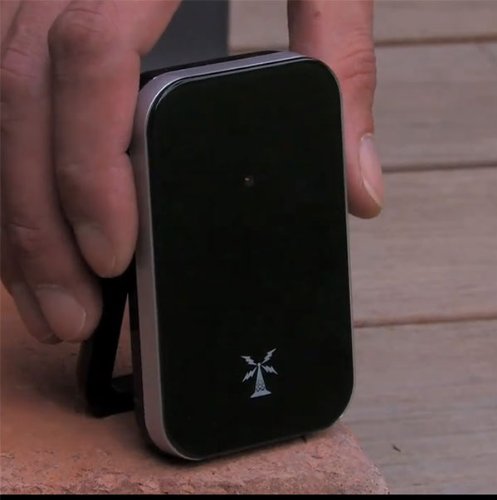
Image: A hand holding the compact outdoor remote sensor, showing its design and size.
4. Setup
4.1 Battery Installation
Main Unit:
- Open the battery compartment cover on the back of the main unit.
- Insert 3 x AA batteries (not included) according to the polarity markings (+/-).
- Close the battery compartment cover.
Outdoor Remote Sensor:
- Open the battery compartment cover on the back of the remote sensor.
- Insert 2 x AAA batteries (not included) according to the polarity markings (+/-).
- Close the battery compartment cover.
Note:
- For best visual results and continuous backlight, use the included mains adapter for the main unit.
- Always insert batteries into the remote sensor first, then the main unit, to ensure proper pairing.
4.2 Powering On and Sensor Pairing
- After installing batteries in both units, connect the mains adapter to the main unit and a power outlet (optional, but recommended for continuous display).
- The main unit will automatically search for the remote sensor. This process may take a few minutes.
- Once connected, the outdoor temperature and humidity will appear on the main unit's display. If the connection is not established, press the CH button on the main unit to initiate a manual search.
4.3 Initial Settings (Time, Date, Units)
Use the buttons on the back of the main unit to configure settings.

Image: The rear panel of the weather station, displaying the various control buttons for settings and functions.
- Press and hold the SET button to enter time setting mode.
- Use the UP and DOWN buttons to adjust the value, then press SET to confirm and move to the next setting.
- Adjust the following in sequence: Year > Month > Day > 12/24 Hour Format > Hour > Minute.
- Press SET again to exit the time setting mode.
- To change temperature units (°C/°F), press the °C/°F button.
- To change barometric pressure units (hPa/inHg), press the MPA/INHG button.
5. Operation
5.1 Display Information
The main unit continuously displays current indoor and outdoor conditions. The weather forecast icons (sunny, cloudy, rainy, etc.) are based on barometric pressure changes and provide a general indication of upcoming weather.
5.2 Button Functions
- LIGHT: Press to activate the backlight for a few seconds. If powered by mains adapter, the backlight is continuous.
- SET: Enter/exit setting modes (time, alarm).
- ALARM: Enter/exit alarm setting mode; activate/deactivate alarm.
- UP / DOWN: Adjust values in setting modes; toggle between display modes.
- LOC: Set location for sunrise/sunset times (refer to full manual for specific codes).
- °C/°F: Toggle between Celsius and Fahrenheit temperature units.
- CH: Manually search for the outdoor sensor; switch between multiple sensors (if applicable).
- ALERT: Set temperature alerts (high/low).
- HISTORY: View 24-hour barometric pressure history.
- MEM: View maximum and minimum recorded temperature and humidity values. Press repeatedly to cycle through Max, Min, and current values.
- MPA/INHG: Toggle between hPa and inHg barometric pressure units.
- Reset: A small button (requires a pin) to reset the unit to factory defaults.
5.3 Alarm Clock
To set the alarm:
- Press and hold the ALARM button.
- Use UP and DOWN to set the alarm hour, then press ALARM.
- Use UP and DOWN to set the alarm minute, then press ALARM to confirm.
- To activate/deactivate the alarm, press the ALARM button briefly. An alarm icon will appear/disappear on the display.
- When the alarm sounds, press any button (except LIGHT) to stop it, or press LIGHT for the snooze function (alarm will sound again after 5 minutes).
5.4 Max/Min Records
The weather station automatically records the maximum and minimum indoor/outdoor temperature and humidity values since the last reset or battery change. To view these records, press the MEM button repeatedly. The display will cycle through Max, Min, and current values.
6. Maintenance
6.1 Battery Replacement
Replace batteries in both the main unit and remote sensor when the low battery indicator appears on the display. Always replace all batteries at once with new ones of the same type. Follow the battery installation steps in Section 4.1.
6.2 Cleaning
Wipe the units with a soft, damp cloth. Do not use abrasive cleaners or solvents, as these may damage the display or casing.
6.3 Sensor Placement
For accurate outdoor readings, place the remote sensor in a shaded, dry location, protected from direct sunlight and rain. Ensure it is within the wireless range of the main unit (typically up to 30 meters/100 feet, depending on obstacles).
7. Troubleshooting
- No display on main unit: Check battery polarity and ensure batteries are fresh. If using the mains adapter, ensure it is properly connected and the power outlet is active.
- Outdoor sensor not connecting/displaying data:
- Ensure batteries in the remote sensor are fresh and correctly inserted.
- Move the sensor closer to the main unit to check for range issues.
- Press the CH button on the main unit to manually search for the sensor.
- Avoid placing the sensor near large metal objects or strong electromagnetic interference.
- Inaccurate temperature/humidity readings:
- Ensure the outdoor sensor is not in direct sunlight or exposed to rain/moisture.
- Allow both units to stabilize for at least 30 minutes after setup.
- Compare readings with other reliable thermometers/hygrometers in the same location.
- Weather forecast inaccurate: The weather forecast is based on barometric pressure changes and is an estimation. It may not always perfectly match local weather conditions.
- Unit unresponsive: Remove all batteries and disconnect the mains adapter for a few minutes, then reinsert batteries and reconnect power. If issues persist, use a pin to press the Reset button on the back of the main unit.
8. Specifications
| Model Number | TG504_SML |
| Main Unit Dimensions | Approx. 19 x 13 x 4.5 cm |
| Indoor Temperature Range | 0°C ~ +50°C (+32°F ~ +122°F) |
| Outdoor Temperature Range | -20°C ~ +60°C (-4°F ~ +140°F) |
| Temperature Accuracy | ±1.5 °C |
| Indoor/Outdoor Humidity Range | 20% ~ 95% |
| Main Unit Power | 3 x AA batteries (not included) or Mains Adapter (included) |
| Remote Sensor Power | 2 x AAA batteries (not included) |
| Connectivity Technology | Wireless |
| Display Type | LED |
9. Warranty and Support
Think Gizmos products are designed for reliability and performance. For any questions, technical support, or warranty inquiries, please refer to the contact information provided with your purchase or visit the official Think Gizmos website. Please retain your proof of purchase for warranty claims.