Introduction
This manual provides detailed instructions for the setup, operation, and maintenance of your Seiko QHR024S Digital Alarm Clock. Please read this manual thoroughly before using your clock to ensure proper function and longevity. Keep this manual for future reference.
Product Overview
The Seiko QHR024S is a modern digital alarm clock featuring a clear LCD display, radio wave control for accurate timekeeping, and essential functions like alarm, snooze, and temperature display.
Key Features:
- Digital Display
- Calendar Display
- Snooze Function
- Temperature Display
- Alarm Function
- Quartz, Atomic Movement
- Illumination (Backlight)
- Global Radio Wave Control
Component Identification:
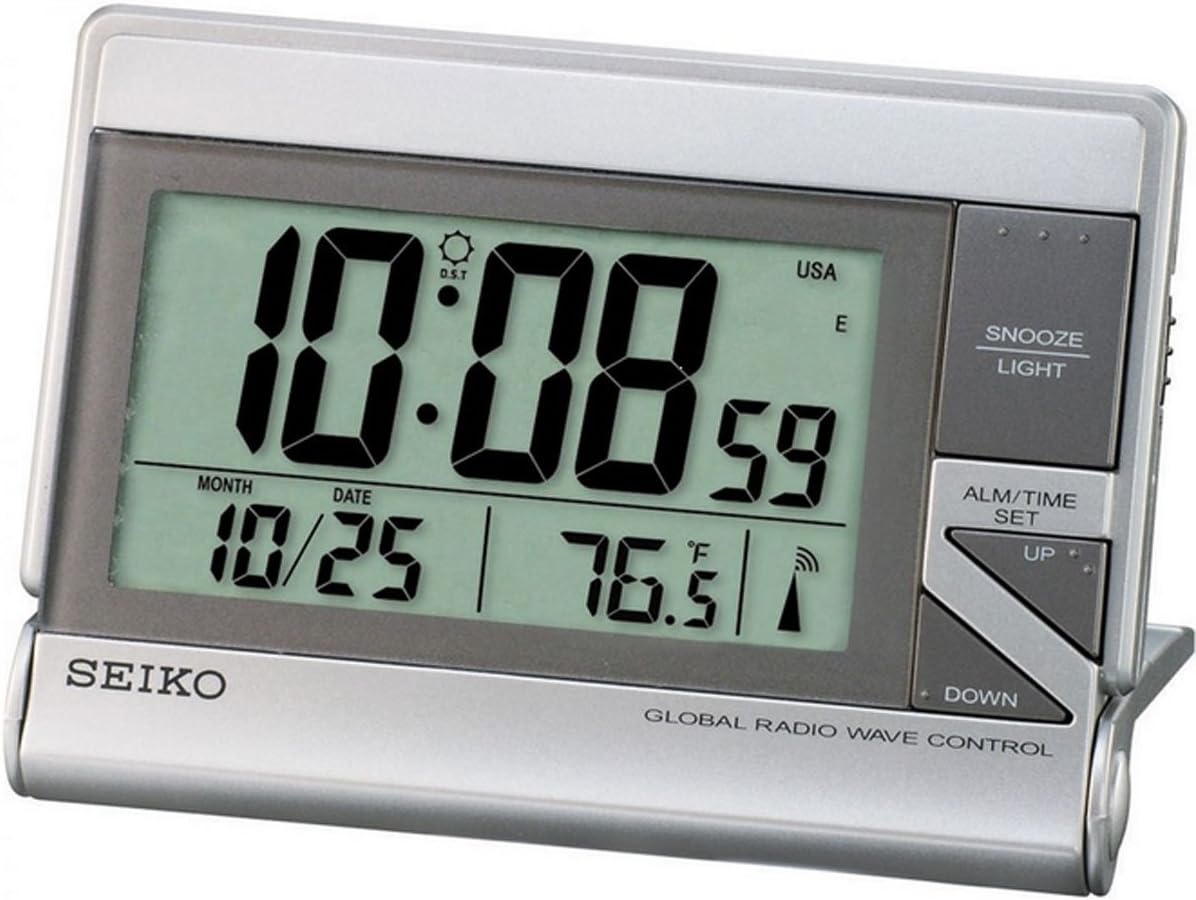
The image displays the front view of the Seiko QHR024S Digital Alarm Clock. The large LCD screen shows the time (e.g., 10:08:59), date (e.g., 10/25), and temperature (e.g., 76.5°F). Indicators for Daylight Saving Time (DST), USA time zone, and radio wave reception are also visible. To the right of the display are the control buttons: 'SNOOZE LIGHT' at the top, 'ALM/TIME SET' in the middle, and 'UP' and 'DOWN' arrow buttons below it. The 'SEIKO' logo is printed on the bottom left, and 'GLOBAL RADIO WAVE CONTROL' is printed on the bottom right.
Refer to the image above for the location of the following components:
- LCD Display: Shows time, date, temperature, and various indicators.
- SNOOZE LIGHT Button: Activates snooze function and backlight.
- ALM/TIME SET Button: Used to enter time and alarm setting modes.
- UP Button: Adjusts values upwards during setting.
- DOWN Button: Adjusts values downwards during setting.
Setup
1. Battery Installation
- Locate the battery compartment cover on the back of the clock.
- Remove the cover by sliding or unlatching it.
- Insert one (1) LR44 battery, ensuring the polarity (+/-) matches the diagram inside the compartment.
- Replace the battery compartment cover securely.
Note: An LR44 battery is typically included with your purchase.
2. Initial Power On and Radio Wave Reception
Upon battery installation, the clock will power on and automatically attempt to receive the time signal from the nearest atomic clock transmitter. This process may take several minutes to several hours depending on your location and environmental conditions.
- Place the clock near a window, away from electronic devices that may cause interference.
- The radio wave indicator on the display will flash during reception and become solid once synchronized.
- If reception is poor, try repositioning the clock. Manual time setting is available if automatic synchronization is not successful.
Operating Instructions
1. Setting Time and Date Manually
- Press and hold the ALM/TIME SET button until the time display begins to flash.
- Use the UP or DOWN buttons to adjust the hour. Press ALM/TIME SET to confirm and move to minutes.
- Repeat this process for minutes, year, month, and date.
- After setting the date, press ALM/TIME SET to exit the setting mode.
2. Setting the Alarm
- Press the ALM/TIME SET button once briefly to display the current alarm time.
- While the alarm time is displayed, press and hold ALM/TIME SET until the alarm hour flashes.
- Use the UP or DOWN buttons to adjust the alarm hour. Press ALM/TIME SET to confirm and move to alarm minutes.
- Adjust alarm minutes using UP or DOWN. Press ALM/TIME SET to confirm and exit alarm setting.
- To activate or deactivate the alarm, press the ALM/TIME SET button briefly to show the alarm time, then press UP or DOWN to toggle the alarm ON/OFF indicator.
3. Snooze and Backlight Function
When the alarm sounds, press the SNOOZE LIGHT button to temporarily stop the alarm. The alarm will sound again after a few minutes (typical snooze duration is 5-10 minutes). Pressing any other button will turn off the alarm until the next set time.
Press the SNOOZE LIGHT button at any time to activate the backlight for a few seconds, illuminating the display for easy viewing in low light conditions.
4. Temperature Display
The clock displays the ambient temperature. The unit of temperature (Celsius or Fahrenheit) can typically be switched via a small button or switch located on the back or side of the clock. Refer to the physical unit for the exact location of this control.
5. Daylight Saving Time (DST)
The Seiko QHR024S, with its Global Radio Wave Control feature, is designed to automatically adjust for Daylight Saving Time. Ensure the DST indicator is correctly set (usually automatic) or manually adjust if necessary during time setting.
Maintenance
1. Cleaning
To clean the clock, use a soft, dry cloth. Do not use abrasive cleaners, solvents, or chemical sprays, as these can damage the casing or display.
2. Battery Replacement
When the display becomes dim or the clock functions erratically, it is time to replace the battery. Follow the battery installation steps outlined in the
Related Documents - QHR024S
 |
Seiko QHL095-W Clock Instruction Manual - Setup and Operation Guide Comprehensive guide for the Seiko QHL095-W clock, covering setup, time and alarm setting, operation, maintenance, and troubleshooting. Ensure optimal performance of your Seiko timepiece. |
 |
Gingko Black Alarm Clocks: User Guide and Instructions Comprehensive user guide for Gingko Black Alarm Clocks, covering display, alarm settings, charging, materials, care, safety, and support information. |
 |
Edwards and Dukane Clocks and Time Systems Catalog A comprehensive catalog detailing Edwards and Dukane synchronized clock systems, including analog, digital, Power-over-Ethernet (PoE), and wireless timekeeping solutions. Features product specifications, ordering information, and technical details for various models. |
 |
Karlsson KA6070 LED Cuckoo Alarm Clock Instruction Manual Detailed instructions and warnings for the Karlsson KA6070 LED Cuckoo Alarm Clock, covering setup, functions, alarm settings, temperature, and maintenance. |
 |
Karlsson Alarm Clock Six In The Mix KA5805 Instruction Manual Comprehensive user manual for the Karlsson Alarm Clock Six In The Mix KA5805, covering features, settings, operation, and troubleshooting. |
 |
American Time Network Clock Setup App Quick Start Guide Step-by-step guide for setting up American Time network clocks using the mobile app, covering Wi-Fi and PoE clock configuration, provisioning, and activation on the inCloud platform. |