Wagner 0529010
Wagner FLEXiO 590 HVLP Paint Sprayer User Manual
Model: 0529010
Introduction
The Wagner FLEXiO 590 is a versatile handheld HVLP (High Volume Low Pressure) paint sprayer designed for both indoor and outdoor projects. It features an X-Boost turbine for adjustable control and full coverage, and includes two specialized nozzles for various applications. This manual provides essential information for the safe and effective operation, maintenance, and troubleshooting of your FLEXiO 590 paint sprayer.
Safety Information
Always adhere to the following safety guidelines when operating the Wagner FLEXiO 590 paint sprayer:
- Always keep the sprayer pointed away from people and animals.
- Wear appropriate protective gear, including goggles and a mask.
- Never point the sprayer at yourself or others.
- Always follow local regulations for paint disposal.
- Keep the sprayer clean and dry when not in use.
- Always unplug the sprayer before cleaning or performing maintenance.
Components and What's Included
Your Wagner FLEXiO 590 package includes the following components:
- iSpray Front End Nozzle
- Fine Finish Detail Nozzle
- FLEXiO 590 Turbine (main unit)
- Carrying Case
- Instruction Guide (this manual)

Image: The Wagner FLEXiO 590 paint sprayer, showing the main unit, two interchangeable nozzles (iSpray and Detail Finish), and the included carrying case.

Image: A detailed view highlighting the two included spray nozzles: the iSpray nozzle for larger areas like decks, walls, and fences, and the Detail Finish nozzle for smaller projects such as cabinets, trim, and furniture.
Setup
- Prepare the Work Area: Ensure the area is well-ventilated and protected from overspray using drop cloths or plastic sheeting.
- Prepare the Material: For optimal results, ensure your paint or stain is properly mixed and, if necessary, thinned according to the paint manufacturer's recommendations and the sprayer's guidelines. The FLEXiO 590 is designed to spray most unthinned latex paints, but thinning may improve finish quality for some materials.
- Attach the Nozzle: Select either the iSpray nozzle for broad surfaces or the Detail Finish nozzle for fine work. Securely attach the chosen nozzle to the main turbine unit.
- Fill the Container: Fill the material container with your prepared paint or stain. Do not overfill.
- Connect Power: Plug the sprayer into a grounded electrical outlet.
Operating Instructions
The FLEXiO 590 offers complete adjustability to suit various project needs. Familiarize yourself with the controls before beginning your project. This sprayer can cover an 8' x 10' surface in 1 minute for stains and 5 minutes for latex paints, spraying up to 8.0 gallons per hour.
Adjustments:
- X-Boost Power Dial: This dial has 10 speed settings to adjust the air power and material flow. Higher settings are for thicker materials and faster coverage, while lower settings are for thinner materials and finer finishes.
- Material Flow Control: Located on the trigger, this knob allows you to fine-tune the amount of material being sprayed.
- Pattern Adjustment: The air cap ears on the nozzle can be rotated to change the spray pattern from horizontal to vertical, or from wide to narrow.

Image: Visual guide to the sprayer's adjustable features, including controls for pattern width, material flow, air power (X-Boost dial), and spray pattern orientation (horizontal/vertical).
Spraying Technique:
- Test Spray: Always test the spray pattern and material flow on a piece of scrap material before applying to your project. Adjust settings until the desired finish is achieved.
- Maintain Distance: Hold the sprayer approximately 6-12 inches from the surface, depending on the material and desired coverage.
- Even Strokes: Use smooth, even strokes, overlapping each pass by about 50% to ensure uniform coverage.
- Release Trigger: Release the trigger at the end of each pass to avoid paint buildup.

Image: An individual using the FLEXiO 590 to spray a white picket fence, illustrating the sprayer's capability for outdoor projects.
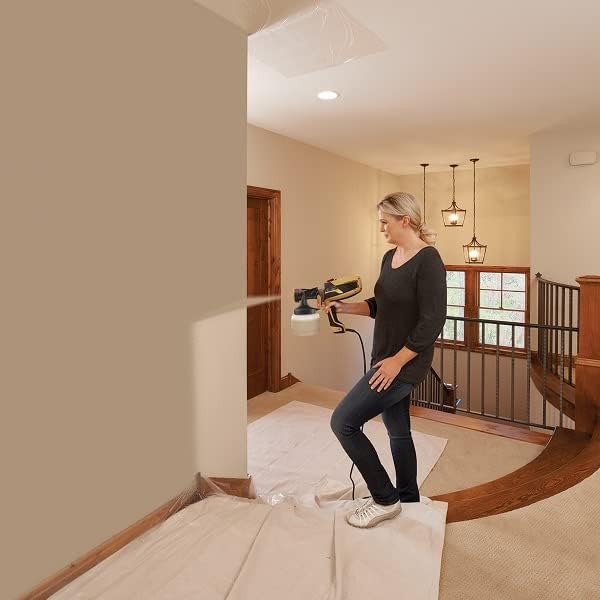
Image: A woman applying paint to an interior wall using the FLEXiO 590, showcasing its suitability for indoor painting tasks.

Image: A man demonstrating the sprayer's ability to apply unthinned paints to an exterior surface, emphasizing its power and efficiency.

Image: A visual guide indicating the optimal project types for the FLEXiO 590, ranging from large interior and exterior surfaces to fine finishing and smaller rooms.
Maintenance and Cleaning
Proper cleaning after each use is crucial for maintaining the performance and longevity of your paint sprayer. Clean-up is designed to be quick and easy.
- Empty Material: Empty any remaining paint or stain from the container back into its original can.
- Rinse Container: Fill the container with appropriate cleaning solution (water for latex/water-based paints, mineral spirits for oil-based paints) and spray through until clear.
- Disassemble Nozzle: Carefully disassemble the nozzle and clean all parts thoroughly with the appropriate cleaning solution and a brush.
- Clean Main Unit: Wipe down the exterior of the main turbine unit with a damp cloth. Do not immerse the turbine in liquid.
- Dry and Store: Ensure all parts are completely dry before reassembling and storing the sprayer in its carrying case.

Image: Components of the sprayer's front end and paint container soaking in soapy water, demonstrating the ease of cleaning after use.
Troubleshooting
If you encounter issues with your FLEXiO 590, consult the following common troubleshooting tips:
| Problem | Possible Cause | Solution |
|---|---|---|
| No spray or weak spray | Clogged nozzle, insufficient material, air leaks, material too thick. | Clean nozzle, refill container, check connections, thin material. |
| Uneven spray pattern | Clogged air cap, incorrect pattern adjustment, inconsistent movement. | Clean air cap, adjust pattern, maintain steady hand movement. |
| Paint spitting or dripping | Nozzle not tightened, material too thin, worn parts. | Ensure nozzle is secure, adjust material consistency, inspect for wear. |
| Motor runs but no spray | Suction tube blocked, material container empty. | Clear suction tube, refill material. |
Specifications
| Feature | Detail |
|---|---|
| Brand | Wagner |
| Model Name | FLEXiO 590 |
| Part Number | 0529010 |
| Power Source | Corded Electric |
| Tank Volume | 1.5 Quarts |
| Recommended Uses | Painting (furniture, walls, ceilings, siding, fences, cabinets, trim) |
| Compatible Materials | Most unthinned interior and exterior paints and stains (e.g., Latex) |
| Item Weight | 2.11 Pounds |
| Product Dimensions | 15.9"W x 13.9"H |
| Special Features | Low Pressure, High Volume (HVLP), Adjustable Flow, Adjustable Pattern |
| Coverage Rate | 8' x 10' surface in 1-5 minutes (stains/latex), up to 8.0 gal/hour |
Warranty and Support
The Wagner FLEXiO 590 includes a 1-year warranty from the date of purchase. For warranty claims, technical assistance, or general inquiries, please refer to the contact information provided in the original product packaging or visit the official Wagner Spraytech website.
Additional resources:
Ask a question about this manual
Ask about setup, troubleshooting, compatibility, parts, safety, or missing instructions. Manuals+ will review the question and use this page’s manual context to help answer it.