Introduction
This manual provides essential information for the safe and effective installation, operation, and maintenance of the Ocal HUB1-G 1-Inch PVC Coated Hub. The HUB1-G is designed for electrical conduit applications requiring corrosion resistance and a secure connection to enclosures.
Safety Information
Always adhere to the following safety guidelines to prevent injury or damage to equipment:
- Disconnect Power: Ensure all power to the electrical system is disconnected before beginning any installation or maintenance procedures.
- Qualified Personnel: Installation and maintenance should only be performed by qualified electricians in accordance with all national and local electrical codes.
- Personal Protective Equipment (PPE): Wear appropriate PPE, including safety glasses and gloves, during installation.
- Inspect Components: Before installation, inspect all components for any signs of damage. Do not install damaged parts.
Product Overview
The Ocal HUB1-G is a corrosion-resistant knockout hub featuring robust construction and a protective PVC coating. It is engineered to provide a reliable and sealed connection for 1-inch conduits.
Key Features:
- Corrosion Resistance: Constructed from zinc or copper-free aluminum with a nominal 0.04-inch (40 mil) PVC coating bonded to the exterior.
- Secure Connection: Features a hexagonal/splined body and locknut for fast and easy installation.
- Sealing Integrity: A captive sealing ring provides a complete 360-degree seal, even when the conduit is not perfectly perpendicular to the enclosure.
- Thermoplastic Insulation: Includes a 1-inch thermoplastic insulated throat.
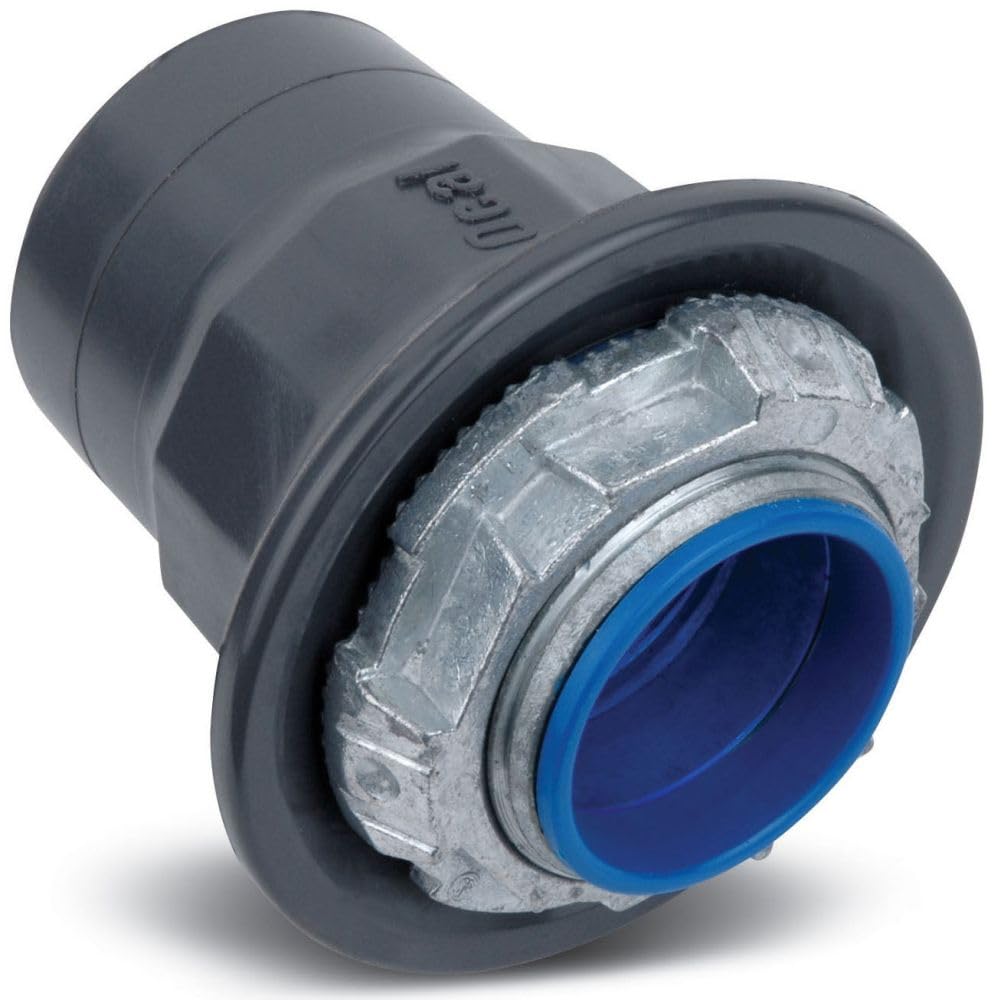
Figure 1: Top-down view of the Ocal HUB1-G hub, highlighting the internal blue sealing ring and the metal locknut structure.
Setup and Installation
Follow these steps for proper installation of the Ocal HUB1-G hub:
- Prepare Enclosure: Ensure the enclosure has a properly sized knockout or threaded opening for a 1-inch conduit.
- Thread Hub: Thread the Ocal HUB1-G hub into the prepared opening of the enclosure.
- Secure Locknut: Hand-tighten the hexagonal/splined locknut onto the hub from the inside of the enclosure.
- Final Tightening: Use an appropriate wrench to firmly tighten the locknut, ensuring a secure connection. The captive sealing ring should compress to create a complete 360-degree seal against the enclosure surface.
- Connect Conduit: Thread the 1-inch conduit into the hub. Ensure the conduit is fully engaged and tightened to prevent movement and maintain the seal.
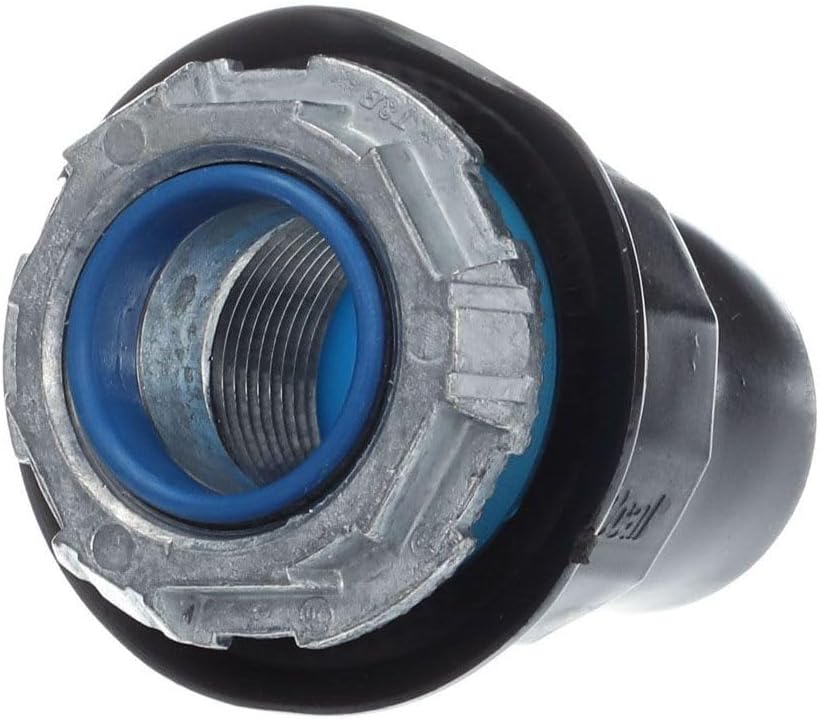
Figure 2: Angled view of the Ocal HUB1-G, illustrating the threaded interior for conduit connection and the durable PVC exterior.
Operating
Once correctly installed, the Ocal HUB1-G functions as a permanent, sealed, and corrosion-resistant connection point for electrical conduits to an enclosure. It requires no active operation.
Maintenance
The Ocal HUB1-G is designed for minimal maintenance. However, periodic inspection is recommended:
- Visual Inspection: Annually inspect the hub and its connection points for any signs of physical damage, cracking of the PVC coating, or corrosion.
- Seal Integrity: Verify that the sealing ring remains intact and that the connection to the enclosure is still tight and secure.
- Cleaning: If necessary, clean the exterior of the hub with a damp cloth. Avoid abrasive cleaners that could damage the PVC coating.

Figure 3: Side view of the Ocal HUB1-G, displaying the complete profile and threaded conduit connection point.
Troubleshooting
Should issues arise, consider the following:
- Loose Connection: If the conduit or hub feels loose, re-tighten the locknut and the conduit connection. Ensure the sealing ring is properly compressed.
- Signs of Corrosion: If significant corrosion is observed on the metal components despite the PVC coating, the hub may need to be replaced. Ensure the PVC coating is not compromised.
- Water Ingress: If water or moisture is found inside the enclosure at the hub connection, check the tightness of the hub and the integrity of the sealing ring. Re-installation or replacement may be necessary.
Specifications
| Specification | Detail |
|---|---|
| Model Number | HUB1-G |
| Thread Size | 1-Inch |
| Thread Type | NPT |
| Material | Zinc or Copper-Free Aluminum with PVC Coating |
| Coating Thickness | Nominal 0.04-Inch (40 mil) PVC |
| Overall Diameter | Approximately 2 inches |
| Connector Type | Screw |
| Item Weight | 2 pounds |
| UPC | 704508388164 |
Warranty Information
Please note that the manufacturer's specifications indicate No Warranty for this product. For details regarding return policies, please refer to your point of purchase.
Support
For technical assistance or further inquiries regarding the Ocal HUB1-G 1-Inch PVC Coated Hub, please contact your distributor or the manufacturer directly. Ensure you have the model number (HUB1-G) available when seeking support.


