Introduction
Thank you for purchasing the Philips AJ3116M/37 Digital Tuning Clock Radio. This manual provides essential information for setting up, operating, and maintaining your device. Please read these instructions carefully before use to ensure optimal performance and safety.
The Philips AJ3116M/37 is designed to provide reliable timekeeping, FM radio, and alarm functions. Key features include FM digital tuning with presets, a sleep timer, and a dual alarm system.
Safety Information
Please observe the following safety precautions:
- Do not expose the device to rain or moisture.
- Do not place the device near heat sources such as radiators or stoves.
- Ensure proper ventilation; do not block ventilation openings.
- Use only attachments/accessories specified by the manufacturer.
- Unplug the device during lightning storms or when unused for long periods.
- Refer all servicing to qualified service personnel.
What's in the Box
Upon unpacking, please ensure all items are present and in good condition:
- Philips AJ3116M/37 Digital Tuning Clock Radio
- Power Adapter (if included, otherwise integrated)
- User Manual (this document)
Product Overview
Familiarize yourself with the main components of your clock radio:
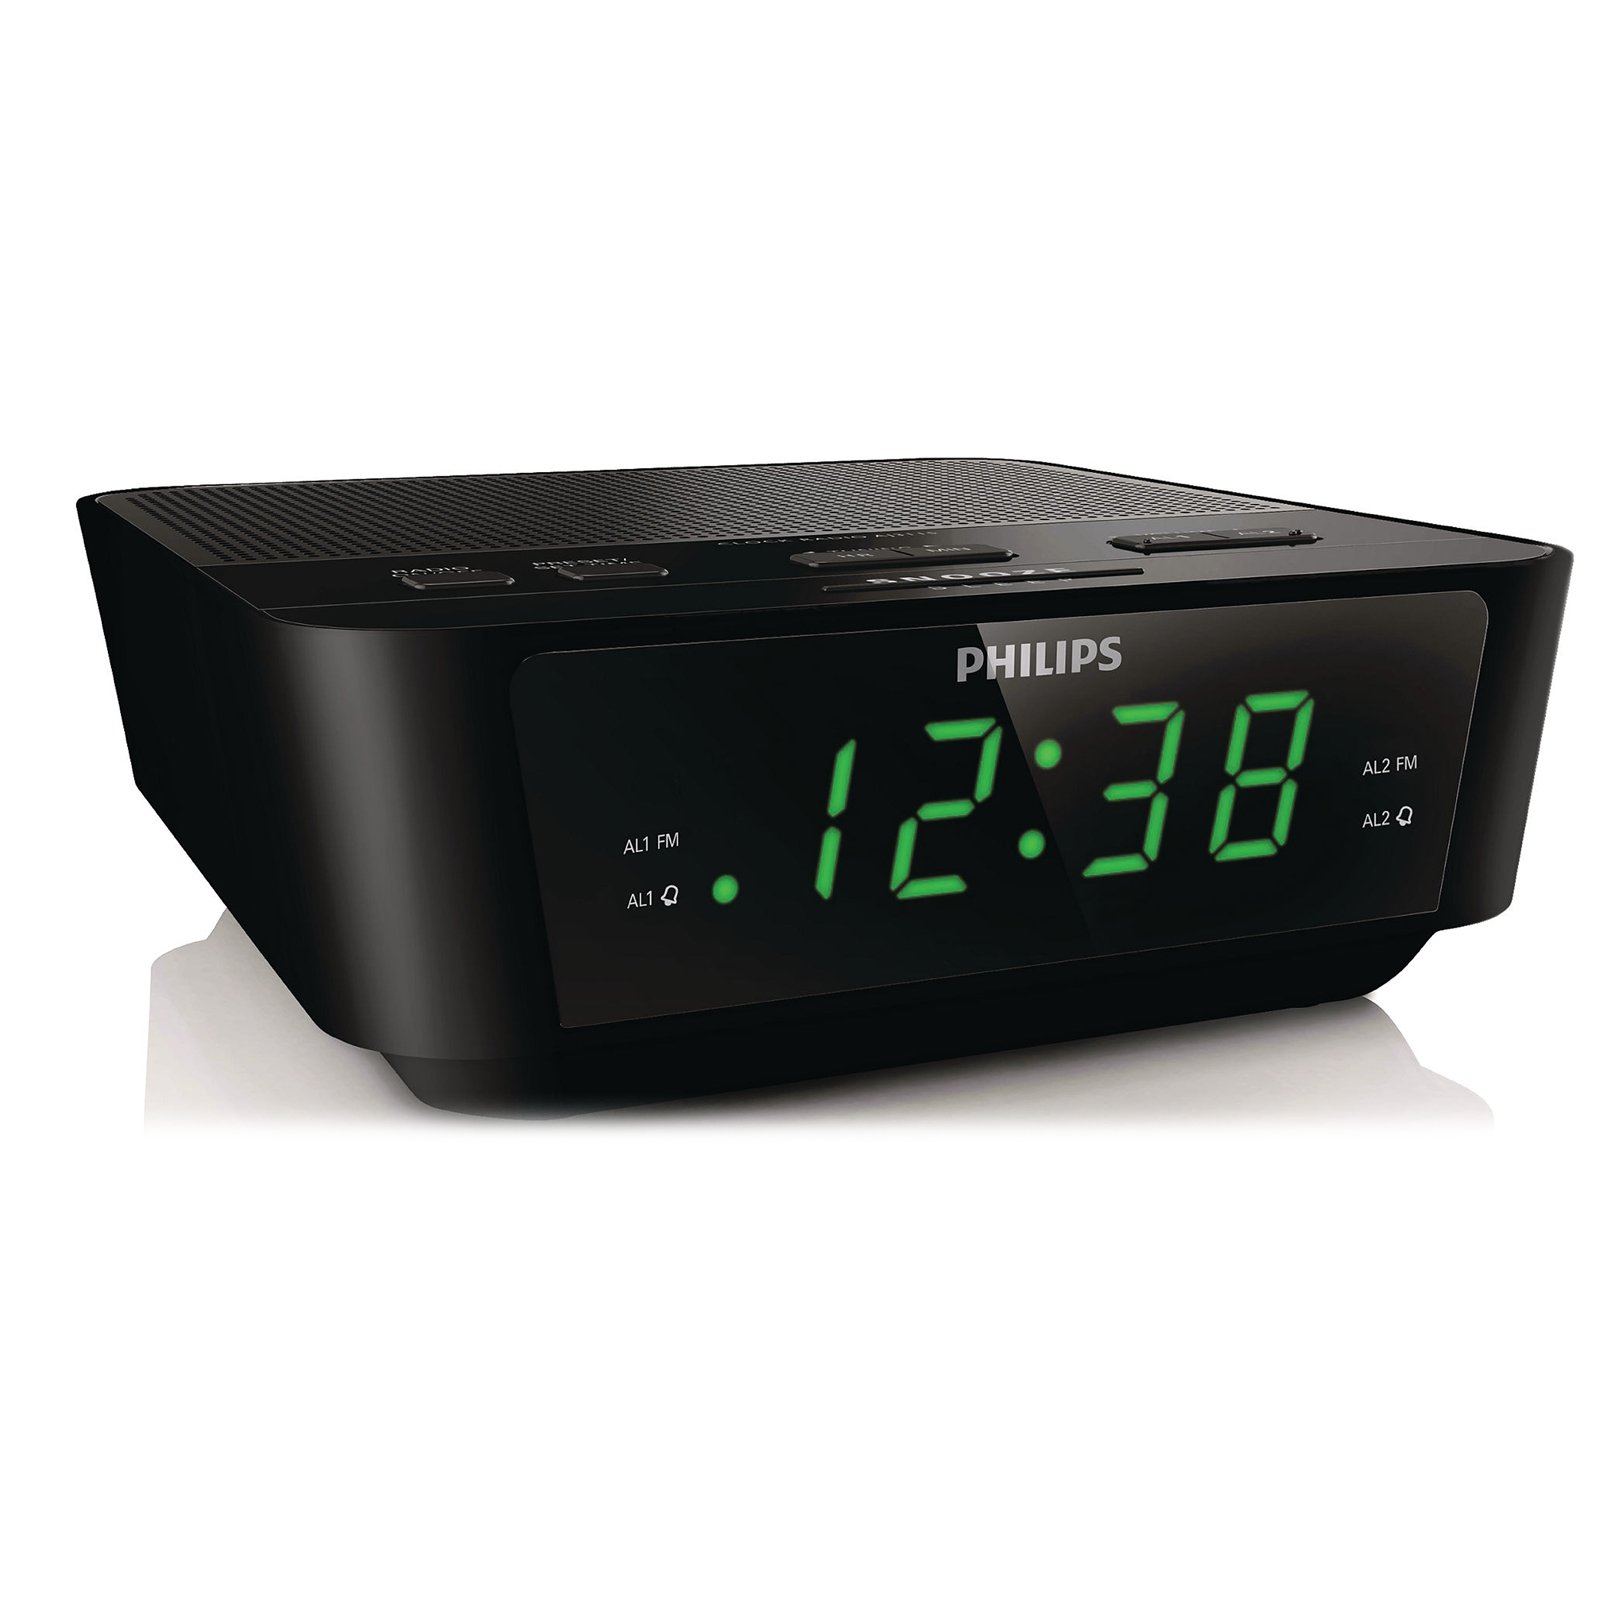
This image shows the front of the Philips AJ3116M/37 Digital Tuning Clock Radio. It features a large digital display, speaker grille, and control buttons on the top surface.
- Digital Display: Shows time, alarm status, and radio frequency.
- Control Buttons: Located on the top panel for setting time, alarms, tuning radio, and adjusting volume.
- Speaker: Integrated for audio output.
- FM Antenna: For radio reception.
- Power Input: For connecting to AC power.
- Battery Compartment: Located on the bottom for backup batteries.
Setup
-
Connect Power:
Plug the AC power adapter into the DC input jack on the back of the clock radio, then plug the adapter into a wall outlet.
-
Install Backup Batteries:
Open the battery compartment cover on the bottom of the unit. Insert 2 AA batteries (not included) according to the polarity markings (+ and -). These batteries retain time and alarm settings during a power outage but do not power the unit for normal operation.
-
Set the Time:
Press and hold the TIME SET button until the hour digits flash. Use the HOUR and MINUTE buttons to adjust the time. Press TIME SET again to confirm.
Operating Instructions
Radio Operation
-
Turn On/Off:
Press the RADIO ON/OFF button to turn the radio on or off.
-
Tune to a Station:
Press the TUNE + or TUNE - buttons to manually adjust the frequency. For automatic tuning, press and hold TUNE + or TUNE - for two seconds; the radio will scan for the next strong station.
-
Set Presets:
Tune to your desired station. Press and hold the PRESET button until the preset number flashes. Use TUNE + or TUNE - to select a preset number (1-10). Press PRESET again to save.
-
Select Presets:
While the radio is on, press the PRESET button repeatedly to cycle through saved stations.
-
Adjust Volume:
Use the VOLUME + or VOLUME - buttons to adjust the sound level.
Alarm Functions
The clock radio features a dual alarm system, allowing you to set two independent alarms.
-
Set Alarm 1 or Alarm 2:
Press and hold the ALARM 1 or ALARM 2 button until the alarm time flashes. Use the HOUR and MINUTE buttons to set the desired alarm time. Press the respective ALARM button again to confirm.
-
Select Alarm Source:
After setting the alarm time, press the ALARM 1 or ALARM 2 button repeatedly to cycle through alarm modes: Buzzer, Radio, or Off. An indicator will light up next to your selection.
-
Stop/Snooze Alarm:
When the alarm sounds, press the SNOOZE button for a temporary pause (typically 9 minutes). To turn off the alarm completely, press the ALARM OFF button.
Sleep Timer
The sleep timer allows you to fall asleep to the radio, which will automatically turn off after a set period.
-
Activate Sleep Timer:
While the radio is on, press the SLEEP button repeatedly to select a sleep duration (e.g., 120, 90, 60, 30, 15 minutes, or OFF). The radio will play for the selected duration and then turn off.
Display Brightness
Adjust the display brightness to your preference.
- Press the DIMMER button (if available, or a similar button) to cycle through different brightness levels for the digital display.
Maintenance
-
Cleaning:
Wipe the unit with a soft, damp cloth. Do not use abrasive cleaners or solvents. Ensure the unit is unplugged before cleaning.
-
Battery Replacement:
Replace the backup batteries annually or when the battery low indicator appears (if applicable) to ensure time retention during power outages.
Troubleshooting
| Problem | Possible Cause | Solution |
|---|---|---|
| No power / Display off | Power cord not connected properly. Power outage. | Check AC power connection. Ensure power outlet is functional. |
| Poor radio reception | Antenna not extended or positioned correctly. Interference from other electronics. | Fully extend the FM wire antenna. Reposition the unit for better reception. Move away from other electronic devices. |
| Alarm does not sound | Alarm not activated or set incorrectly. Volume too low (if radio alarm). | Verify alarm time and source (Buzzer/Radio) are correctly set and activated. Increase radio volume if using radio alarm. |
| Time/settings lost after power outage | Backup batteries are dead or not installed. | Install 2 new AA batteries in the battery compartment. |
Specifications
| Brand | Philips |
| Model Number | AJ3116M/37 |
| Display Type | Digital |
| Color | Black |
| Special Features | Alarm, Radio, Timer |
| Product Dimensions | 5.39"W x 6.46"H |
| Item Weight | 9.6 ounces |
| Power Source | Battery & AC |
| Batteries Required | 2 AA batteries (for backup) |
| Manufacturer | Philips Consumer Electronics |
| UPC | 609585234185 |
Warranty and Support
For warranty information and customer support, please refer to the warranty card included with your product or visit the official Philips support website. You can also visit the Philips Store on Amazon for more product information.
Please retain your proof of purchase for any warranty claims.