1. Introduction
Thank you for choosing the Premiere XC-1000 Benchtop Centrifuge. This manual provides essential information for the safe and efficient operation, maintenance, and troubleshooting of your centrifuge. The XC-1000 is designed for reliable separation of fluids in various medical, scientific, clinical, and industrial laboratory applications. Please read this manual thoroughly before operating the device.
2. Safety Information
To ensure safe operation and prevent damage to the unit or injury to personnel, observe the following safety precautions:
- Always read and understand this manual completely before operating the centrifuge.
- Place the centrifuge on a stable, level, and vibration-free surface. Ensure adequate clearance around the unit for ventilation.
- The unit features an automatic stop function that activates if the lid is opened before the cycle completes. Do not attempt to bypass this safety feature.
- Ensure tubes are properly balanced and securely placed in the rotor. Unbalanced loads can cause excessive vibration and damage.
- Use only tubes compatible with the centrifuge's rotor capacity (10 ml to 15 ml).
- Do not operate the centrifuge if the rotor or lid is damaged.
- Keep hands and loose clothing clear of the rotor area during operation.
- Unplug the unit from the power source before cleaning or performing any maintenance.
- The three suction feet on the base are designed to keep the unit in place and reduce vibrations. Ensure they are clean and firmly gripping the surface.
3. Product Overview
The Premiere XC-1000 is a compact benchtop centrifuge designed for ease of use and reliable performance. It features a fixed-angle rotor, a simple control panel, and essential safety mechanisms.
3.1. Centrifuge Components

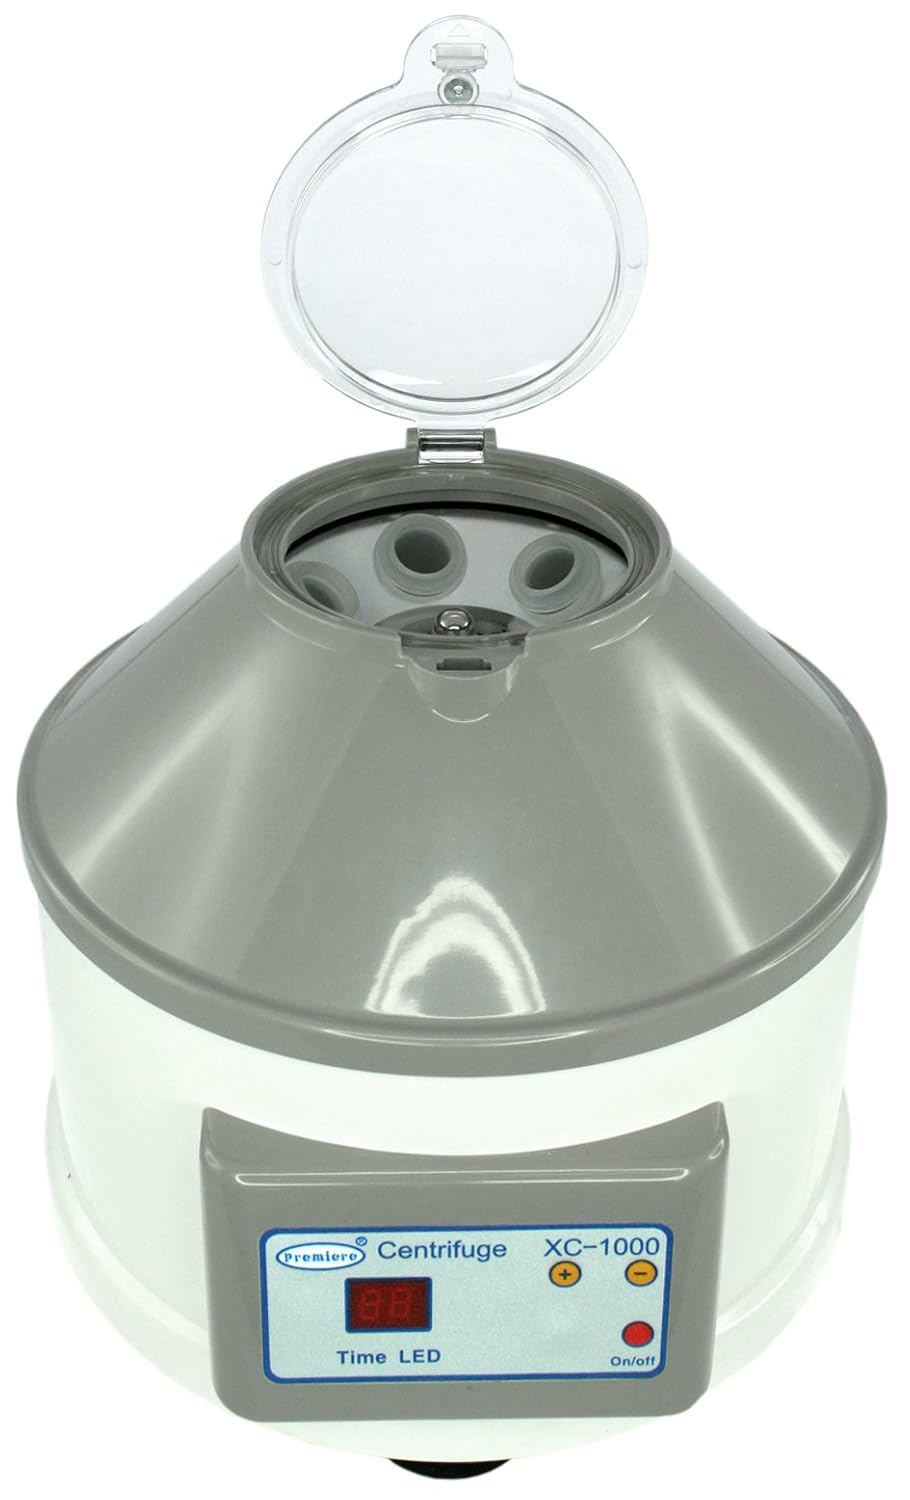


3.2. Control Panel
The front control panel includes:
- Time LED Display: Shows the remaining run time.
- On/Off Button: Powers the unit on or off.
- Timer Selection Buttons (+/-): Adjusts the run time.
4. Setup
Follow these steps for initial setup:
- Unpack: Carefully remove the centrifuge from its packaging and inspect for any shipping damage. Report any damage to your supplier immediately.
- Placement: Position the centrifuge on a sturdy, level, and clean workbench or laboratory surface. Ensure the three rubber suction feet on the base make firm contact with the surface for maximum stability and vibration reduction.
- Power Connection: Connect the power cord to the centrifuge and then to a grounded electrical outlet. Ensure the voltage matches the unit's requirements (110V, 60Hz as indicated on the product label).
- Rotor Inspection: Open the lid and ensure the rotor is clean and free of any debris.


5. Operating Instructions
The Premiere XC-1000 operates at a fixed speed of 4000 RPM (1790 g RCF).
- Power On: Press the On/Off button to power on the centrifuge. The Time LED display will illuminate.
- Set Time: Use the +/- buttons to set the desired run time. The timer can be set up to 60 minutes. For continuous operation, set the timer to '00' or a specific continuous hold setting if available (refer to display for 'continuous' indicator). The unit also features a last run memory function, recalling the previous setting.
- Load Samples: Open the lid and carefully place your sample tubes (10 ml to 15 ml capacity) into the rotor positions. It is crucial to balance the load. If you are running fewer than six tubes, place them symmetrically opposite each other to ensure even weight distribution. For example, if running two tubes, place them in positions 1 and 4. If running three, place them in 1, 3, and 5.

- Close Lid: Close the lid firmly until it clicks into place. The centrifuge will not operate if the lid is not securely closed.
- Start Operation: The centrifuge will automatically begin spinning once the lid is closed and the timer is set.
- Monitor: Allow the centrifuge to run for the set duration. The unit operates quietly, with a noise level below 70 dB.
- Completion: Once the set time expires, the centrifuge will automatically stop. Wait for the rotor to come to a complete stop before attempting to open the lid.
- Unload Samples: Open the lid and carefully remove your processed sample tubes.
- Power Off: Press the On/Off button to power off the unit when not in use.
6. Maintenance
Proper maintenance ensures the longevity and optimal performance of your centrifuge.
- Cleaning: Regularly clean the exterior of the centrifuge with a soft, damp cloth and a mild, non-abrasive detergent. Do not use harsh chemicals or abrasive cleaners, as they can damage the plastic surfaces.
- Rotor Care: Clean the rotor and tube wells after each use, especially if there are spills. Ensure the rotor is dry before closing the lid or operating the unit again.
- Lid: Keep the transparent lid clean to allow for visual inspection during operation.
- Inspection: Periodically inspect the power cord for any signs of damage. Check the rubber suction feet for wear.
- Storage: When not in use for extended periods, store the centrifuge in a clean, dry environment.
7. Troubleshooting
If you encounter issues with your Premiere XC-1000, refer to the following common problems and solutions:
| Problem | Possible Cause | Solution |
|---|---|---|
| Centrifuge does not power on. | No power supply; Power cord loose; On/Off button not pressed. | Ensure power cord is securely plugged in; Check power outlet; Press On/Off button firmly. |
| Centrifuge does not spin. | Lid not closed securely; Timer not set. | Close the lid firmly until it clicks; Set the desired run time using the +/- buttons. |
| Excessive vibration or noise during operation. | Unbalanced load; Centrifuge on an unstable surface; Damaged tubes or rotor. | Ensure tubes are balanced symmetrically; Place centrifuge on a stable, level surface; Inspect tubes and rotor for damage and replace if necessary. |
| Lid cannot be opened after a run. | Rotor has not come to a complete stop. | Wait for the rotor to stop completely. The safety interlock prevents opening while spinning. |
8. Specifications
- Model Number: XC-1000
- Brand: Premiere
- Speed: Fixed 4000 RPM
- Maximum RCF: 1790 g
- Rotor Type: Fixed Angle
- Capacity: 6 tubes (10 ml to 15 ml fluid capacity)
- Timer: 0-60 minutes, Continuous Hold function, Last Run Memory
- Noise Level: < 70 dB
- Dimensions (Package): 32.77 cm x 29.21 cm x 29.21 cm (approx. 12.9 x 11.5 x 11.5 inches)
- Weight (Package): 5.9 kg (approx. 13 lbs)
- Safety Features: Automatic lid stop, Suction feet for stability
- Certifications: CE certified, Manufactured in ISO 9001 certified factory
9. Warranty and Support
The Premiere XC-1000 Benchtop Centrifuge is backed by a comprehensive 1-year warranty against manufacturer defects. This warranty covers defects in materials and workmanship under normal use.
For technical support, warranty claims, or service inquiries, please contact your authorized Premiere distributor or the manufacturer directly. Please have your model number (XC-1000) and purchase information ready when contacting support.


