1. Introduction
This manual provides essential information for the proper installation, operation, and maintenance of the Ranco 016-527 Low Pressure Control. The Ranco 016-527 is a genuine OEM replacement part designed for use in commercial foodservice industry equipment. Adhering to these instructions ensures safety, reliability, and optimal performance of the unit.
2. Safety Information
WARNING: Electrical shock hazard. Disconnect power before servicing.
Always follow local electrical codes and safety regulations. Installation and servicing should only be performed by qualified personnel. Wear appropriate personal protective equipment (PPE) during installation and maintenance. Ensure the system is depressurized before attempting any work on the control unit. Do not operate the control if it appears damaged.
3. Product Overview
The Ranco 016-527 is a low pressure control device. Its primary function is to monitor and regulate the low-side pressure within a refrigeration or air conditioning system. It typically features adjustable set points for cut-in and cut-out pressures, ensuring the system operates within safe and efficient parameters. This control helps protect compressors from damage due to excessively low suction pressure.
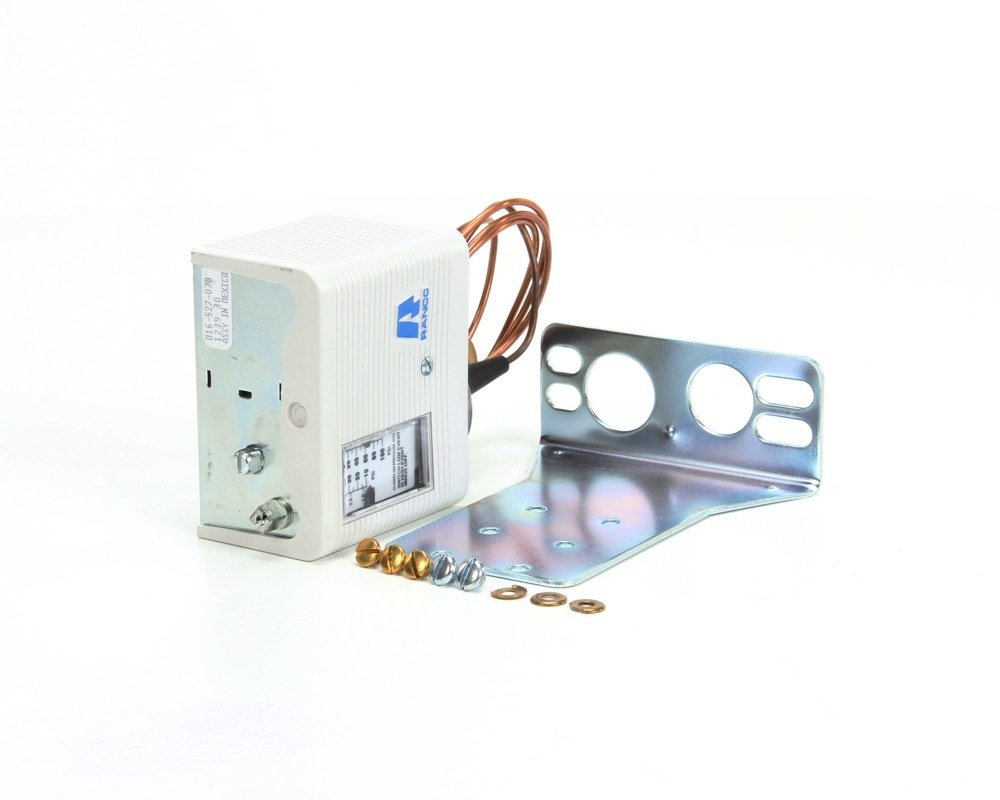
Image showing the Ranco 016-527 Low Pressure Control unit, typically used in commercial foodservice applications. This unit is designed to monitor and regulate low-side pressure in refrigeration systems.
4. Setup and Installation
- Preparation: Ensure the system is de-energized and depressurized. Gather all necessary tools and safety equipment.
- Mounting: Mount the control securely in a location free from excessive vibration and moisture. Refer to the equipment manufacturer's instructions for specific mounting points.
- Pressure Connection: Connect the low-pressure sensing line to the control's pressure port. Ensure all connections are tight and leak-free.
- Electrical Wiring: Wire the control according to the equipment manufacturer's wiring diagram and local electrical codes. Ensure proper grounding.
- Initial Settings: Adjust the cut-in and cut-out pressure settings as required by the system specifications. Use a calibrated pressure gauge for verification.
- System Start-up: Re-pressurize and re-energize the system. Monitor the control's operation to ensure it functions correctly.
It is highly recommended that installation be performed by a certified HVAC/R technician.
5. Operating Instructions
Once properly installed and configured, the Ranco 016-527 Low Pressure Control operates automatically. It continuously monitors the low-side pressure of the refrigeration system. When the pressure drops below the set cut-out point, the control will open its contacts, typically de-energizing the compressor to prevent damage. When the pressure rises back above the set cut-in point, the control will close its contacts, allowing the compressor to restart. The differential setting determines the pressure difference between the cut-in and cut-out points.
6. Maintenance
The Ranco 016-527 Low Pressure Control is designed for reliable operation with minimal maintenance. However, periodic checks are recommended:
- Visual Inspection: Annually inspect the control for any signs of physical damage, corrosion, or loose connections.
- Pressure Line Check: Ensure the pressure sensing line is free from kinks, blockages, or leaks.
- Electrical Connections: Verify that all electrical connections are secure and free from corrosion.
- Functionality Test: Periodically verify the cut-in and cut-out set points using a calibrated pressure gauge to ensure accurate operation.
Always disconnect power to the equipment before performing any maintenance.
7. Troubleshooting
If the system is not operating as expected, consider the following common issues:
- Compressor Not Starting:
- Check if the low-side pressure is below the cut-out setting.
- Verify electrical connections to the control.
- Ensure the control's contacts are closing when pressure rises above cut-in.
- Compressor Short Cycling:
- Check for refrigerant leaks causing rapid pressure drops.
- Verify the differential setting is appropriate for the system.
- Inspect for issues with the pressure sensing line (e.g., partial blockage).
- Incorrect Pressure Readings:
- Ensure the pressure sensing line is clear and properly connected.
- Compare control readings with a calibrated external pressure gauge.
For complex issues or if troubleshooting steps do not resolve the problem, contact a qualified service technician.
8. Specifications
| Attribute | Value |
|---|---|
| Brand Name | Ranco |
| Model Number | 016-527 |
| Item Weight | 1.4 pounds |
| Product Dimensions | 5 x 5 x 9 inches |
| Part Number | 016-527 |
| Batteries Required? | No |
| National Stock Number | 5930-00-028-4190 |
9. Warranty Information
Specific warranty details for the Ranco 016-527 Low Pressure Control are typically provided by the manufacturer or the authorized distributor at the time of purchase. Please refer to your purchase documentation or contact Ranco directly for comprehensive warranty terms and conditions.
10. Support
For technical assistance, replacement parts, or further inquiries regarding the Ranco 016-527 Low Pressure Control, please contact Ranco customer support or an authorized Ranco service provider. Contact information can typically be found on the Ranco official website or through your product supplier.