
Introduction
This manual provides essential instructions for the safe installation, operation, and maintenance of your Dabmar Lighting D5100-G Pagoda Fixture. Please read this manual thoroughly before installation and retain it for future reference. This fixture is designed for outdoor landscape lighting applications, providing illumination with its four-tier pagoda design and incandescent light source.
Safety Information
WARNING: Risk of electric shock. Disconnect power at the fuse or circuit breaker before installing or servicing. All electrical connections must be in accordance with local codes, ordinances, or the National Electric Code (NEC).
- Ensure the power supply is turned off before installation, maintenance, or bulb replacement.
- This fixture is designed for 120V incandescent light sources. Do not exceed the maximum wattage specified.
- Use only UL listed direct burial wire/cable for connections as the fixture is pre-wired with such.
- Consult a qualified electrician if you are unsure about any part of the installation process.
- Do not operate the fixture with a damaged cord or if the glass lens is broken.
Package Contents
Verify that all components are present before beginning installation:
- Dabmar Lighting D5100-G Pagoda Fixture (1 unit)
- Clear, heat-resistant, tempered glass lens (pre-installed)
- Pre-wired UL listed direct burial wire/cable
Note: A 0.50 inch threaded stem and light bulb (E26 base, 120V incandescent) are not included and must be purchased separately.
Setup and Installation
Follow these steps for proper installation of your pagoda fixture:
- Prepare the Installation Area: Choose a suitable location for your path light. Ensure the ground is stable and clear of obstructions. Dig a trench for the direct burial wire if necessary, following local electrical codes for depth and separation from other utilities.
- Mount the Stem (Not Included): The pagoda head is compatible with a 0.50 inch threaded stem. Securely install the stem into the ground or a suitable mounting base according to the stem manufacturer's instructions. Ensure the stem is plumb and stable.
- Attach the Fixture Head: Carefully thread the pagoda fixture head onto the 0.50 inch threaded stem. Tighten securely by hand until snug. Do not overtighten.
- Install the Light Bulb:
- Gently remove the top tier or access panel of the fixture to expose the bulb socket.
- Insert an E26 base, 120V incandescent bulb (maximum wattage as specified on the fixture label) into the socket.
- Replace the top tier or access panel, ensuring it is securely fastened to protect the bulb and internal components from moisture.
- Wire the Fixture:
- Connect the pre-wired UL listed direct burial wire/cable from the fixture to your main landscape lighting power supply.
- Ensure all connections are made using appropriate waterproof connectors and are buried according to local electrical codes.
- Verify that the power supply is off during wiring.
- Test the Fixture: Once all connections are secure and the fixture is properly assembled, restore power to the circuit. Test the light to ensure it functions correctly.
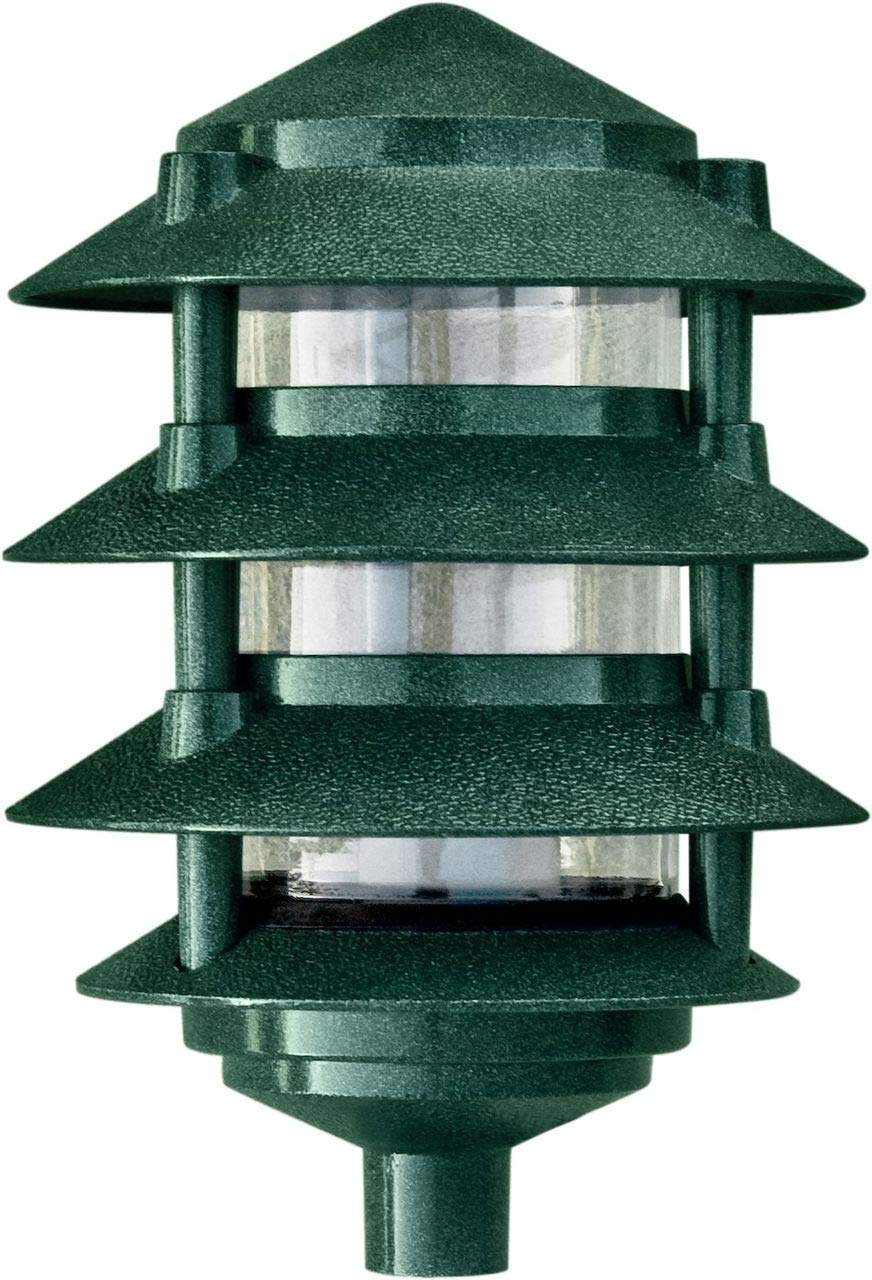
Operating Instructions
The Dabmar Lighting D5100-G Pagoda Fixture is designed for simple operation once installed.
- Power On/Off: This fixture is typically controlled by an external switch, timer, or photocell connected to your landscape lighting system. Activate the external control to turn the light on or off.
- Light Source: The fixture uses a standard E26 base incandescent bulb. Ensure the bulb is securely seated for proper operation.
Maintenance
Regular maintenance ensures the longevity and optimal performance of your fixture.
- Cleaning:
- Ensure power is disconnected before cleaning.
- Wipe the cast aluminum body with a soft, damp cloth. Avoid abrasive cleaners that could damage the green finish.
- Clean the clear, heat-resistant, tempered glass lens with a mild glass cleaner and a soft cloth to maintain light output.
- Bulb Replacement:
- Turn off power to the fixture at the circuit breaker.
- Allow the bulb to cool completely before handling.
- Access the bulb by carefully removing the top tier or access panel.
- Unscrew the old E26 base incandescent bulb and replace it with a new one of the same type and wattage (do not exceed maximum wattage).
- Reassemble the fixture, ensuring all parts are securely fastened.
- Restore power and test the fixture.
- Inspection: Periodically inspect the fixture and wiring for any signs of damage, wear, or corrosion. Address any issues promptly to prevent hazards.
Troubleshooting
If your fixture is not operating as expected, refer to the following common issues and solutions:
| Problem | Possible Cause | Solution |
|---|---|---|
| Light does not turn on. |
|
|
| Light flickers. |
|
|
| Water inside fixture. |
|
|
Specifications
| Model Number | D5100-G |
| Brand | Dabmar Lighting |
| Material | Cast Aluminum (Fixture Body), Tempered Glass (Lens) |
| Finish | Green |
| Light Source Type | Incandescent |
| Bulb Base | E26 |
| Voltage | 120 Volts |
| Power Source | Corded Electric |
| Indoor/Outdoor Usage | Outdoor |
| Dimensions (Product) | 6 x 6 x 9 inches |
| Item Weight | 1.6 Pounds |
| Special Feature | Energy Efficient (Note: This refers to the design, actual efficiency depends on bulb used) |
| Specification Met | UL Listed |
| Water Resistance Level | Water Resistant |