
1. Introduction
This manual provides detailed instructions for the setup, operation, and maintenance of your VuPoint Magic InstaScan PDS-ST420-VP Portable Smart Scanner. Please read this manual thoroughly before using the device to ensure proper functionality and to maximize its lifespan. This portable scanner is designed for convenient scanning of documents and images without requiring a direct computer connection, saving files directly to a microSD card.
2. Package Contents
Verify that all items listed below are included in your package:
- VuPoint Magic InstaScan PDS-ST420-VP Portable Smart Scanner
- USB Cable
- 4 x AA Batteries
- PaperPort 14 Software Download Key
- Cleaning Cloth (may vary by package)
3. Parts of the Scanner
Familiarize yourself with the various components of your scanner:
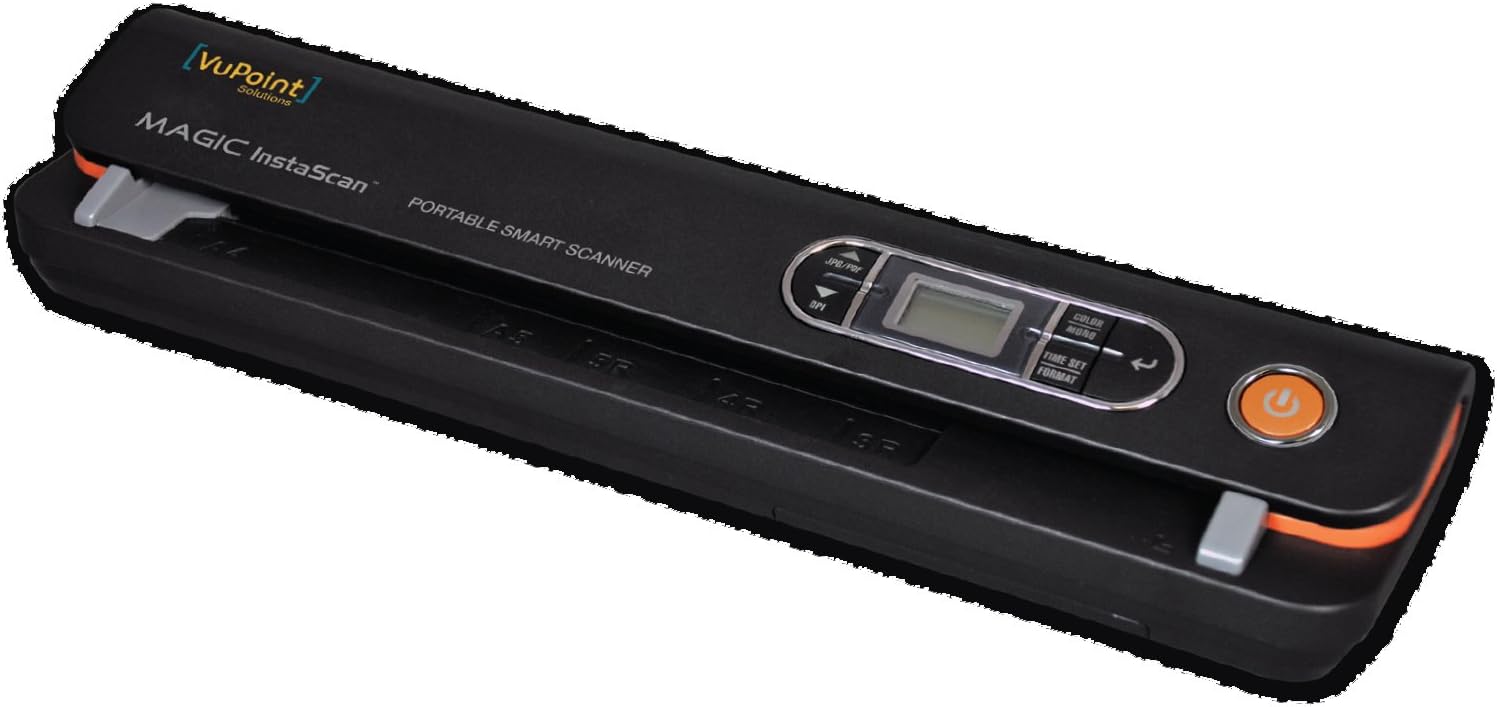
An image showing the black VuPoint Magic InstaScan portable scanner from a top-down angle, highlighting its compact design and control panel.
- Document Feed Slot: Where documents are inserted for scanning.
- Control Panel: Contains buttons and LCD display for operating the scanner.
- LCD Display: Shows current settings, battery status, and scan count.
- JPG/PDF Button: Toggles between JPEG and PDF file formats.
- DPI Button: Adjusts scanning resolution (e.g., 300, 600, 900 DPI).
- COLOR/MONO Button: Switches between color and monochrome scanning modes.
- TIME SET/FORMAT Button: Used for setting the date/time or formatting the microSD card.
- Power Button: Turns the scanner on and off.
- MicroSD Card Slot: For inserting the microSD/microSDHC memory card.
- USB Port: For connecting to a computer to transfer files.
- Battery Compartment: Holds 4 AA batteries.
4. Setup
4.1. Battery Installation
- Locate the battery compartment on the underside of the scanner.
- Open the battery compartment cover.
- Insert the 4 included AA batteries, ensuring correct polarity (+/-).
- Close the battery compartment cover securely.
4.2. MicroSD Card Installation
A microSD/microSDHC memory card (up to 32GB) is required and sold separately.
- Locate the microSD card slot on the side of the scanner.
- Insert the microSD card into the slot until it clicks into place. Ensure the card is inserted with the correct orientation.
- To remove, gently push the card inward until it springs out.
4.3. Powering On/Off
- To Power On: Press and hold the Power Button until the LCD display illuminates.
- To Power Off: Press and hold the Power Button until the LCD display turns off. The scanner will also automatically power off after a period of inactivity to conserve battery life.
5. Operation
5.1. Basic Scanning Procedure
- Ensure the scanner is powered on and a microSD card is inserted.
- Adjust scanning settings (DPI, Color/Mono, JPG/PDF) as desired using the respective buttons on the control panel. The current settings will be displayed on the LCD.
- Gently insert the document into the Document Feed Slot. The scanner will automatically detect the document and begin feeding it through.
- Hold the document steady as it passes through the scanner.
- Once the scan is complete, the file will be saved to the microSD card. The LCD display will show the number of scans saved.
5.2. Adjusting Scan Settings
- File Format (JPG/PDF): Press the JPG/PDF button to switch between JPEG (for images) and PDF (for documents) formats.
- Resolution (DPI): Press the DPI button to cycle through available resolutions (e.g., 300 DPI for standard documents, 600 DPI for higher detail, 900 DPI for maximum quality). Higher DPI settings result in larger file sizes.
- Color Mode (COLOR/MONO): Press the COLOR/MONO button to select between color scanning and monochrome (black and white) scanning.
5.3. Transferring Scans to a Computer
- Ensure the scanner is powered on.
- Connect the scanner to your computer using the provided USB cable.
- Your computer should recognize the scanner as a removable storage device (similar to a USB flash drive).
- Navigate to the scanner's drive and locate the scanned files.
- Copy the desired files to your computer.
- Safely eject the removable storage device from your computer before disconnecting the USB cable.
6. Maintenance
6.1. Cleaning the Scanner
Regular cleaning helps maintain optimal scan quality.
- Exterior: Wipe the exterior of the scanner with a soft, dry, lint-free cloth. Do not use liquid cleaners or abrasive materials.
- Scan Head and Rollers: Over time, dust and paper fibers can accumulate on the scan head and rollers, affecting scan quality. Use a specialized scanner cleaning sheet (if available) or a soft, dry cloth to gently clean the glass surface of the scan head and the rubber rollers inside the document feed path. Ensure the scanner is powered off before cleaning internal components.
7. Troubleshooting
Refer to the following table for common issues and their solutions:
| Problem | Possible Cause | Solution |
|---|---|---|
| Scanner does not power on. | Low or depleted batteries; incorrectly inserted batteries. | Replace batteries with new AA batteries; ensure correct polarity. |
| Poor scan quality (streaks, blurry images). | Dirty scan head or rollers; incorrect DPI setting. | Clean the scan head and rollers as described in the Maintenance section; increase DPI setting. |
| Document does not feed or jams. | Document misaligned; paper too thick or thin; foreign object in feed path. | Ensure document is straight and properly aligned; use appropriate paper thickness; check for and remove any obstructions. |
| Cannot transfer files to computer. | Loose USB connection; no microSD card inserted; corrupted microSD card. | Ensure USB cable is securely connected; verify microSD card is inserted; try formatting the microSD card (this will erase all data). |
| LCD display shows an error message. | Specific error condition. | Refer to the scanner's on-screen error codes (if any) or try powering off and on again. If persistent, contact customer support. |
8. Specifications
Technical specifications for the VuPoint Magic InstaScan PDS-ST420-VP Portable Smart Scanner:
| Feature | Detail |
|---|---|
| Optical Resolution | 900 dpi |
| File Formats | JPEG, PDF |
| Memory Support | MicroSD/microSDHC card up to 32GB (not included) |
| Power Source | 4 x AA Batteries (included) |
| Maximum Scanning Length | Up to 90 inches |
| Connectivity | USB |
| Product Dimensions | 12.3 x 7.1 x 2 inches |
| Item Weight | 1.7 pounds |
| Model Number | PDSST420VP |
| Manufacturer | VuPoint |
| Minimum System Requirements | Windows 7 |
9. Warranty and Support
For warranty information and technical support, please refer to the documentation included with your purchase or visit the official VuPoint Solutions website. Keep your proof of purchase for warranty claims.
- Online Support: Visit the VuPoint Solutions website for FAQs, driver downloads, and contact information.
- Customer Service: Contact customer service for assistance with product issues or warranty inquiries.