
1. Introduction
The Perry 1IT1061 is a modular staircase timer designed for controlling lighting in stairwells and common areas. This device ensures that lights remain on for a user-defined period, then automatically switch off, promoting energy efficiency and convenience. It features an adjustable timer from 1 minute to 18 minutes and includes a switch for continuous light operation. This timer is suitable for modular installation and can also be wall-mounted.
2. Safety Information
WARNING: Electrical installation should only be performed by a qualified electrician in accordance with local wiring regulations and safety standards. Always disconnect power at the main circuit breaker before installing, servicing, or removing the device.
- Ensure the power supply matches the device's specifications (230 V AC +5%-10% 50/60 Hz).
- Do not expose the device to moisture or extreme temperatures.
- Do not attempt to open or repair the device yourself. Refer all servicing to qualified personnel.
- Keep children away from electrical installations.
3. Package Contents
Verify that all components are present in the package:
- 1x Perry 1IT1061 Modular Staircase Timer
- Instruction Manual (this document)
4. Product Overview
The Perry 1IT1061 is a compact, 2 DIN module designed for integration into electrical distribution boards. It features a rotary knob for time adjustment and a selector switch for operational modes. The device is constructed from durable polycarbonate.
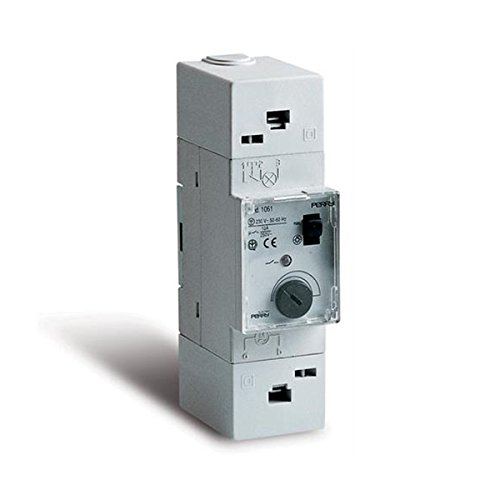
Figure 1: Front view of the Perry 1IT1061 modular staircase timer. This image displays the device's compact form factor, the rotary dial for setting the timer duration, and the switch for selecting between timed operation and continuous light mode. The unit is designed for DIN rail mounting.
5. Installation and Setup
Follow these steps for safe and correct installation:
- Power Disconnection: Before starting any work, ensure the main power supply to the installation is completely disconnected at the circuit breaker. Use a voltage tester to confirm that no power is present.
- Mounting: The 1IT1061 is designed for DIN rail mounting. Snap the device onto the DIN rail within your electrical distribution board. Ensure it is securely fastened.
- Wiring: Connect the timer according to the wiring diagram provided on the device or in the full technical manual. Typically, this involves connecting the phase (L) and neutral (N) power supply, and then connecting the switched phase output to the lighting circuit. The timer supports operation with an arbitrary number of illuminated pushbuttons.
- Time Adjustment: Once wired, set the desired lighting duration using the rotary knob on the front of the device. The timer is adjustable from 1 minute to 18 minutes.
- Mode Selection: Use the selector switch to choose between timed operation (lights turn off after the set duration) and continuous light operation (lights remain on until manually switched off or the mode is changed).
- Power Reconnection: After all connections are secure and verified, restore power to the circuit.
- Testing: Test the timer's functionality by activating a pushbutton and observing the light duration.
Note: A detailed wiring diagram is crucial for correct installation. If you are unsure, consult a qualified electrician.
6. Operating Instructions
The Perry 1IT1061 staircase timer offers straightforward operation:
- Timed Operation: In this mode, pressing any connected pushbutton will activate the lights for the duration set by the rotary knob (1 to 18 minutes). The lights will automatically switch off after this period.
- Continuous Light Operation: If the selector switch is set to the continuous light position, the lights will remain on indefinitely until the switch is moved back to the timed operation mode or the power is cycled. This is useful for extended periods of illumination.
- Adjusting Time: To change the duration of the timed operation, simply rotate the knob on the front panel to the desired time setting.
7. Maintenance
The Perry 1IT1061 staircase timer requires minimal maintenance.
- Cleaning: Periodically wipe the exterior of the device with a soft, dry cloth. Do not use abrasive cleaners or solvents.
- Inspection: Occasionally inspect the wiring connections to ensure they remain secure. This should only be done by a qualified person with the power disconnected.
- No user-serviceable parts are inside the unit.
8. Troubleshooting
| Problem | Possible Cause | Solution |
|---|---|---|
| Lights do not turn on. | No power to the timer. Incorrect wiring. Faulty light bulb/fixture. | Check circuit breaker. Verify wiring connections (consult electrician). Test light bulb/fixture. |
| Lights stay on continuously in timed mode. | Selector switch set to continuous light. Timer malfunction. | Ensure selector switch is in timed mode. If problem persists, contact support. |
| Lights turn off too quickly or too slowly. | Incorrect time setting. | Adjust the rotary time setting knob. |
If you encounter issues not listed here or if solutions do not resolve the problem, please contact Perry customer support.
9. Specifications
| Feature | Detail |
|---|---|
| Model Number | 1IT1061 |
| Manufacturer | Perry |
| Power Supply | 230 V AC +5%-10% 50/60 Hz |
| Adjustable Time Range | 1 to 18 minutes |
| Mounting | DIN Rail (2 DIN modules) |
| Material | Polycarbonate |
| Color | White |
| Product Dimensions | 5 x 14 x 8 cm |
| Weight | 150 g |
10. Warranty and Support
Specific warranty details for the Perry 1IT1061 are not provided in the product data. Please refer to the warranty information included with your purchase or contact Perry customer service for details regarding warranty coverage and technical support.
For further assistance, please visit the official Perry website or contact your local distributor.