Introduction
This manual provides detailed instructions for the replacement of your remote key transmitter casing using the MTC VR945 / 9166199. This product is designed for compatible 3-button Volvo remote key fobs. Please read these instructions carefully before proceeding with the replacement to ensure proper installation and functionality.
Product Overview
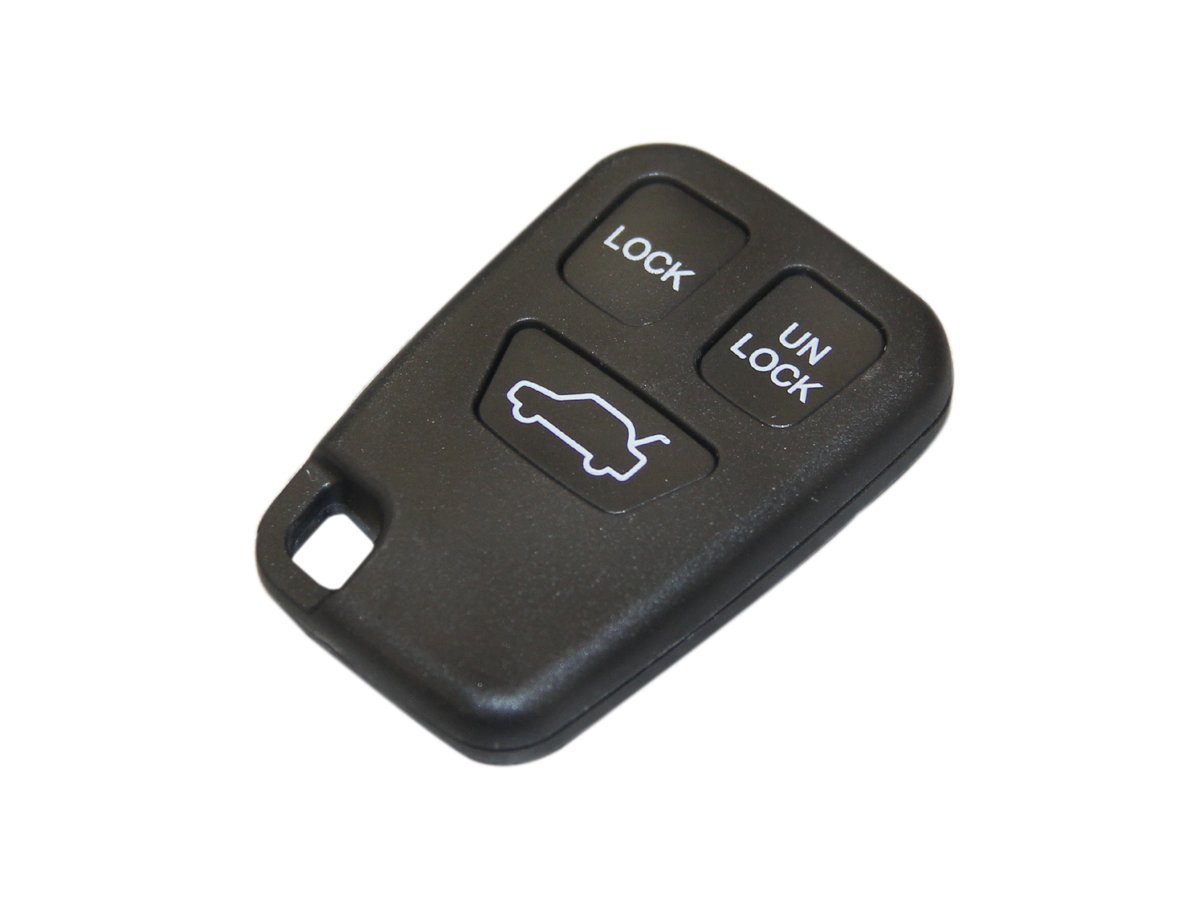
The MTC VR945 / 9166199 is a high-quality replacement casing for your existing 3-button Volvo remote key transmitter. It is engineered from durable materials to provide a reliable and long-lasting solution for worn, cracked, or damaged key fobs. This product allows you to transfer the internal electronic components from your old key into a new, sturdy casing, restoring the appearance and integrity of your remote key.
Key Features:
- Direct replacement for original 3-button Volvo remote key casings.
- Durable construction for extended lifespan.
- Designed for easy transfer of existing internal electronics.
Compatibility
This remote key transmitter casing is specifically designed for certain Volvo models that utilize a 3-button remote key fob. Before proceeding with the replacement, visually compare your existing key fob with the product images to ensure compatibility. The internal electronic circuit board and transponder chip from your original key must fit into this new casing.
Setup and Installation
Follow these steps to replace your remote key transmitter casing:
- Gather Tools: You will need your existing remote key fob, the new MTC VR945 / 9166199 casing, and a small flat-head screwdriver or a similar prying tool.
- Disassemble Old Key Fob: Carefully pry apart the two halves of your old key fob. Start from a seam and gently work your way around. Be cautious not to damage the internal components.
- Transfer Components:
- Remove the internal electronic circuit board from the old casing. Handle it by the edges to avoid touching the components.
- If your key fob has a separate transponder chip (often a small glass or carbon tube), carefully remove it. This chip is crucial for starting your vehicle.
- If your key blade is integrated into the casing and needs to be transferred, remove it from the old casing.
- Insert Components into New Casing:
- Place the electronic circuit board into the designated slots within the new MTC VR945 / 9166199 casing. Ensure it is seated correctly and securely.
- Insert the transponder chip into its specific holder within the new casing.
- If transferring the key blade, insert it into its slot in the new casing.
- Assemble New Casing: Align the two halves of the new casing and press them together firmly until they snap securely into place. Ensure there are no gaps.
- Test Functionality: After assembly, test all buttons (lock, unlock, trunk, panic, etc.) to ensure they function correctly. Also, verify that the key starts your vehicle. If the vehicle does not start, re-check the transponder chip installation.
Operating Instructions
Once the internal electronic components are successfully transferred to the new MTC VR945 / 9166199 casing and the casing is securely assembled, your remote key transmitter will operate exactly as it did with the original casing. No reprogramming of the key fob is typically required, as you are only replacing the physical housing, not the electronic brain of the key.
Maintenance
To ensure the longevity and proper functioning of your MTC VR945 / 9166199 remote key transmitter casing and its internal components, observe the following maintenance guidelines:
- Keep Dry: Protect the key fob from moisture and liquids, as water can damage the internal electronics.
- Avoid Extreme Temperatures: Do not expose the key fob to excessively high or low temperatures, which can affect battery life and electronic performance.
- Prevent Physical Damage: Avoid dropping the key fob or subjecting it to strong impacts, as this can crack the casing or dislodge internal components.
- Cleaning: If necessary, clean the exterior of the casing with a soft, dry, lint-free cloth. Do not use harsh chemicals or abrasive cleaners.
Troubleshooting
If you encounter issues after replacing the key casing, refer to the following troubleshooting tips:
| Problem | Possible Cause | Solution |
|---|---|---|
| Buttons do not respond or respond intermittently. |
|
|
| Vehicle does not start after key casing replacement. | Transponder chip not transferred or improperly seated. | Re-open the casing and verify that the transponder chip (a small glass or carbon tube) has been correctly transferred from the old key and is securely placed in its holder within the new casing. This chip is essential for vehicle immobilization systems. |
| New casing does not close properly. | Internal components are misaligned or obstructing closure. | Ensure all internal components (circuit board, transponder chip, key blade) are correctly positioned and not protruding. Gently press the halves together, ensuring proper alignment. |
Specifications
| Model Number | VR945 / 9166199 |
| OEM Equivalent Part Number | 9166199 |
| Brand | MTC |
| Item Weight | Approximately 0.32 ounces (9 grams) |
| Package Dimensions | Approximately 2.5 x 1.5 x 0.5 inches |
| Country of Origin | Taiwan |
Warranty Information
Specific warranty details for the MTC VR945 / 9166199 Remote Key Transmitter Casing are not provided by the manufacturer in the available product data. Please consult the retailer from whom you purchased this product for their return, exchange, or warranty policies.
Customer Support
For any questions, concerns, or assistance regarding the MTC VR945 / 9166199 Remote Key Transmitter Casing, please contact the customer support department of the retailer where you made your purchase. They will be able to provide the most accurate and timely assistance.