1. Introduction
The HUION A3 LED Light Tracing Pad is a versatile tool designed for various creative and technical applications. Its slim profile and advanced LED technology provide a uniformly illuminated surface, making it suitable for tasks such as animation, drawing, calligraphy, and more. This manual provides essential information for the proper setup, operation, and maintenance of your device.

Figure 1: HUION A3 LED Light Tracing Pad displaying an illustration.
Key features of the HUION A3 LED Light Tracing Pad include:
- AC Powered: Ensures stable and bright illumination with a brightness of 730.80 cd/m2 and 84.5% uniformity.
- Adjustable Brightness: Features a touch switch for stepless brightness adjustment and a memory function that recalls your last used brightness setting.
- Ultra-Slim Design: With a thickness of only 7.33mm, it is lightweight and portable.
- Eyesight-Protected Technology: Designed to minimize eye strain during extended use.
- Versatile Applications: Ideal for animation, cartooning, tattoo tracing, sewing, quilting, fabric design, photography, X-ray film viewing, and calligraphy.

Figure 7: Diverse applications for the HUION A3 LED Light Tracing Pad.
2. Setup
Follow these steps to set up your HUION A3 LED Light Tracing Pad:
- Unpack the Device: Carefully remove the light tracing pad and all accessories from its packaging. Ensure all components listed in the package contents are present.
- Place on a Stable Surface: Position the light tracing pad on a flat, stable, and clean surface.
- Connect Power Adapter: Insert the DC adapter cable into the power port on the side of the light tracing pad. Then, plug the AC power adapter into a standard electrical outlet.
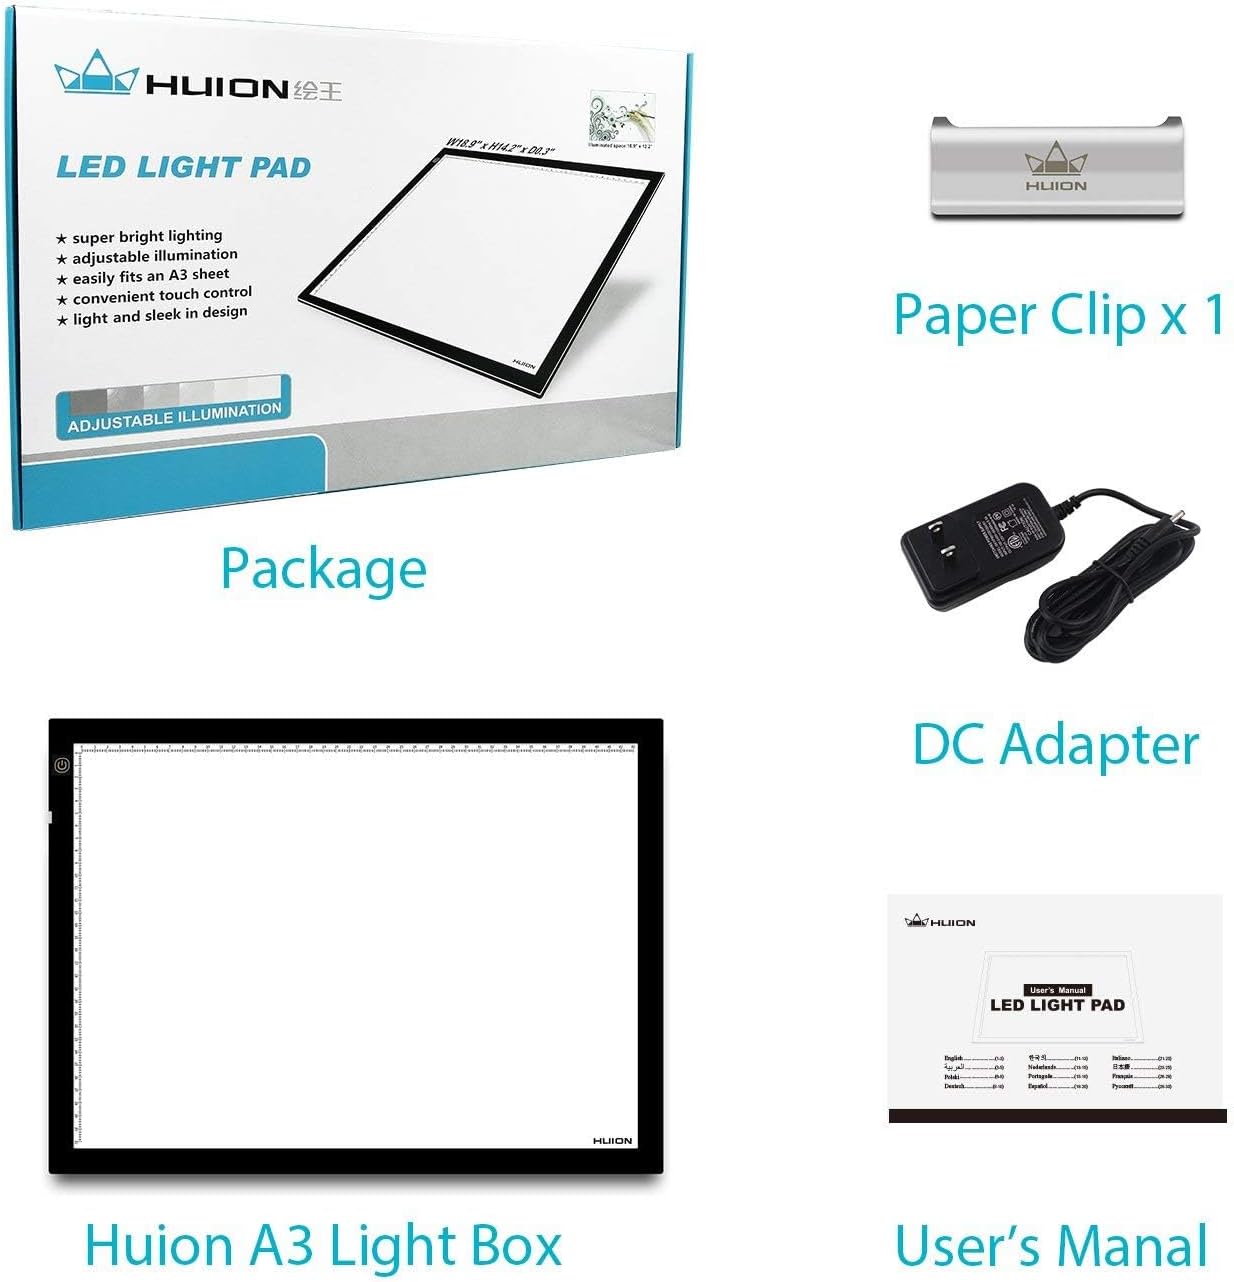
Figure 2: Included items: HUION A3 Light Box, Paper Clip, DC Adapter, and User's Manual.
The light pad is designed for immediate use upon power connection. No assembly is required.
3. Operating Instructions
The HUION A3 LED Light Tracing Pad features a simple touch-sensitive control for power and brightness adjustment.
- Power On/Off: After connecting the power adapter, gently touch the power button located on the surface of the light pad to turn it on. Touch it again to turn it off.
- Adjusting Brightness: To adjust the brightness, press and hold the power button. The light intensity will gradually increase or decrease. Release the button when you reach your desired brightness level. The device will automatically remember your last brightness setting for future use.

Figure 3: Stepless adjustable brightness control via touch switch.
The illuminated surface is designed to be perfectly even, providing clear visibility for tracing and viewing various materials.

Figure 4: Overview of key features including scale design and eyesight protection.
4. Maintenance
Proper care and maintenance will ensure the longevity and optimal performance of your HUION A3 LED Light Tracing Pad.
- Cleaning the Surface: Use a soft, dry, or slightly damp cloth to clean the acrylic work surface. Avoid abrasive cleaners, solvents, or harsh chemicals, as these can damage the surface.
- Storage: When not in use, store the light pad in a clean, dry place, away from direct sunlight and extreme temperatures.
- Handling: Handle the light pad with care to prevent scratches or damage to the acrylic surface and internal components. Avoid placing heavy objects on the pad.
- Power Cord: Ensure the power cord is not bent sharply or placed under heavy objects to prevent damage.
5. Troubleshooting
If you encounter issues with your HUION A3 LED Light Tracing Pad, refer to the following common problems and solutions:
| Problem | Possible Cause | Solution |
|---|---|---|
| Light pad does not turn on. |
|
|
| Brightness adjustment is not working. |
|
|
| Uneven illumination. |
|
|
6. Specifications
Detailed technical specifications for the HUION A3 LED Light Tracing Pad:
| Feature | Detail |
|---|---|
| Model Name | A3 |
| Dimensions (L x W x H) | 479mm x 361mm x 7mm (18.86" x 14.21" x 0.27") |
| Active Area | 310mm x 430mm (12.20" x 16.92") |
| Work Surface Material | Acrylic Panels |
| Light Source Type | LED (Light Emitting Diode) |
| Brightness | 730.80 cd/m2 |
| Illuminate Uniformity | 84.5% |
| Working Voltage | DC12V |
| Power Source | AC Powered (Input: DC 12V, Output: AC 110V-220V) |
| Net Weight | 2.3 KG (5.04 pounds) |
| Item Thickness | 0.27 Inches |
| Scale Size | Yes |
| UPC | 519670708005 |

Figure 5: Dimensions and power input details of the A3 Light Pad.

Figure 6: Size comparison of HUION light pads, highlighting the A3 model's dimensions.
7. Warranty and Support
Warranty Information: The HUION A3 LED Light Tracing Pad comes with a one-year warranty from the date of purchase. This warranty covers manufacturing defects and malfunctions under normal use. Please retain your proof of purchase for warranty claims.
Manufacturer: ShenZhen Huion Animation Technology Co., LTD
For technical support, warranty claims, or any inquiries regarding your product, please contact HUION customer service through their official channels. Refer to the contact information provided in the original product packaging or on the official HUION website.

