Introduction
The Weather X WR383R is a multifunctional device designed to keep you informed and connected, especially during severe weather events. It features AM/FM and weather band radio reception, an integrated LED flashlight, a USB port for charging cellular phones, an emergency siren, and a dynamo hand crank for power generation. This manual provides detailed instructions for the proper use and maintenance of your device.
Setup
1. Battery Installation
The Weather X WR383R requires 1 AAA battery for operation. Locate the battery compartment on the device, insert the battery according to the polarity indicators, and securely close the compartment cover.
2. Antenna Setup
For optimal radio reception, extend the telescopic antenna fully. Ensure it is positioned vertically for best signal strength.

Front view of the Weather X WR383R radio, showing the extended antenna for improved reception.
3. Initial Charging
Before first use, it is recommended to fully charge the internal battery using the provided power cord. Alternatively, the device can be charged via the dynamo hand crank or solar panel (if applicable to your model).

Rear view of the Weather X WR383R, highlighting the hand crank and various charging ports.
Operating Instructions
1. Radio Operation
- Power On/Off: Rotate the Volume knob clockwise to turn the radio on. Continue rotating to increase volume. Rotate counter-clockwise to decrease volume and turn off.
- Band Selection: Use the FM/AM/WB switch to select your desired radio band.
- Tuning: Rotate the Tuning knob to scan for stations. The frequency display will indicate the current station.
2. Flashlight and Lantern
- Flashlight: The LED flashlight is located on one end of the unit. Activate it using the dedicated switch.
- Lantern: The lantern feature is activated by pulling up the light panel located on the side of the unit. Push it back down to turn off.
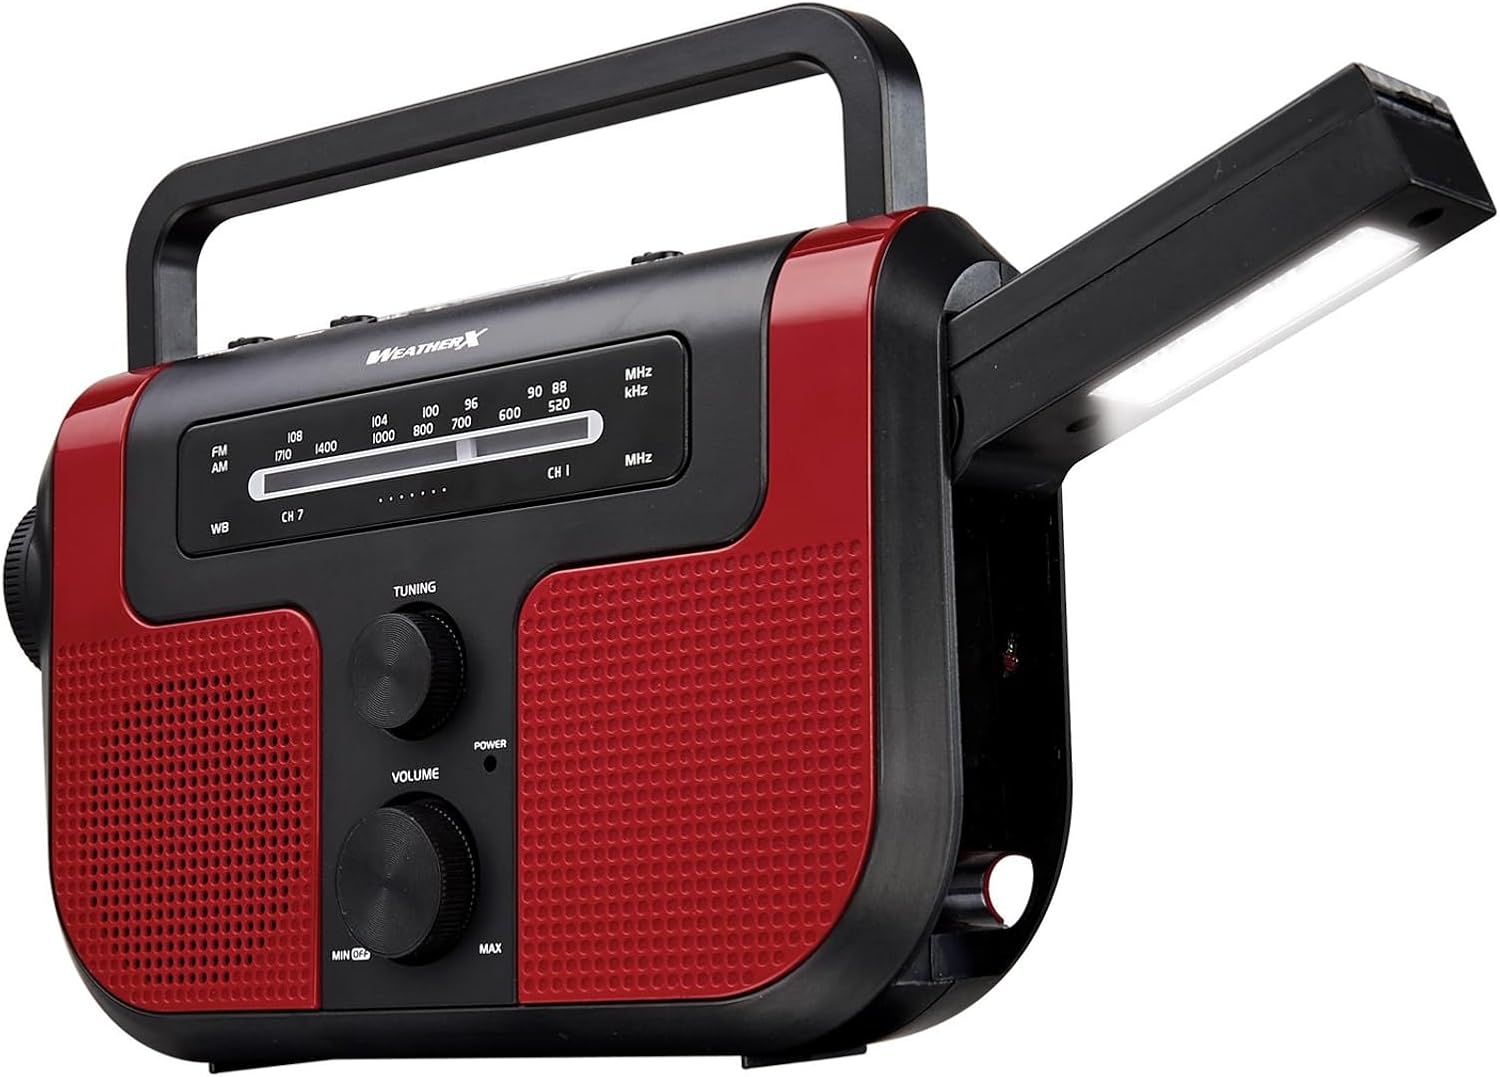
The Weather X WR383R with its integrated lantern extended, providing ambient light.
3. USB Charging Function
The device can charge external USB-powered devices, such as cellular phones. Connect your device's USB charging cable to the USB output port on the back of the radio. For charging without an external power source, utilize the hand crank to generate power.

A smartphone being charged by the Weather X WR383R via its USB port.
Maintenance
- Cleaning: Use a soft, dry cloth to clean the exterior of the radio. Avoid using abrasive cleaners or solvents.
- Storage: When not in use for extended periods, store the radio in a cool, dry place.
- Battery Care: If using AAA batteries, remove them if the unit will not be used for a long time to prevent leakage.
Troubleshooting
| Problem | Possible Cause | Solution |
|---|---|---|
| No power / Unit does not turn on | Low or dead batteries; Internal battery not charged. | Replace AAA batteries or fully charge the internal battery using the power cord or hand crank. |
| Poor radio reception | Antenna not extended; Weak signal area. | Fully extend the telescopic antenna. Try repositioning the radio or moving to an area with better signal. |
| Flashlight/Lantern not working | Low battery; Switch not fully engaged. | Charge the unit. Ensure the light switch is firmly in the 'on' position or the lantern panel is fully extended. |
| Phone not charging via USB | Low internal battery; Incorrect cable; Device not compatible. | Ensure the radio's internal battery is sufficiently charged. Use a compatible USB cable. Note that continuous hand cranking may be required for charging. |
Specifications
- Product Type: Radio
- Model Number: WR383R
- Brand: GPX
- Radio Bands Supported: AM/FM/Weather Band
- Power Source: Solar Powered, Dynamo Hand Crank, AC Power (via adapter)
- Batteries: 1 AAA batteries required (for certain functions/backup)
- Special Feature: Built-In Flashlight, Lantern, USB Charging
- Material: Plastic
- Item Weight: 1.9 Pounds (approx. 0.86 kg)
- Product Dimensions: 11.1 x 6.1 x 3 inches (approx. 28.19 x 15.49 x 7.62 cm)
Warranty & Support
For warranty information and product support, please contact the manufacturer, DPI. Refer to the product packaging or the manufacturer's official website for the most current contact details and warranty terms.
Note: Warranty terms may vary by region and retailer. Keep your proof of purchase for warranty claims.