1. Introduction
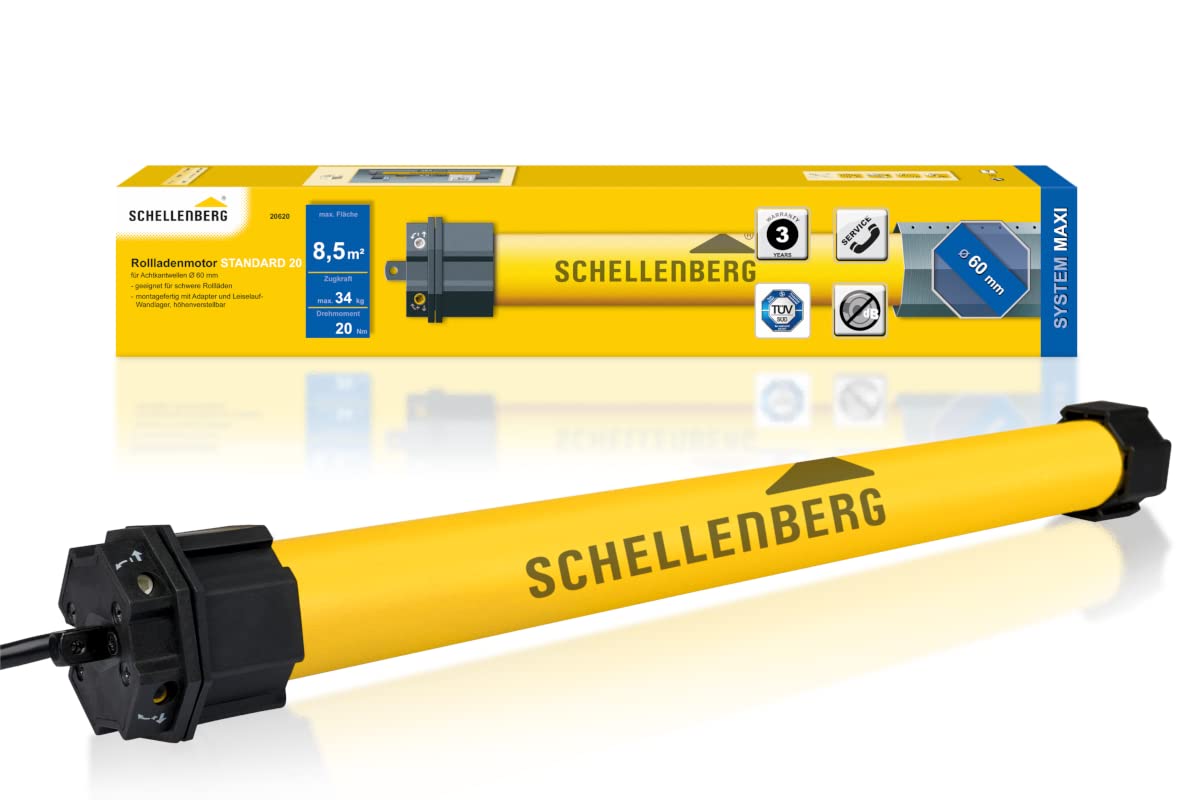
This manual provides essential information for the installation, operation, and maintenance of your Schellenberg 20620 MAXI Standard Roller Shutter Motor. This tubular motor is designed for MAXI roller shutter systems with 60 mm octagonal shafts, offering a powerful 20 Nm torque suitable for roller shutter surfaces up to 8.5 m² and a maximum pulling force of 34 kg. It features a mechanical limit position setting for precise control.
2. Safety Instructions
- Electrical Safety: Installation and electrical connection must be performed by a qualified electrician in accordance with local regulations. Disconnect power before any installation or maintenance work.
- Moving Parts: Keep hands, clothing, and other objects clear of the roller shutter and motor during operation to prevent injury.
- Intended Use: This motor is designed exclusively for operating roller shutters. Do not use it for other purposes.
- Children and Pets: Ensure children and pets are kept away from the operating roller shutter. Control devices should be installed out of reach of children.
- Damage: Do not operate the motor if it is damaged. Contact customer support for assistance.
3. Package Contents
Verify that all components are present in the package:
- 1x MAXI Standard Tubular Motor 20 Nm with cable
- 1x Wall bracket
- 1x Adjustment tool
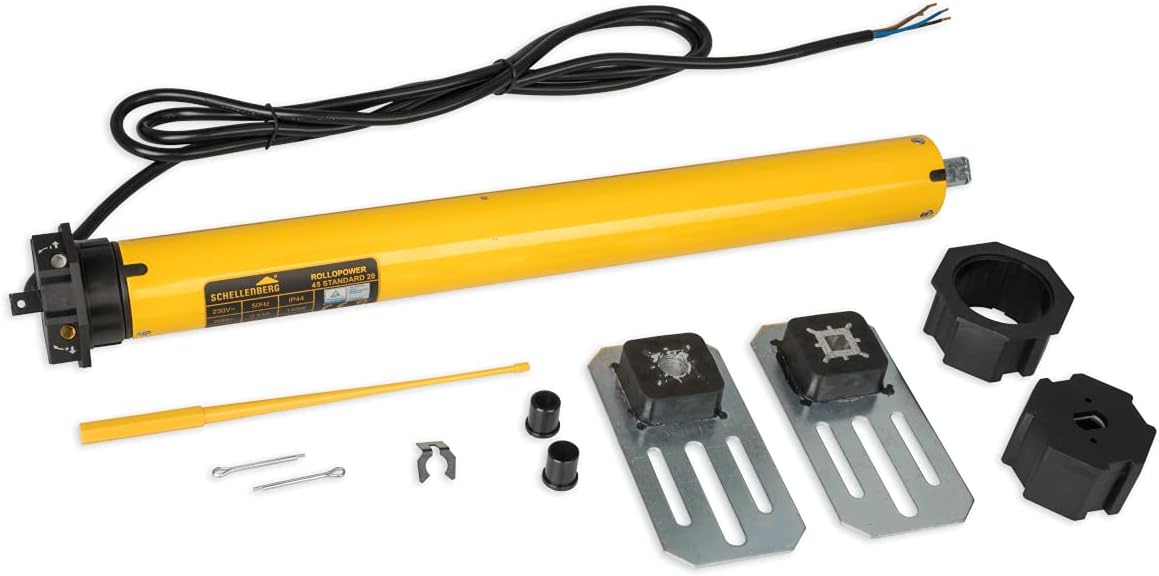
4. Setup and Installation
4.1 Mounting the Motor
- Ensure the power supply to the roller shutter system is disconnected.
- Remove the existing roller shutter shaft and any old winding mechanisms.
- Insert the tubular motor into the 60 mm octagonal shaft. Ensure it is securely seated and aligned.
- Mount the shaft with the motor into the roller shutter box using the provided wall bracket.
4.2 Electrical Connection
The electrical connection must be carried out by a qualified electrician. Connect the motor's electrical cable to the appropriate power supply and control switch according to the wiring diagram provided with the product and local electrical codes.
4.3 Setting Mechanical Limit Positions
The motor features mechanical limit switches to define the upper and lower end positions of the roller shutter. Use the supplied adjustment tool to set these limits.
- Upper Limit: Rotate the upper adjustment screw (often marked with an 'up' arrow or '+' sign) with the adjustment tool until the roller shutter reaches the desired upper position and stops.
- Lower Limit: Rotate the lower adjustment screw (often marked with a 'down' arrow or '-' sign) with the adjustment tool until the roller shutter reaches the desired lower position and stops.


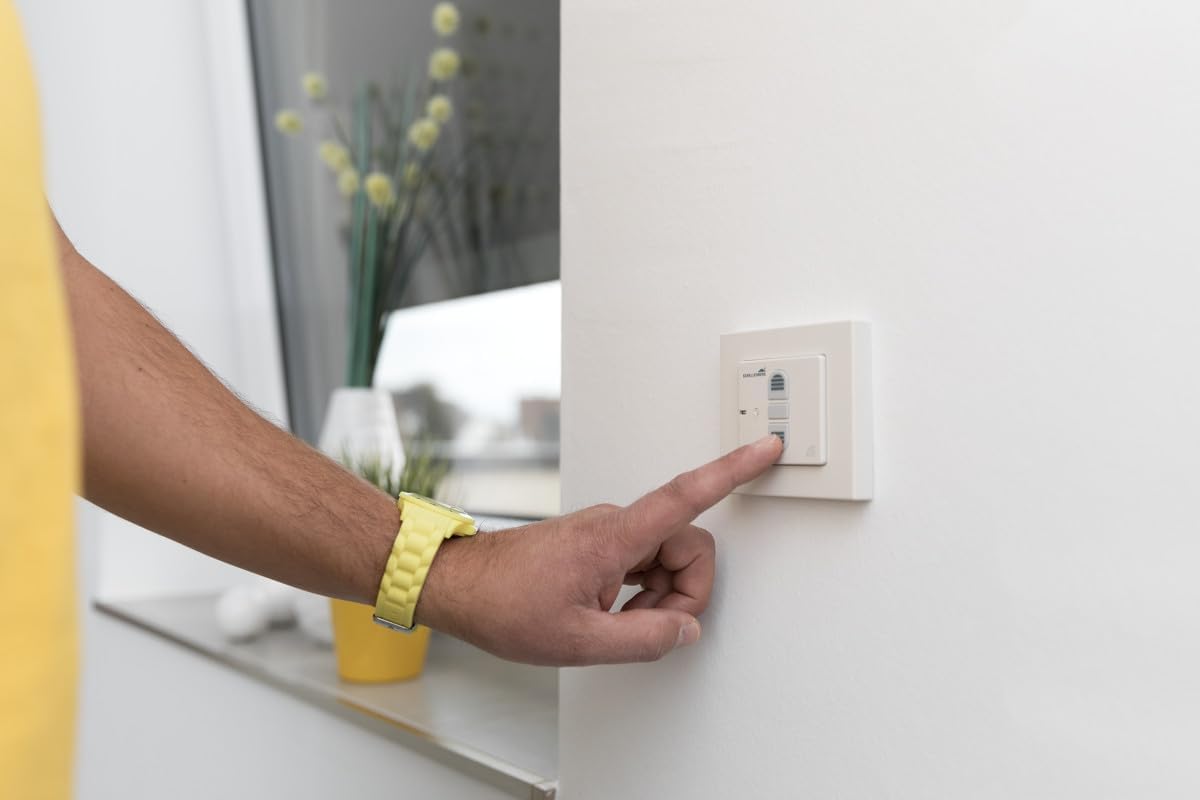
5. Operating Instructions
Once installed and the limit positions are set, the roller shutter motor can be operated via a connected wall switch or an optional wireless control system.
- Standard Operation (Wall Switch): Press the 'Up' button on your wall switch to raise the roller shutter. Press the 'Down' button to lower it. The shutter will stop automatically at the set limit positions.
- Stopping Mid-Position: Press the opposite direction button briefly while the shutter is moving to stop it at any desired intermediate position.
- Optional Wireless Control: This motor can be retrofitted with wireless control. If you have installed a Schellenberg wireless switch, timer, or remote control, refer to the specific instructions for that device for pairing and operation.

6. Maintenance
The Schellenberg MAXI Standard Roller Shutter Motor is designed to be maintenance-free. No lubrication or internal adjustments are required.
- Cleaning: Keep the visible parts of the motor and roller shutter system clean from dust and debris. Use a soft, dry cloth. Do not use abrasive cleaners or solvents.
- Inspection: Periodically check the roller shutter system for any signs of wear or damage to the shaft, suspension, or motor cable. If any damage is observed, discontinue use and contact customer support.
7. Troubleshooting
If you encounter issues with your roller shutter motor, refer to the following common problems and solutions:
| Problem | Possible Cause | Solution |
|---|---|---|
| Motor does not respond | No power supply; loose wiring; faulty switch | Check power circuit breaker; verify wiring connections (by a qualified electrician); test switch functionality. |
| Roller shutter stops prematurely or does not reach limits | Limit positions incorrectly set; obstruction in the roller shutter path | Re-adjust mechanical limit positions (refer to Section 4.3); check for and remove any obstructions. |
| Unusual noises during operation | Obstruction; motor or shaft damage | Check for obstructions; if noise persists, discontinue use and contact support. |
If the problem persists after attempting these solutions, please contact Schellenberg customer support.
8. Specifications
| Specification | Value |
|---|---|
| Model Number | 20620 |
| Torque | 20 Nm |
| Max. Roller Shutter Area (Plastic) | 8.5 m² |
| Max. Pulling Force | 34 kg |
| Shaft Diameter | 60 mm (Octagonal) |
| Voltage | 230 Volts |
| Power | 147.2 Watts |
| Protection Class | IP44 |
| Product Dimensions (L x W x H) | 58 x 10.5 x 7.5 cm |
| Weight | 2.45 kg |
| Material | Plastic |
| Operating Mode | ON-OFF |

9. Warranty and Support
Specific warranty details for this product may vary by region and retailer. Please refer to your purchase documentation or contact your point of sale for warranty information.
For any questions regarding your Schellenberg products, including selection, installation, or replacement, our customer support team is available to assist you.
Contact Information: Please visit the official Schellenberg website or refer to the contact details provided with your product for support.
