
Hutchins 700
Hutchins 700 Sander User Manual
Model: 700
Introduction
This manual provides comprehensive instructions for the safe and efficient operation, maintenance, and troubleshooting of your Hutchins 700 Sander. Please read this manual thoroughly before using the tool to ensure proper handling and to maximize its lifespan. The Hutchins 700 Sander is a high-quality, value-priced tool designed for rugged and reliable performance in various sanding applications.
Safety Information
Always adhere to the following safety guidelines to prevent injury and damage to the tool.
- Read All Instructions: Familiarize yourself with the tool's operation and safety procedures before use.
- Wear Personal Protective Equipment (PPE): Always wear safety glasses, hearing protection, and a dust mask when operating the sander.
- Secure Workpiece: Ensure the material being sanded is firmly secured to prevent movement during operation.
- Proper Ventilation: Operate the sander in a well-ventilated area to minimize dust inhalation.
- Disconnect Power: Always disconnect the air supply before changing sanding pads, performing maintenance, or when the tool is not in use.
- Inspect Tool: Before each use, inspect the sander for any damage, loose parts, or worn components. Do not use a damaged tool.
- Keep Work Area Clean: Cluttered work areas and benches invite accidents.
- Avoid Accidental Starting: Ensure the trigger is not engaged when connecting to the air supply.
- California Proposition 65 Warning: This product may expose you to chemicals known to the State of California to cause cancer and birth defects or other reproductive harm. For more information go to www.P65Warnings.ca.gov.
Product Overview
The Hutchins 700 Sander is a random-orbit sander designed for efficient material removal and smooth finishing. Its compact design and ergonomic features contribute to user comfort and control.

Figure 1: Front view of the Hutchins 700 Sander, showcasing its ergonomic design and sanding pad.
Key Components:
- Sanding Pad: The circular base where abrasive discs are attached.
- Trigger/Lever: Activates and deactivates the sander.
- Air Inlet: Connection point for the air supply hose.
- Ergonomic Grip: Designed for comfortable and secure handling.
Setup
Before operating your Hutchins 700 Sander, ensure proper setup for optimal performance and safety.
- Air Supply Connection:
- Connect a suitable air hose (not included) to the sander's air inlet. Ensure the connection is secure and free of leaks.
- The sander requires a clean, dry, and regulated air supply. Recommended operating pressure is typically 90 PSI (6.2 bar).
- Attaching Sanding Disc:
- Ensure the sander is disconnected from the air supply.
- Select the appropriate abrasive disc for your application. The sander uses hook-and-loop (Velcro-style) sanding discs.
- Align the holes on the sanding disc with the holes on the sanding pad for efficient dust extraction (if applicable).
- Press the sanding disc firmly onto the sanding pad, ensuring it is centered and securely attached.
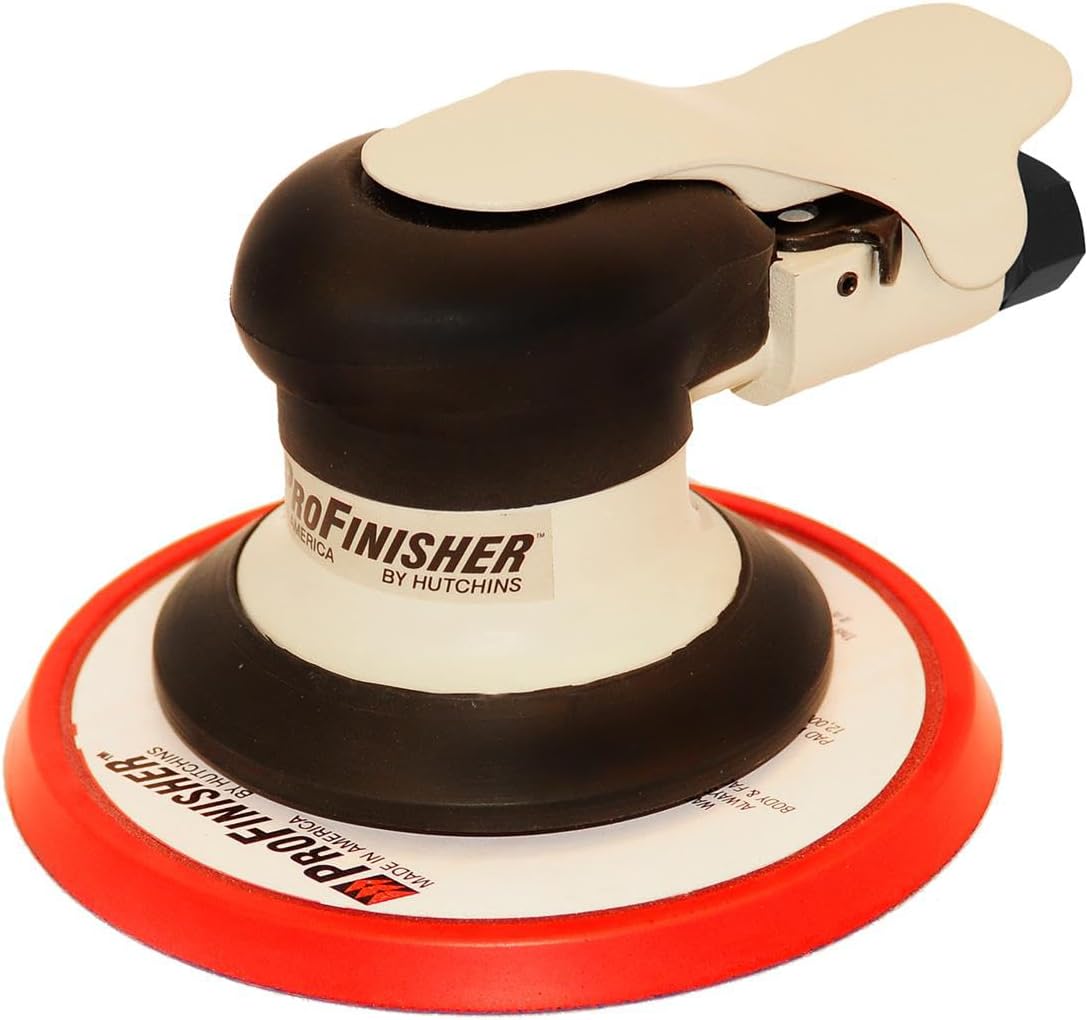
Figure 2: The Hutchins 700 Sander shown with a wrench, indicating potential for pad replacement or maintenance.
Operating Instructions
Follow these steps for effective and safe operation of your Hutchins 700 Sander.
- Prepare Workpiece: Ensure the workpiece is clean, dry, and securely clamped to prevent movement during sanding.
- Connect Air Supply: Connect the air hose to the sander and turn on the air compressor. Adjust the air pressure to the recommended PSI (typically 90 PSI).
- Start Sanding:
- Place the sanding pad flat against the surface of the workpiece before engaging the trigger.
- Gently press the trigger to start the sander.
- Move the sander in overlapping circular or elliptical patterns across the surface. Avoid applying excessive pressure, as the weight of the tool is usually sufficient.
- Maintain constant movement to prevent gouging or creating swirl marks.
- Stop Sanding: Release the trigger to stop the sander. Lift the tool from the workpiece only after the sanding pad has stopped rotating.
- Dust Management: If your model includes dust collection, ensure the dust bag or vacuum system is properly attached and emptied regularly.

Figure 3: Side view of the Hutchins 700 Sander, highlighting its compact form factor and air inlet.
Maintenance
Regular maintenance ensures the longevity and optimal performance of your Hutchins 700 Sander.
- Lubrication:
- Apply a few drops of pneumatic tool oil into the air inlet before and after each use, or at least once daily if used frequently.
- Run the tool for a few seconds after oiling to distribute the lubricant.
- Cleaning:
- Disconnect the air supply.
- Wipe down the exterior of the sander with a clean, dry cloth.
- Use compressed air to blow out any dust or debris from the air inlet and around the sanding pad.
- Sanding Pad Inspection:
- Regularly inspect the sanding pad for wear, damage, or loss of hook-and-loop adhesion.
- Replace the sanding pad if it shows signs of significant wear to ensure proper sanding performance.
- Air Filter/Regulator: Ensure your air compressor system has a functioning air filter and regulator to provide clean, dry, and consistent air pressure to the tool.
Troubleshooting
This section addresses common issues you might encounter with your Hutchins 700 Sander.
| Problem | Possible Cause | Solution |
|---|---|---|
| Sander not starting or running slowly | Low air pressure; Insufficient lubrication; Clogged air inlet; Damaged internal components. | Check air compressor pressure and regulator setting; Add pneumatic tool oil; Clean air inlet; Contact qualified service technician. |
| Excessive vibration | Worn sanding pad; Unbalanced sanding disc; Damaged bearings. | Replace sanding pad; Ensure sanding disc is properly centered; Contact qualified service technician. |
| Poor sanding performance / Swirl marks | Worn sanding disc; Incorrect grit; Excessive pressure; Worn sanding pad. | Replace sanding disc; Use appropriate grit for the task; Reduce pressure; Replace sanding pad. |
| Air leaks | Loose fittings; Damaged O-rings/seals. | Tighten connections; Replace worn seals or O-rings. |
Specifications
Technical specifications for the Hutchins 700 Sander.
| Feature | Detail |
|---|---|
| Model Number | 700 |
| Product Type | Sander (Random-Orbit) |
| Brand | Hutchins |
| Power Source | Pneumatic (Air Powered) |
| Maximum Rotational Speed | 12000 RPM |
| Recommended Air Pressure | Typically 90 PSI (6.2 bar) |
| Item Weight | 1.36 pounds (approx. 0.62 kg) |
| Product Dimensions | 6 x 4 x 6 inches (approx. 15.24 x 10.16 x 15.24 cm) |
| Country Of Origin | United States |
| Included Components | Hutchins - Profinisher 700 (700) |
Warranty and Support
For warranty information, service, or technical support regarding your Hutchins 700 Sander, please contact Hutchins Manufacturing Co. directly. Refer to the product packaging or the official Hutchins website for the most current contact details and warranty terms.
Hutchins Manufacturing Co. is committed to providing durable and reliable tools. For any issues not covered in this manual, professional assistance is recommended.
You can find more information about Hutchins products and support at their official website: www.hutchinsmfg.com
Ask a question about this manual
Ask about setup, troubleshooting, compatibility, parts, safety, or missing instructions. Manuals+ will review the question and use this page’s manual context to help answer it.