Introduction
This manual provides comprehensive instructions for the assembly, operation, and maintenance of your Cooler Master N200 Mini Tower Computer Case. The N200 is designed with a fully meshed front panel for optimal ventilation and supports various components including 240mm liquid cooling radiators. Please read these instructions carefully before proceeding with installation.
Product Features
- Edgy, asymmetrical design with full mesh front panel for enhanced airflow.
- Mini tower form factor offering expandability for up to three 3.5" HDDs and four 2.5" SSDs.
- Front panel support for a 240mm liquid CPU water cooling kit.
- Accommodates high-end graphics cards with a length of up to 355mm (14 inches).
- Supports CPU air coolers with heights up to 160mm (6.3 inches).
- Equipped with SuperSpeed USB 3.0 ports for fast data transfer.
- Features a removable dust filter located under the power supply mount area for simplified maintenance.
Package Contents
The Cooler Master N200 Mini Tower Computer Case package includes:
- Cooler Master N200 Computer Case
- Accessory Box (containing screws, standoffs, cable ties, etc.)
- User Manual/Quick Start Guide (this document)
Please verify all components are present before beginning installation.
Setup and Installation
This section outlines the general steps for installing components into your Cooler Master N200 case. Always ensure your system is powered off and unplugged before handling internal components.
1. Preparing the Case
Remove the side panels of the case. The N200 typically uses thumbscrews for easy access. Identify the motherboard tray and cable management cutouts.
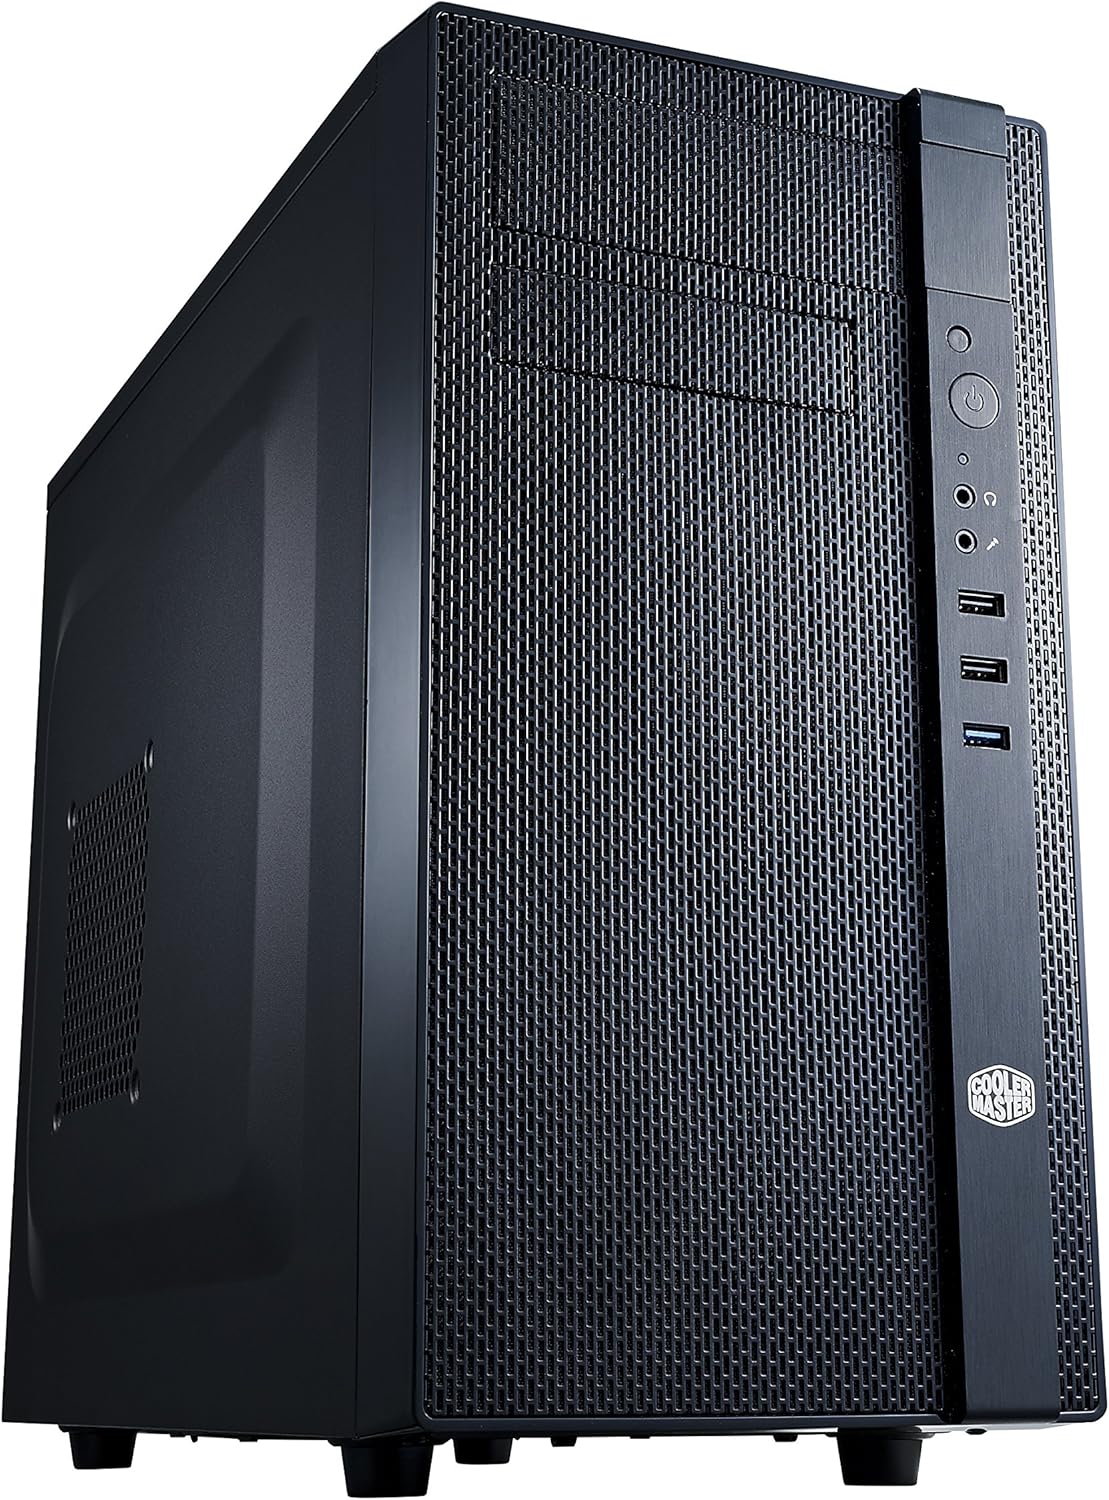
Image: Front and side view of the Cooler Master N200 Mini Tower Computer Case, showcasing its meshed front panel and overall compact design.

Image: Interior view of the Cooler Master N200 case without components, highlighting the motherboard tray, drive bays, and cable routing options.
2. Motherboard Installation
Install the necessary motherboard standoffs onto the motherboard tray, aligning them with the screw holes on your Micro-ATX motherboard. Carefully place the motherboard onto the standoffs and secure it with screws. Connect the front panel headers (power, reset, USB, audio) to the motherboard.
Caution:
Some users have reported that motherboard screws can become tightly stuck in standoffs, potentially causing the standoff to unscrew from the case when removing the motherboard. Exercise care during installation and removal to prevent this issue.
3. Power Supply Installation
Mount your ATX power supply in the bottom rear section of the case. Ensure the fan faces downwards if there is a filtered vent on the bottom of the case, or upwards if not. Secure it with screws from the rear of the case.
4. Storage Drive Installation
The N200 supports up to three 3.5" HDDs and four 2.5" SSDs. Utilize the designated drive cages and mounting points. For 3.5" drives, slide them into the drive cage and secure them. For 2.5" SSDs, use the dedicated mounting brackets or locations.
5. Expansion Card Installation (GPU, etc.)
Remove the necessary expansion slot covers from the rear of the case. Insert your graphics card or other expansion cards into the appropriate PCIe slots on your motherboard and secure them with screws or retention clips. The case supports graphics cards up to 355mm in length.

Image: Interior view of the Cooler Master N200 case with a motherboard, CPU cooler, graphics card, and storage drives installed, demonstrating component placement.
6. Cooling System Installation
The N200 supports various cooling configurations. You can install a 240mm liquid cooling radiator in the front of the case. For air cooling, the case accommodates CPU coolers up to 160mm in height. Ensure fans are oriented correctly for optimal airflow.
7. Cable Management
Utilize the cable management cutouts and tie-down points behind the motherboard tray to route and secure cables. This improves airflow and maintains a clean interior aesthetic.

Image: Rear view of the Cooler Master N200 case, showing the expansion slots, rear fan mount, and power supply cutout.
Operating the Case
Once all components are installed and secured, replace the side panels. Connect your peripherals, monitor, and power cable. Press the power button located on the front panel to start your system.
Front Panel Connectivity

Image: Close-up of the Cooler Master N200 front panel, showing the power button, audio jacks, USB 2.0 ports, and USB 3.0 port.
- Power Button: Initiates system startup or shutdown.
- Reset Button: Restarts the system.
- USB 3.0 Port: For high-speed data transfer with compatible devices.
- USB 2.0 Ports: For connecting standard USB devices.
- Audio Jacks: For connecting headphones and microphones.
Maintenance
Regular maintenance helps ensure optimal performance and longevity of your computer components.
Dust Filter Cleaning
The Cooler Master N200 features a removable dust filter located under the power supply mount area. Periodically remove and clean this filter to prevent dust buildup, which can restrict airflow and increase component temperatures. Simply slide out the filter, clean it with water or compressed air, and reinsert it once dry.

Image: Side panel of the Cooler Master N200 case, showing a vented area that may accommodate an optional fan for additional cooling.
General Cleaning
Use a soft, dry cloth to wipe down the exterior of the case. For the interior, use compressed air to remove dust from fans and components. Ensure the system is powered off and unplugged before performing any internal cleaning.
Troubleshooting
If you encounter issues during or after installation, consider the following common troubleshooting steps:
- No Power: Ensure all power cables (24-pin ATX, 8-pin CPU, GPU PCIe, SATA) are securely connected. Verify the power supply switch is in the 'ON' position and the wall outlet is functional.
- No Display: Check that your monitor is connected to the graphics card (not the motherboard integrated graphics, unless no dedicated GPU is present) and that the monitor is powered on and set to the correct input.
- Component Not Detected: Re-seat the component (e.g., RAM, GPU, storage drive) to ensure it is properly seated in its slot or connector. Check all associated power and data cables.
- Excessive Noise: Identify the source of the noise. It could be a fan, hard drive, or a loose component. Ensure all fans are clear of obstructions and securely mounted.
- Overheating: Verify that all case fans and CPU cooler fans are spinning correctly. Ensure proper airflow by checking for dust buildup on filters and heatsinks.
For more complex issues, consult the manuals for your individual components (motherboard, GPU, etc.) or seek assistance from Cooler Master support.
Specifications
Below are the technical specifications for the Cooler Master N200 Mini Tower Computer Case:
| Feature | Specification |
|---|---|
| Brand | Cooler Master |
| Model Name | Cooler Master NSE-200-KKN1 |
| Case Type | Mini-Tower |
| Motherboard Compatibility | Micro ATX |
| Material | Metal, Plastic |
| Product Dimensions (LxWxH) | 17.5 x 7.9 x 14.9 inches |
| Item Weight | 9.5 pounds |
| Power Supply Mounting Type | Bottom Mount |
| Cooling Method | Air |
| Fan Size | 120 Millimeters |
| Number of USB 2.0 Ports | 1 |
| Number of USB 3.0 Ports | 1 |

Image: Diagram illustrating the dimensions of the Cooler Master N200 Mini Tower Computer Case.
Warranty and Support
For warranty information and technical support, please refer to the official Cooler Master website or contact their customer service department. Keep your proof of purchase for warranty claims.
Cooler Master Official Website: www.coolermaster.com