1. Introduction
This manual provides detailed instructions for the installation, operation, and maintenance of your EasyDrain Flexible P-Trap Model 510. Please read this manual thoroughly before installation and retain it for future reference. This product is designed to create a water seal in your drain system, preventing sewer gases from entering your living space while allowing wastewater to flow freely.
2. Safety Information
- Always turn off the water supply to the sink before beginning any plumbing work.
- Wear appropriate personal protective equipment, such as gloves and eye protection, during installation.
- Ensure all connections are hand-tightened securely to prevent leaks. Do not overtighten.
- Keep small parts away from children.
- If you are unsure about any step, consult a qualified plumber.
3. Package Contents
Verify that all components are present before beginning installation:
- Flexible P-Trap (White, 24 Inch)
- Bracket
- Flanges (for secure connections)
- Reducer for 1-1/4 inch bathroom sink connections (adapters for 7/8 inch connections may also be included)

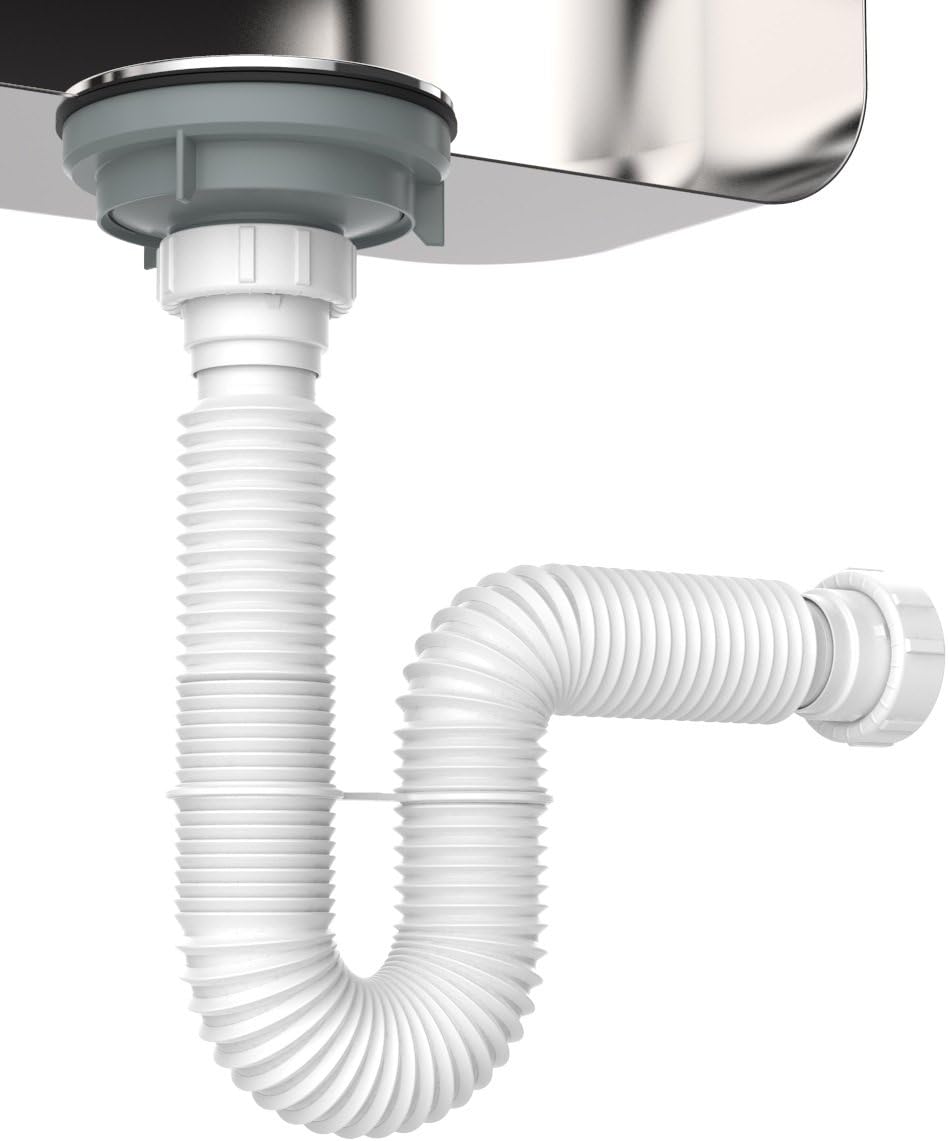
Image: Components of the EasyDrain Flexible P-Trap, showing its closed (10 inch) and expanded (23 inch) lengths, the bracket, and reduction bushings.
4. Specifications
| Feature | Detail |
|---|---|
| Model Number | 510 |
| Material | Polypropylene |
| Color | White |
| Adjustable Length | 10 inches to 24 inches (26 cm to 58 cm) |
| Drain Compatibility | Standard 1-1/2 inch sink drains. Includes adapters for 1-1/4 inch and 7/8 inch connections. |
| Connecting Point Diameter | 1-1/2 inches |
| Internal Pipe Diameter | 1 inch |
| Temperature Resistance | Up to 194°F (90°C) |
| Installation Method | Under Sink (Tool-free, hand-tightened) |
Note: Always verify your existing drain measurements to ensure compatibility before installation.
5. Setup and Installation
The EasyDrain Flexible P-Trap is designed for quick, tool-free installation. Follow these steps for a secure and leak-free connection:
- Prepare the Area: Turn off the water supply to the sink. Place a bucket or towel under the existing drain to catch any residual water. Remove the old P-trap if one is present.
- Check Compatibility: Ensure your sink drain outlet is 1-1/2 inches in diameter. If you have a smaller drain (1-1/4 inch or 7/8 inch), use the provided reducer adapters.
- Connect to Sink Drain: Attach one end of the flexible P-trap to the sink drain tailpiece. Use a flange and hand-tighten the connection until secure. Do not overtighten.
- Form the P-Trap: Gently bend and shape the flexible pipe to form the 'P' shape, ensuring a water seal will be created. The pipe can expand from 10 inches to 24 inches to accommodate various configurations.
- Connect to Wall Drain: Extend the other end of the flexible P-trap to align with your wall drain pipe. Use a flange and hand-tighten the connection.
- Secure with Bracket (Optional): If desired, use the included bracket to provide additional support and maintain the P-trap's shape.
- Test for Leaks: Once installed, turn the water supply back on and run water through the sink. Carefully inspect all connections for any signs of leaks. Tighten connections slightly if necessary.


6. Operation
Once properly installed, the EasyDrain Flexible P-Trap operates automatically as part of your sink's drainage system. Its primary function is to maintain a water seal that prevents unpleasant sewer gases from entering your home. When water drains from the sink, it flows through the P-trap, and a small amount of water remains in the trap's bend, forming this essential barrier.
The non-stick interior of the polypropylene material helps to prevent odor buildup and facilitates smooth water flow.
7. Maintenance
Regular maintenance ensures optimal performance and longevity of your P-trap:
- Routine Cleaning: The flexible design allows for effortless maintenance. If you suspect a clog or wish to clean the trap, you can easily remove it by unscrewing the hand-tightened flanges.
- Clearing Clogs: Once removed, the flexible pipe can be straightened to allow for a quick flush of water or to physically remove obstructions. This design simplifies clog removal compared to rigid P-traps.
- Inspection: Periodically inspect the P-trap and its connections for any signs of wear, cracks, or leaks. Address any issues promptly to prevent water damage.
- Material Durability: Made from robust polypropylene, the P-trap is designed to withstand high water temperatures and daily use. Its thicker walls contribute to long-term durability.
8. Troubleshooting
Most issues with a P-trap are related to leaks or clogs. Here are some common troubleshooting steps:
- Leaks at Connections: If you observe water dripping from the connections, ensure the flanges are hand-tightened securely. Avoid overtightening, as this can damage the plastic. Check that the rubber gaskets are properly seated.
- Slow Drainage or Clogs: If your sink is draining slowly or completely clogged, the P-trap may be obstructed. Follow the maintenance steps to remove the P-trap and clear any blockages. The flexible nature of this P-trap makes it easier to access and remove debris.
- Odor from Drain: If you notice foul odors, ensure the P-trap has water in its bend to maintain the water seal. If the trap is dry (e.g., after prolonged disuse), run water for a minute to refill it. If odors persist, check for proper installation and ensure no leaks are allowing the water seal to break.
9. Warranty and Support
EasyDrain is a US-based company with over a decade of experience, committed to customer satisfaction and product quality.
- Quality Guarantee: We stand by the quality of our products. If you encounter any issues, please contact our customer service team.
- Dedicated Support: Our customer service team is available to assist with any product issues or questions you may have.
- Contact Information: For support, please visit the EasyDrain Brand Store on Amazon or refer to the contact details provided with your purchase.


