
1. Introduction
This manual provides essential information and instructions for the DNJ EK617 Engine Rebuild Kit. This kit is specifically designed for 1993-1994 Mercury Villager vehicles equipped with a 3.0L V6 12V SOHC 182cid engine. Adherence to these instructions and proper automotive repair practices is crucial for successful installation and optimal engine performance. Professional installation by a qualified technician is highly recommended.
2. Kit Contents
The DNJ EK617 Engine Rebuild Kit includes the following components, all supplied in standard size unless otherwise specified or requested:
- Piston Set: A complete set of pistons for the engine.
- Piston Ring Set: Rings for all pistons, ensuring proper cylinder sealing.
- Main Bearings Set: Bearings for the crankshaft main journals.
- Rod Bearings Set: Bearings for the connecting rod journals.
- Full Gasket/Sealing Set: Comprehensive set of gaskets and seals for the entire engine.
- Freeze Plug Set (Brass): Brass freeze plugs for the engine block.
- Piston Pin Bushings: Bushings for the piston pins.
Important Note: All components in this kit are in STANDARD SIZE. If oversized Pistons, Piston Rings, Rod Bearings, or Main Bearings are required, please verify availability with your supplier before installation. Components will be sent in standard size by default if no specific request for oversized parts is made.

Figure 2.1: Overview of the DNJ Engine Rebuild Kit components in their packaging.

Figure 2.2: Example of a piston and piston pin included in the kit.

Figure 2.3: Piston rings, typically packaged for protection and identification.

Figure 2.4: Main bearings, essential for crankshaft support.
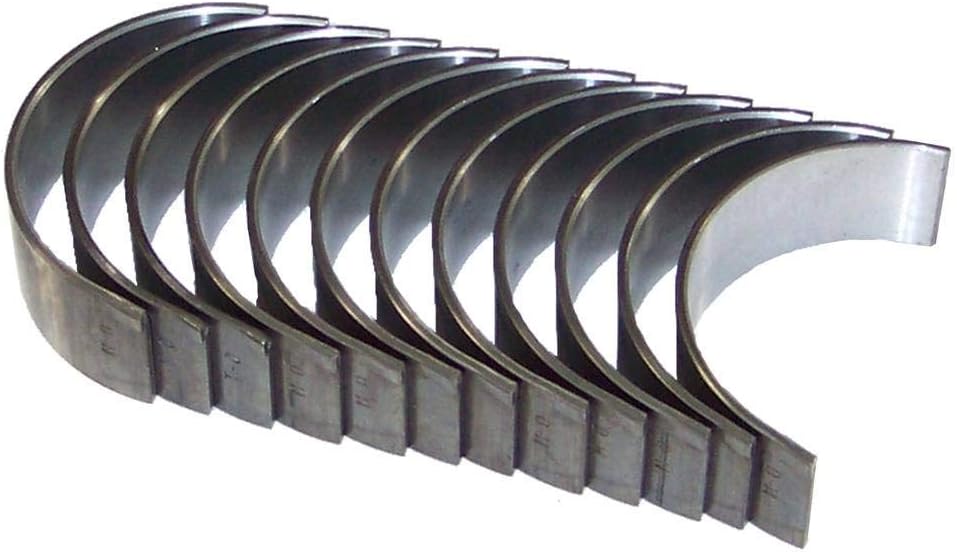
Figure 2.5: Rod bearings, for connecting rod journals.

Figure 2.6: A comprehensive set of gaskets and seals for engine assembly.

Figure 2.7: Brass freeze plugs, used to seal core passages in the engine block.
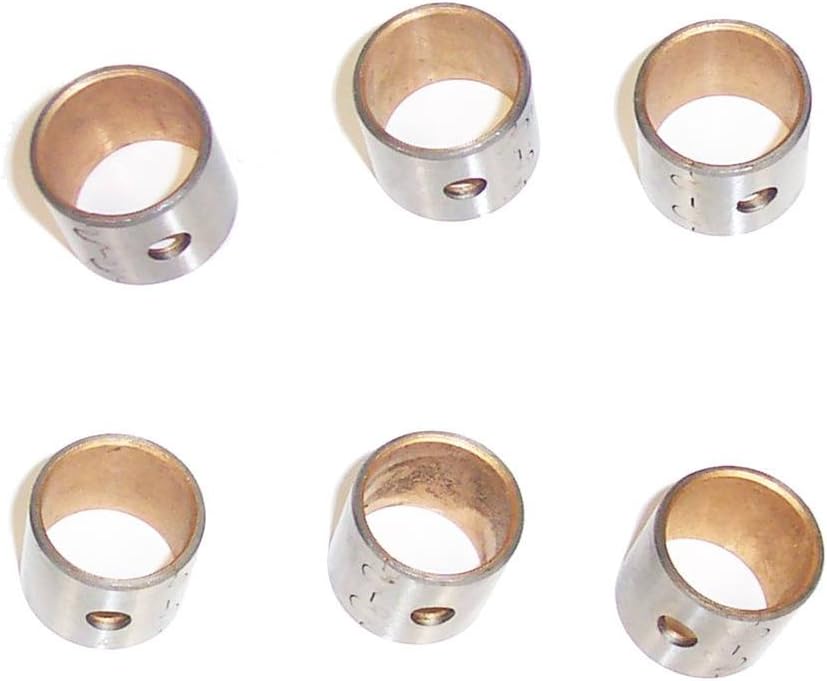
Figure 2.8: Piston pin bushings, for the small end of the connecting rod.
3. Vehicle Compatibility
This DNJ EK617 Engine Rebuild Kit is compatible with the following vehicle specifications:
- Make: Mercury
- Model: Villager
- Years: 1993-1994
- Engine: 3.0L V6 12V SOHC 182cid Naturally Aspirated
Fitment Notes: This kit is supplied without an oil pump and timing belt or timing kit. These components may need to be purchased separately depending on your specific rebuild requirements and vehicle application.
4. Setup and Installation
Engine rebuilding is a complex process that requires specialized tools, knowledge, and experience. It is strongly recommended that installation be performed by a certified automotive technician.
- Preparation: Before beginning any work, ensure the engine is clean and all components are inspected for damage or wear. Refer to your vehicle's specific service manual for detailed disassembly and assembly procedures, torque specifications, and critical clearances.
- Component Verification: Carefully unpackage and verify all components against the kit contents list. Confirm that all parts are the correct size (standard or oversized, if applicable) before installation.
- Piston and Ring Installation: Install piston rings onto pistons according to manufacturer specifications, paying attention to ring orientation and gap placement. Install pistons into cylinders, ensuring correct orientation and lubrication.
- Bearing Installation: Install main and rod bearings into their respective locations. Ensure bearing shells are clean and properly seated. Lubricate all bearing surfaces with appropriate engine assembly lubricant.
- Gasket and Seal Installation: Use the provided full gasket/sealing set for all engine sealing surfaces. Ensure surfaces are clean and dry (unless a specific sealant is required). Follow torque specifications for all fasteners to prevent leaks.
- Freeze Plug Installation: Install the brass freeze plugs into the engine block's core passages. Ensure a tight, leak-free fit.
- Final Assembly: Reassemble the engine following the vehicle's service manual. Pay close attention to timing components (if reusing or installing new ones), oil pump installation, and all fluid connections.
For a visual overview of engine kit components, please refer to the video below:
Video 4.1: An overview of typical DNJ Engine Kit components and their purpose. This video provides a general visual guide to the types of parts included in a comprehensive engine rebuild kit.
5. Operating (Post-Rebuild Break-in)
After a complete engine rebuild, a proper break-in procedure is critical to ensure the longevity and performance of the newly installed components, especially the piston rings and bearings.
- Initial Start-up: Ensure adequate oil pressure is achieved immediately upon start-up. Avoid prolonged idling.
- First 20-30 Minutes: Vary engine RPMs between 1500-3000 without sustained high loads or constant speeds. This helps seat the piston rings.
- First 500 Miles: Avoid heavy acceleration, towing, or sustained high RPMs. Vary driving speeds and engine loads. Avoid using cruise control.
- Oil Change: Perform an oil and filter change after the first 500-1000 miles to remove any break-in contaminants.
- Monitoring: Continuously monitor engine temperature, oil pressure, and fluid levels during the break-in period.
Consult your vehicle's service manual or a professional mechanic for specific break-in recommendations for your engine type.
6. Maintenance
Regular and proper maintenance is essential for the long-term reliability of your rebuilt engine.
- Oil and Filter Changes: Adhere to the manufacturer's recommended oil change intervals using the specified oil type and quality filter.
- Coolant System: Maintain the cooling system by regularly checking coolant levels and condition. Flush and refill as per vehicle manufacturer guidelines.
- Air Filter: Inspect and replace the air filter regularly to ensure clean air intake.
- Spark Plugs: Replace spark plugs at recommended intervals to maintain optimal combustion.
- Belt and Hose Inspection: Periodically inspect all belts and hoses for wear, cracks, or leaks.
Refer to your vehicle's owner's manual for a comprehensive maintenance schedule.
7. Troubleshooting
If you encounter issues after installing the DNJ EK617 Engine Rebuild Kit, consider the following common troubleshooting steps. Always consult a professional mechanic for diagnosis and repair.
| Symptom | Possible Cause | Action |
|---|---|---|
| Low Oil Pressure | Incorrect bearing clearances, faulty oil pump (if reused/new), clogged oil passages, low oil level. | Verify oil level and type. Check for leaks. Inspect oil pump and pickup. Re-check bearing clearances. |
| Engine Overheating | Improperly installed head gaskets, air in cooling system, faulty thermostat, restricted coolant passages. | Bleed cooling system. Check coolant level. Inspect thermostat. Verify head gasket installation. |
| Excessive Smoke from Exhaust | Improperly seated piston rings, damaged valve stem seals (if not replaced), incorrect PCV system operation. | Allow for proper break-in. Check PCV system. Inspect valve stem seals. |
| Unusual Engine Noises | Incorrect bearing installation, improper valve lash adjustment, loose components. | Immediately cease engine operation. Re-inspect all internal components and torque specifications. |
Always prioritize safety and consult a professional for any significant engine issues.
8. Specifications
| Attribute | Detail |
|---|---|
| Manufacturer | DNJ ENGINE COMPONENTS |
| Brand | DNJ |
| Model Number | EK617 |
| Item Weight | 11.5 pounds |
| Product Dimensions | 24 x 12 x 6 inches |
| Engine Compatibility | 1993-1994 Mercury Villager 3.0L V6 12V SOHC 182cid |
9. Warranty and Support
DNJ Engine Components are manufactured to meet or exceed OE quality standards, ensuring reliable performance. For specific warranty information regarding the EK617 Engine Rebuild Kit, please refer to the documentation included with your purchase or contact DNJ customer support directly.
For technical assistance or inquiries, please contact the seller, Partsology, or visit the official DNJ website for support resources.
- Seller: Partsology
- DNJ Store: DNJ Engine Components Store on Amazon